
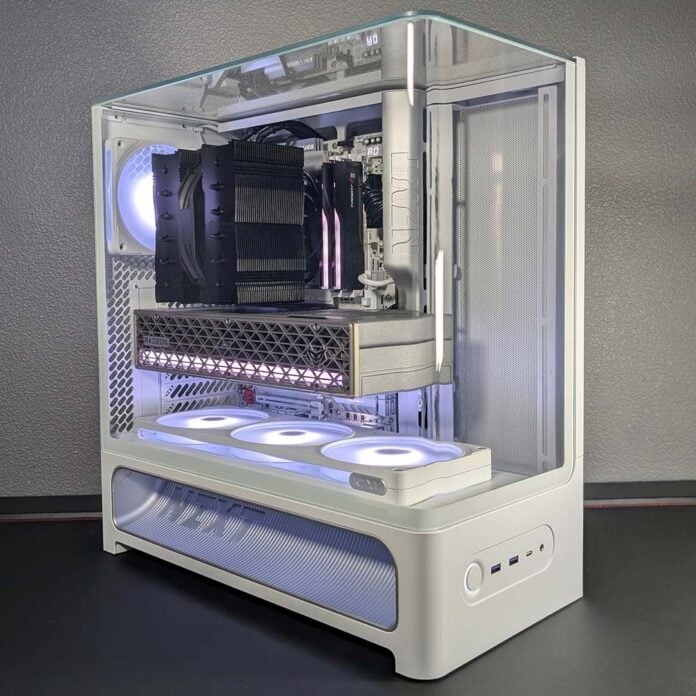
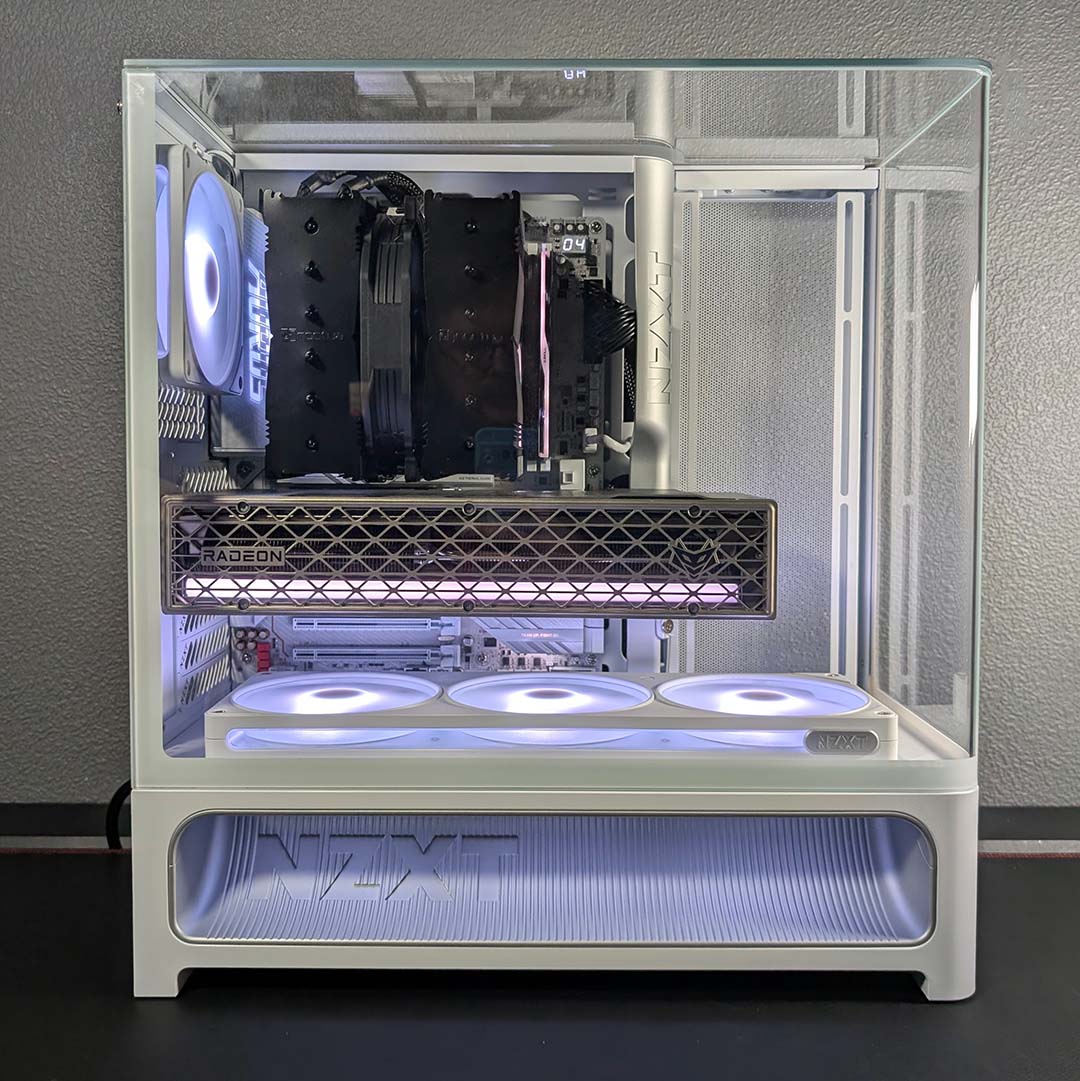
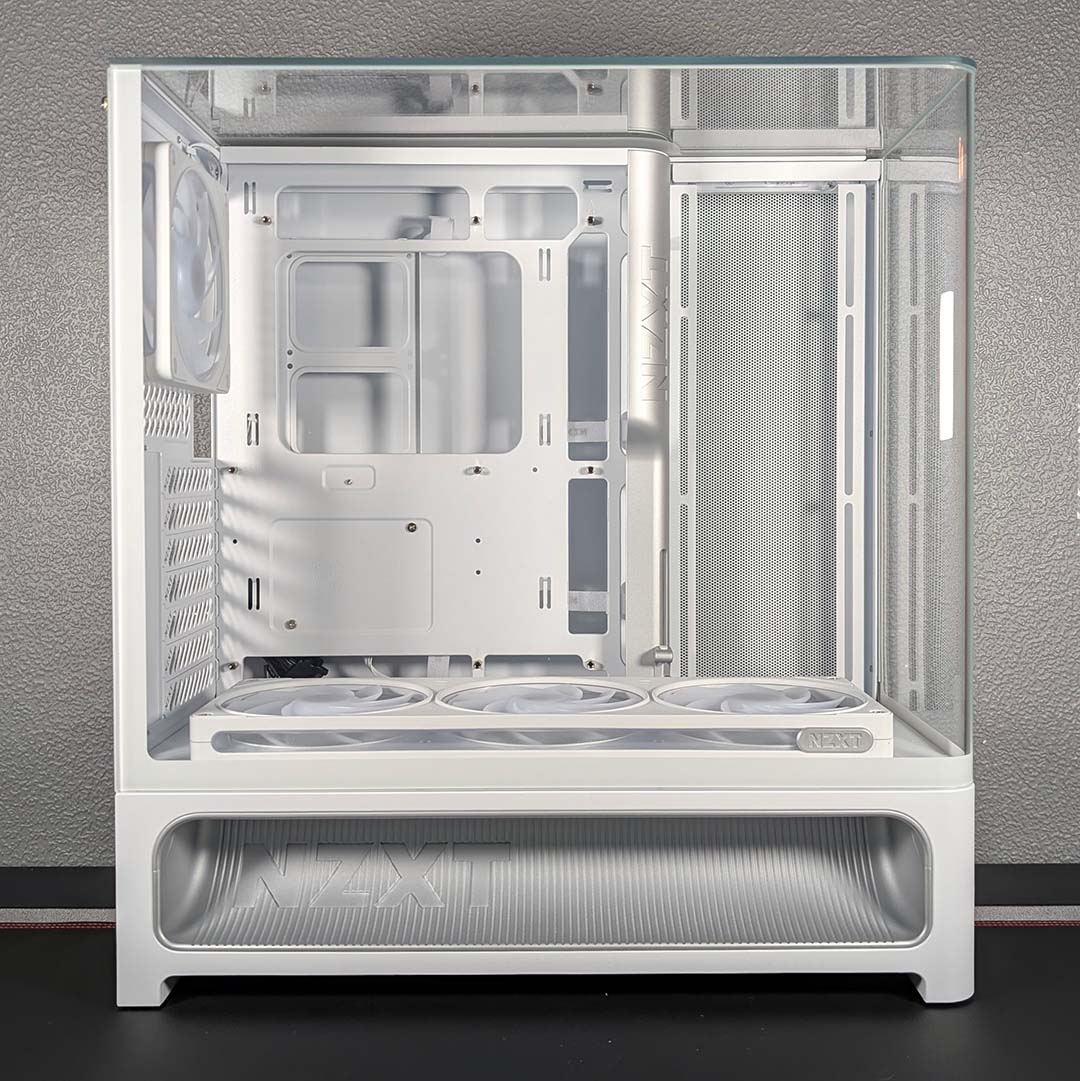
Aquarium-style PC cases are dime a dozen, but I’ve never seen one quite like the NZXT H5 RGB+. This stylish chassis takes panoramic case design to another level, literally, by way of a tempered glass roof to match its wraparound side panel. While this change sounds small on paper, it’s difficult not to appreciate the unique and beautiful aesthetic this approach creates in person.
While the glass finish is dazzling, there are some proverbial smudges beneath the surface that I’d like to see NZXT buff out via a revision or successor. Until that time, though, there are plenty of positives worth celebrating about this case beyond its reflective qualities, which altogether make this chassis a welcome addition to the case market.

NZXT H5 RGB+
£119 / $134
Pros
- Gorgeous tempered glass design
- Four ARGB fans included
- Great cable management
- Intuitive GPU anti-sag system
- Available in black or white
Cons
- Thin radiator clearance
- Proprietary fan hub
Club386 may earn an affiliate commission when you purchase products through links on our site.
How we test and review products.
NZXT is launching the H5 RGB+ in both black and white colour schemes. Each option retails for £119.90, so you can have your pick of your preferred paint job without paying extra. The firm is also launching a base H5 for £74.90, but this more affordable model arrives sans any fans and control hub, while also ditching the tempered glass roof for a mesh finish.
Considering that the F360 single-frame fan included in the latter retails for £44.90 alone, not forgetting the value of its 120mm exhaust and fan hub, it’s clear that value skews heavily in favour of the more expensive model. That’s all without considering the appeal of that tempered glass roof, but I’m getting ahead of myself.
Specifications
This case soon left an impression on me after freeing it from its cardboard confines. The mix of plastic, metal, and (of course) glass all feel appropriately weighty and pleasing to the touch, with NZXT demonstrating its longstanding cross-material colour matching expertise here.
Despite having such a big presence, the case is relatively compact for an ATX mid-tower. Measuring 469mm tall, 233mm wide, and 431mm deep, and weighing around 8kg, I had no difficulties lugging the chassis around nor in carving out space for it on my desk. If you do plan to place the H5 RGB+ in an enclosed space, ensure there’s enough room either side of the case for sufficient air intake.
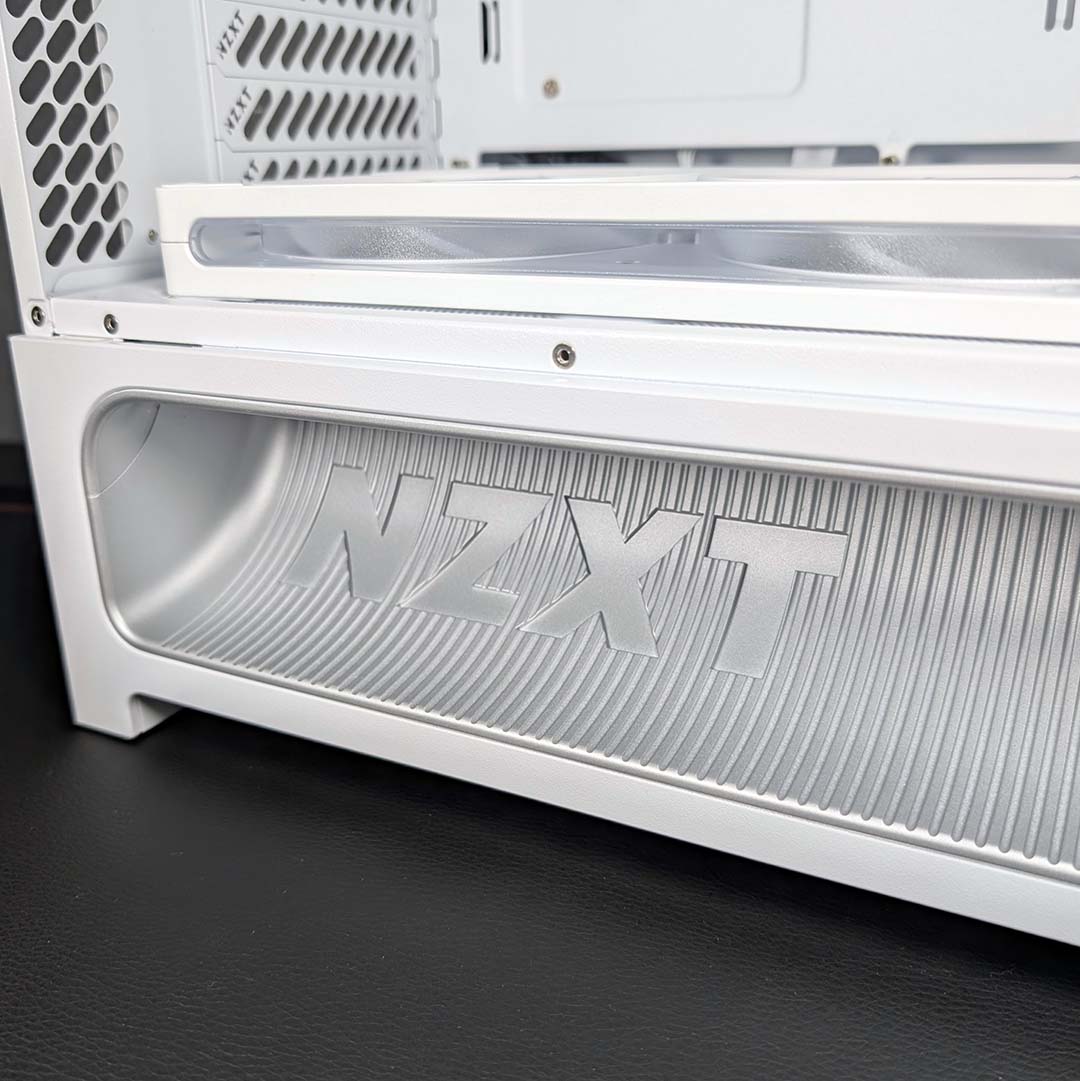
The case’s raised feet and scooped bottom intake provide natural grip points for carrying, but I found it difficult not to smudge the tempered glass regardless. I keep a cloth handy to get rid of fingerprints and other nasties on my monitor, and I’d recommend doing the same for a chassis such as this one. That cut of microfibre certainly put in quite the shift during this review.
| Specifications | NZXT H5 RGB+ |
|---|---|
| Dimensions (H x W x D) | 469 × 233 × 431mm |
| Motherboard support | ATX, micro-ATX, mini-ITX |
| Back-connect compatible | Yes (ATX) |
| Fan support | Bottom: 120mm (x3) Rear: 120mm (x1) Side: 120mm (x3) |
| Radiator support | Side: 360mm |
| CPU cooler height | 173mm |
| PSU length | 200mm |
| Graphics card length | 420mm |
| Connections | 3.5mm audio-out/mic-in (x1) USB-A 5Gbps (x2) USB-C 20Gbps (x1) |
| Storage support | 2.5in (x2) 3.5in (x1) |
| Warranty | Two years |
Accessing the main chamber requires removal of the case’s top panel, which pulls away from the frame via two thumbscrews at the rear. Then you’ll need a screwdriver to remove the two screws that hold the tempered glass surround in place. Meanwhile, the chassis’ right side is always accessible sans tools, clicking in and out of place via ballpoint pegs.
While we normally don’t think twice about the barrier that a top panel creates during a build process, having that part of the chassis out of the way makes for an easier time. Rather than navigating the confines of a square-ish window, you can now freely approach the main chamber from above too.
With your newfound space, you can expect to kit out the H5 RGB+ with an ATX motherboard, with standoffs available to scale down to micro-ATX and mini-ITX designs, as well as cutouts that accommodate back-connect models. There’s enough room to house enormous graphics cards up to 420mm in length, as well as large CPU coolers that sit 173mm tall, as well.
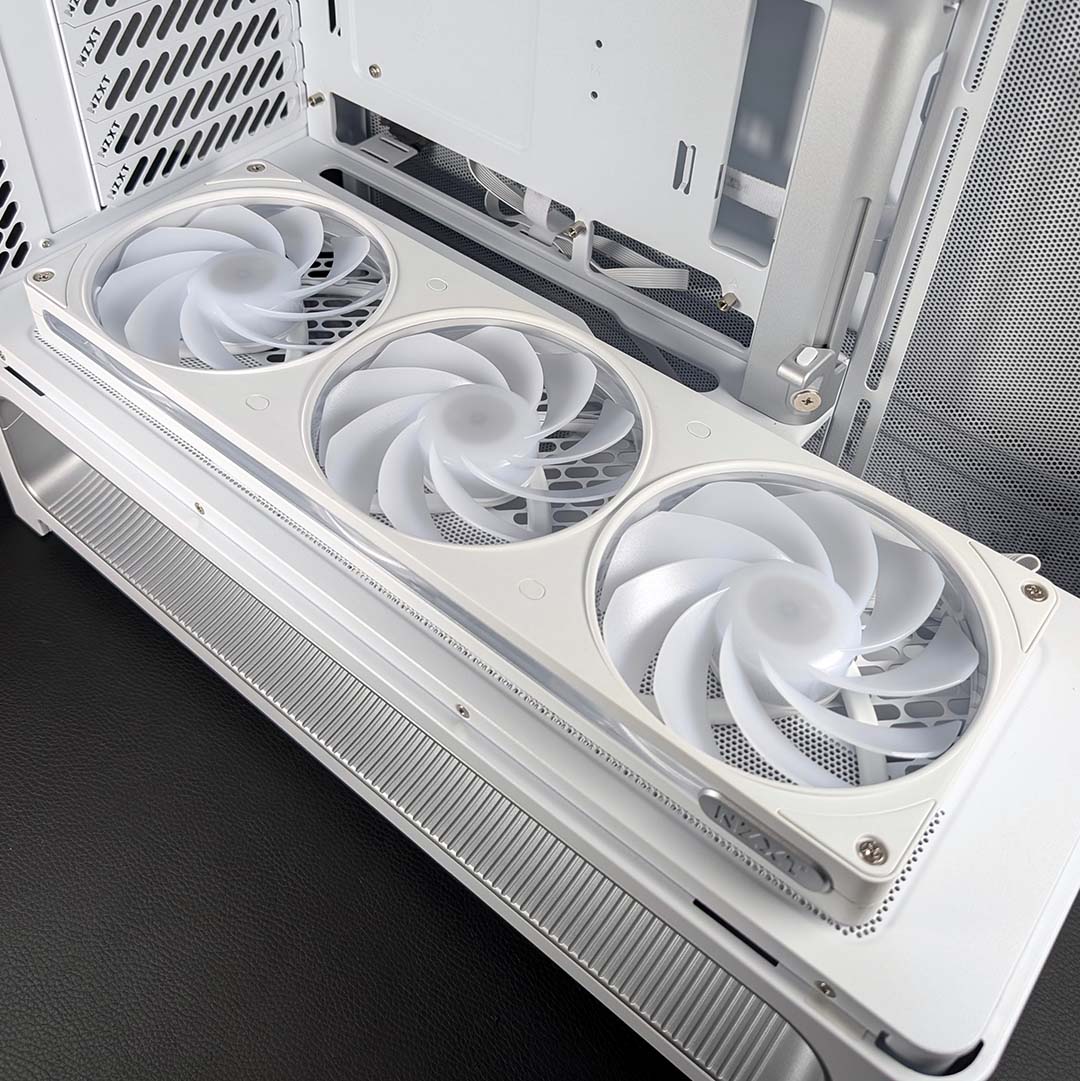
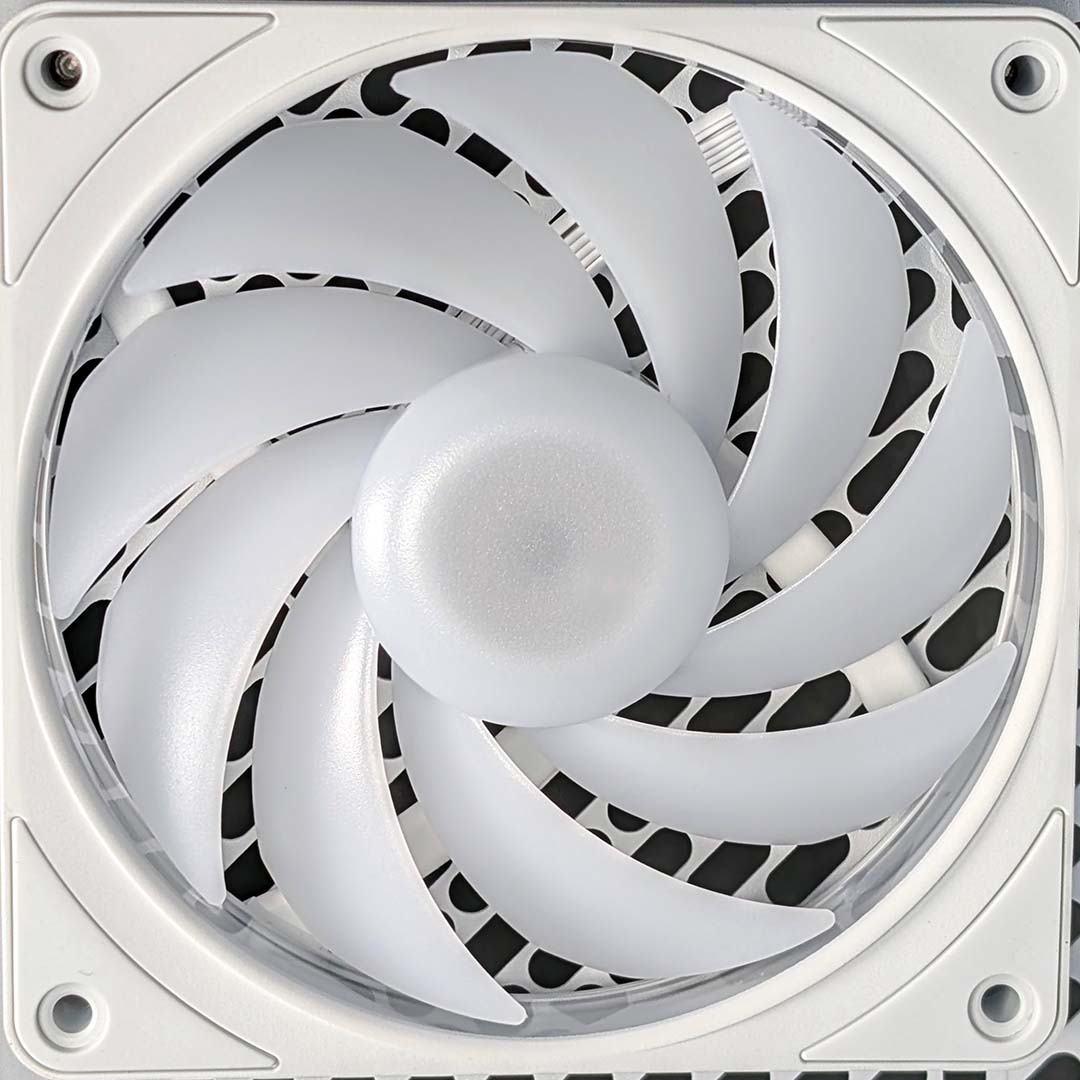
You can fit up to seven 120mm fans inside this case – three along the bottom, another three on the side, and one on the rear. However, stock spinners occupy four of these slots, with an F120 standing ready at the rear, and a single-frame F360 containing three 120mm spinners sitting along the bottom.
The latter serves as an intake, pulling cool air from the curved ramp cut out towards the bottom of the case. This setup will primarily benefit your graphics card, as the F360 sits right beneath it. Meanwhile, the processor’s temperatures will remain reliant on the side intake, either via an AIO liquid-cooling system, or additional case fans assisting an air cooler.
Ideally, this means you only have to install a 360mm radiator on the side and you’ll have maximised the H5 RGB+’s cooling potential. Alternatively, you could use three 120mm fans, or another 360mm single frame, to plug the gap in tandem with an air cooler.
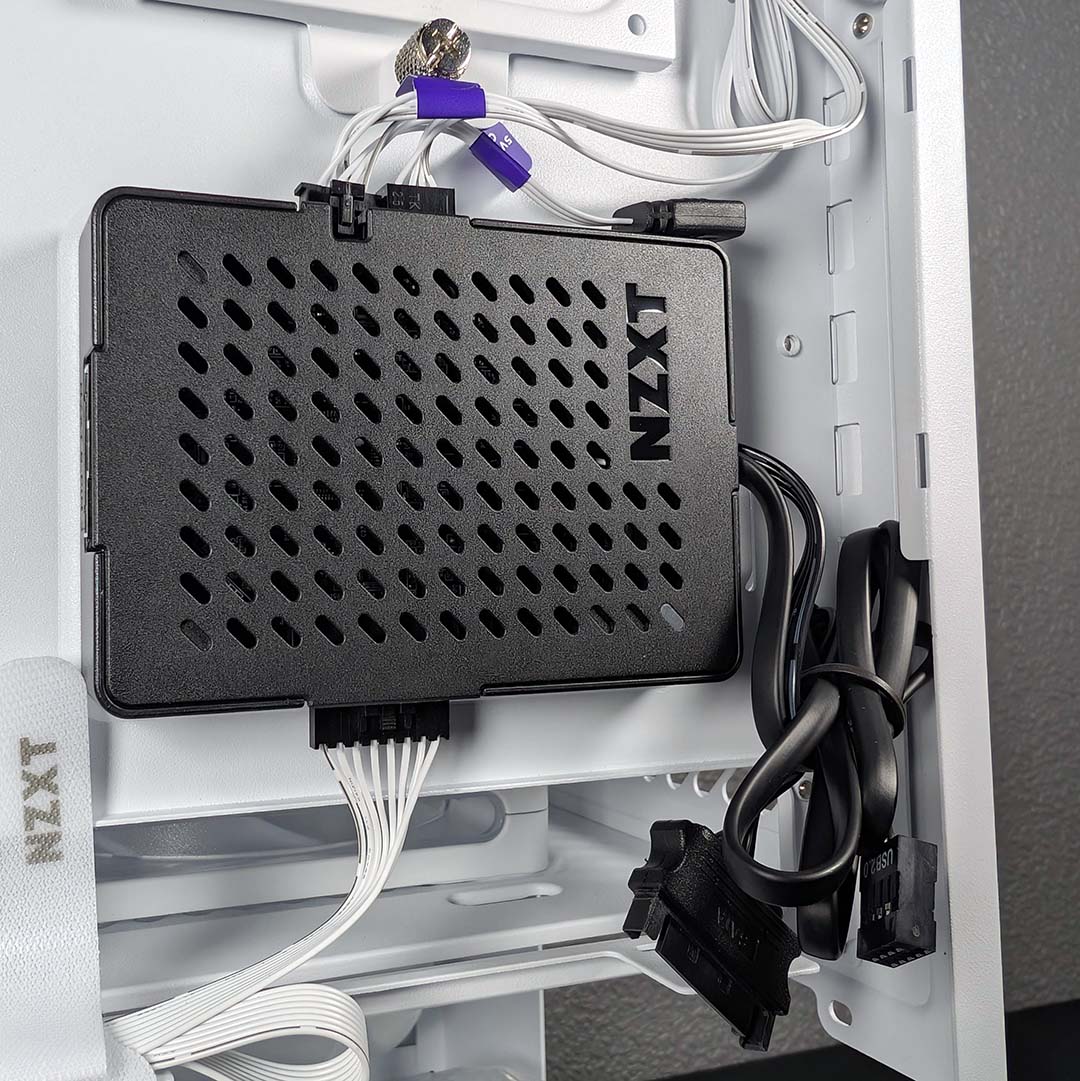
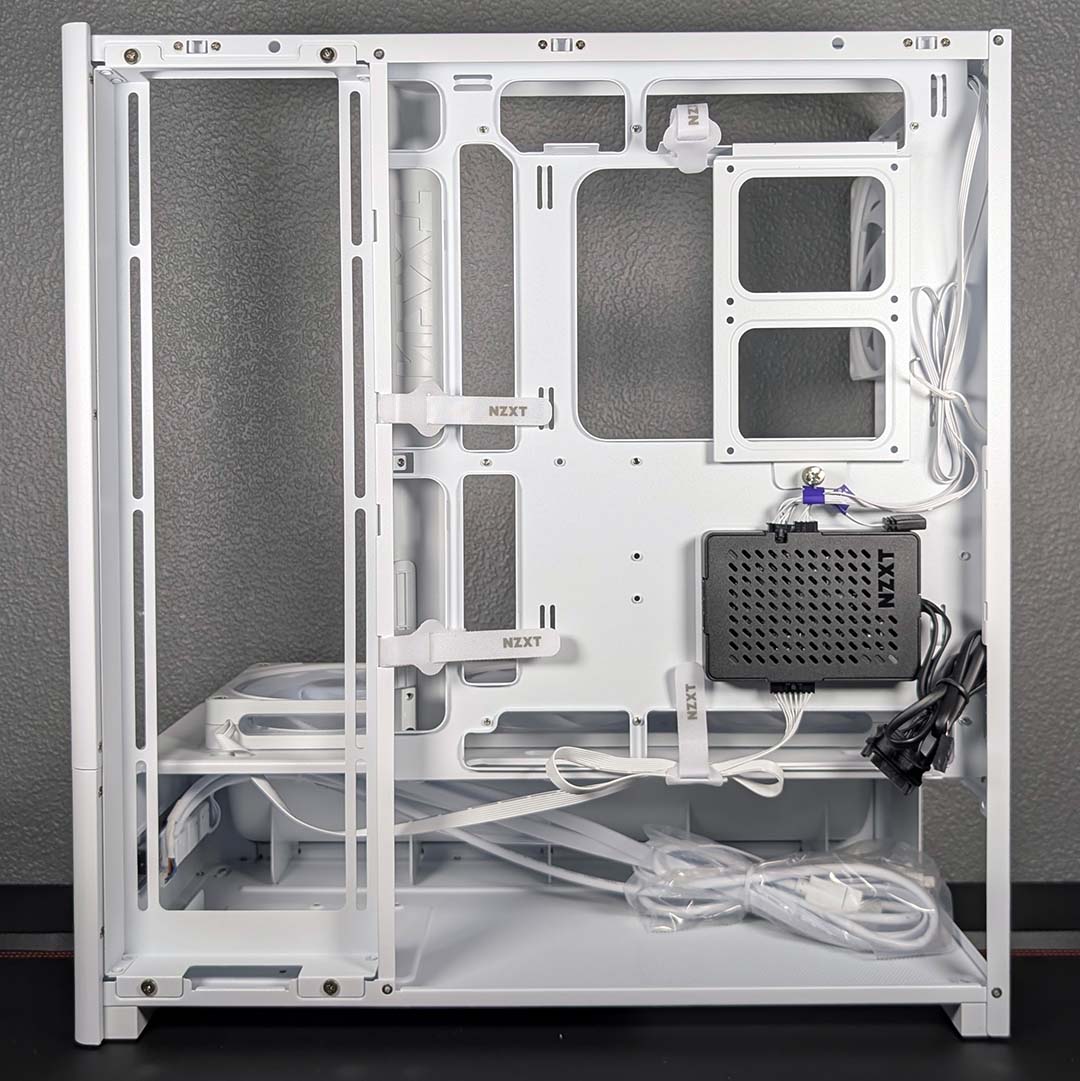
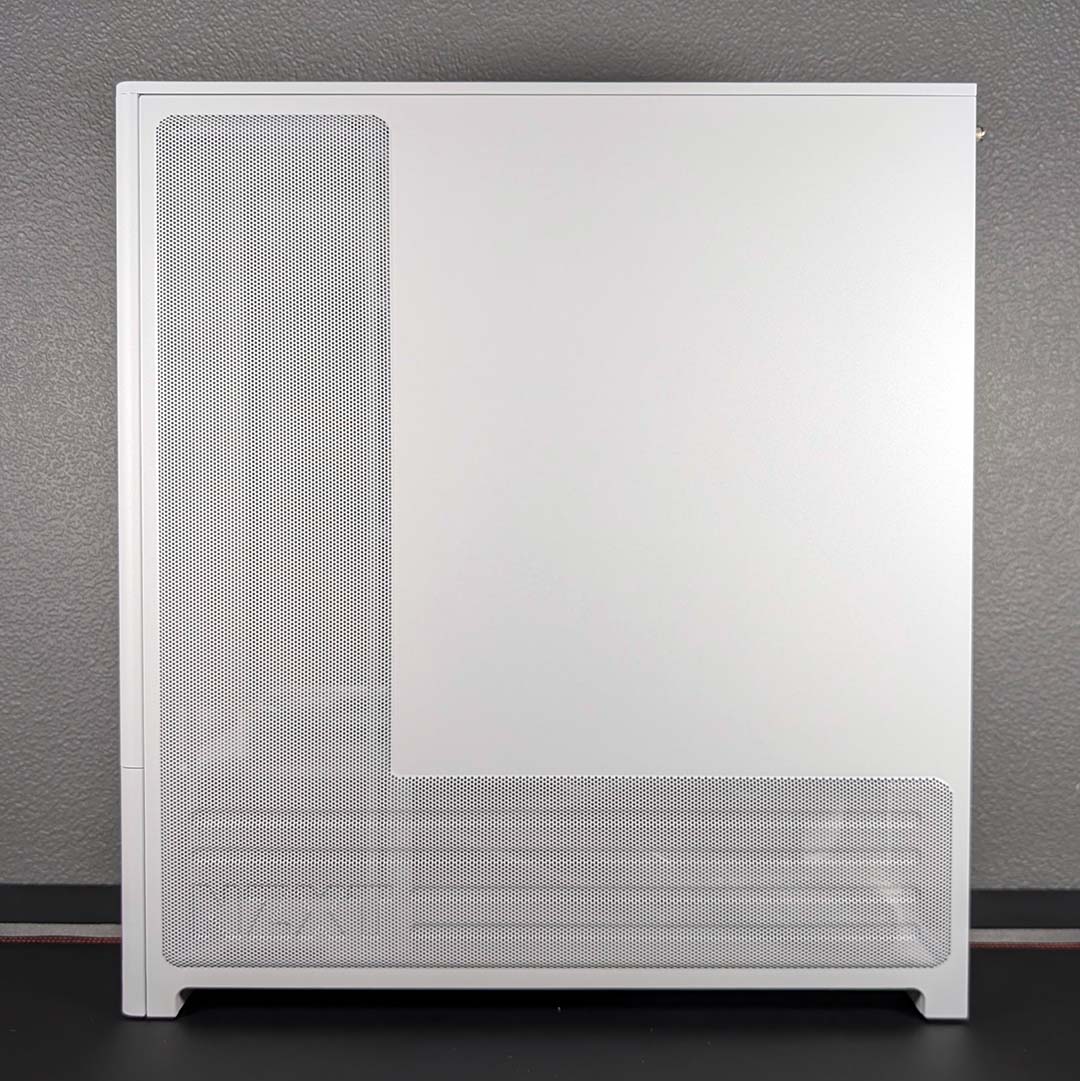
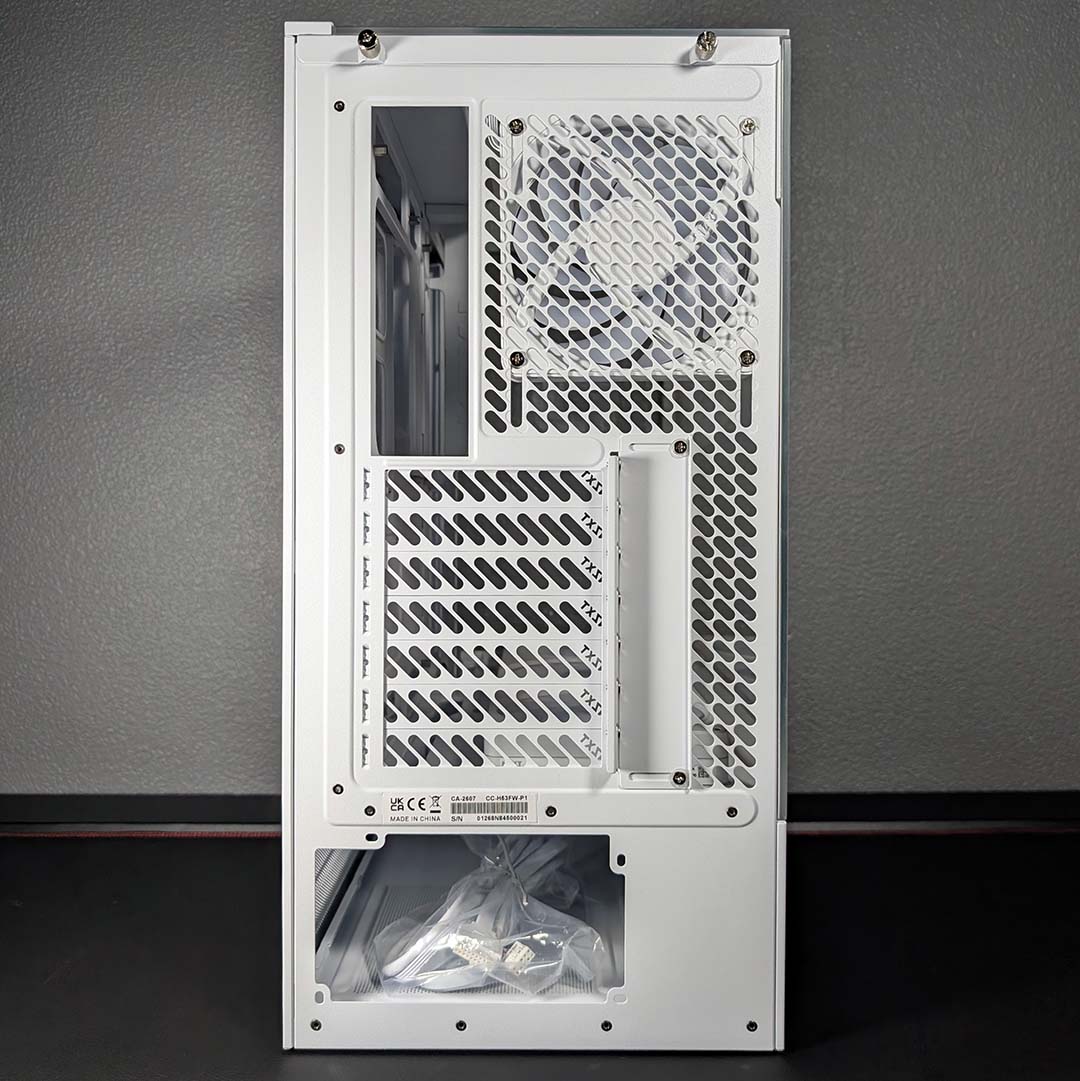
Spin around to the right chamber and pop off the steel panel complete with its dust filter, and you’ll find several features of note. Chief among them is the Control Hub Lite, which NZXT has already hooked up to both the F360 and F120.
While this is a convenient addition for the stock fans, don’t expect to connect your own blowers to this little black box as it only services the firm’s proprietary connections. There’s one port available, encouraging the installation of another single-frame fan setup or NZXT AIO water cooler.
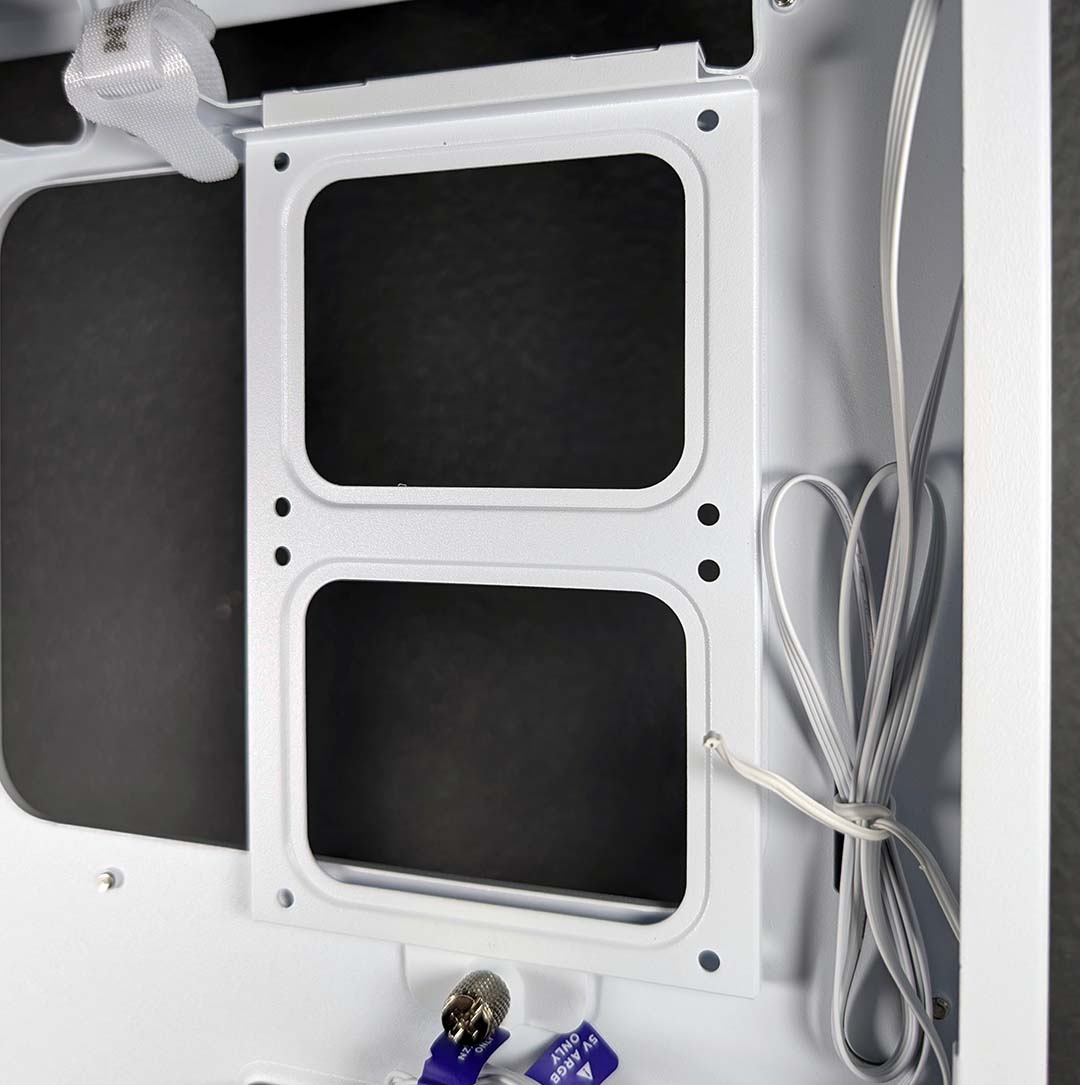
Just above the Control Hub Lite are the storage mounts, or mount singular depending on what kind of drive you’re thinking of installing. The bracket can support up to two 2.5in SSDs or a single 3.5in hard disk. I personally made the switch to exclusively using M.2 sticks a while back, but I’m glad to see NZXT continue to support older form factors, particularly in these trying times.
To the left we find the removable fan/radiator bracket, which connects to the frame via four screws that you’ll need a screwdriver to remove. I personally would like to have seen a thumbscrew design here for ease of access, but this isn’t a part of the case I’d expect to frequently remove in fairness.
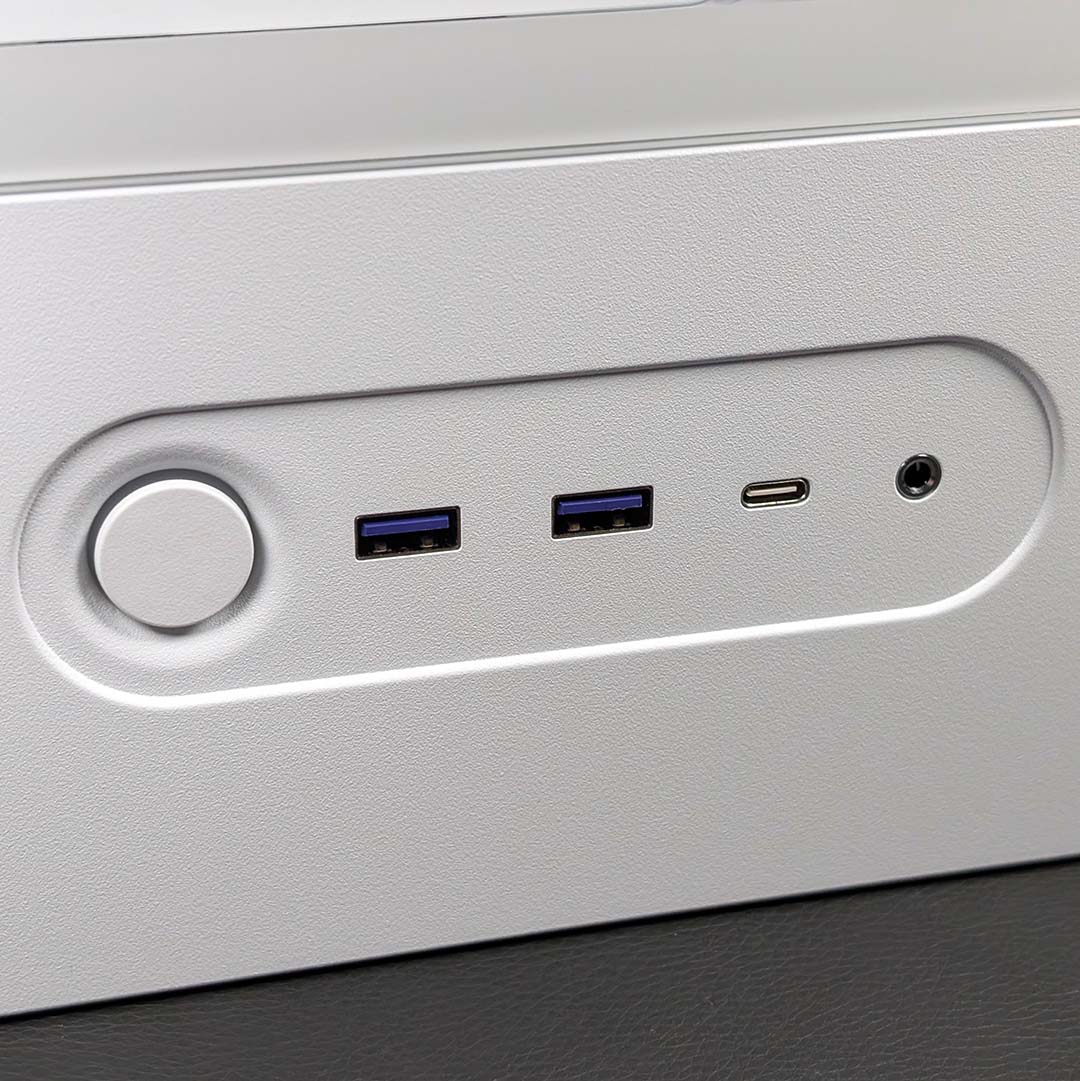
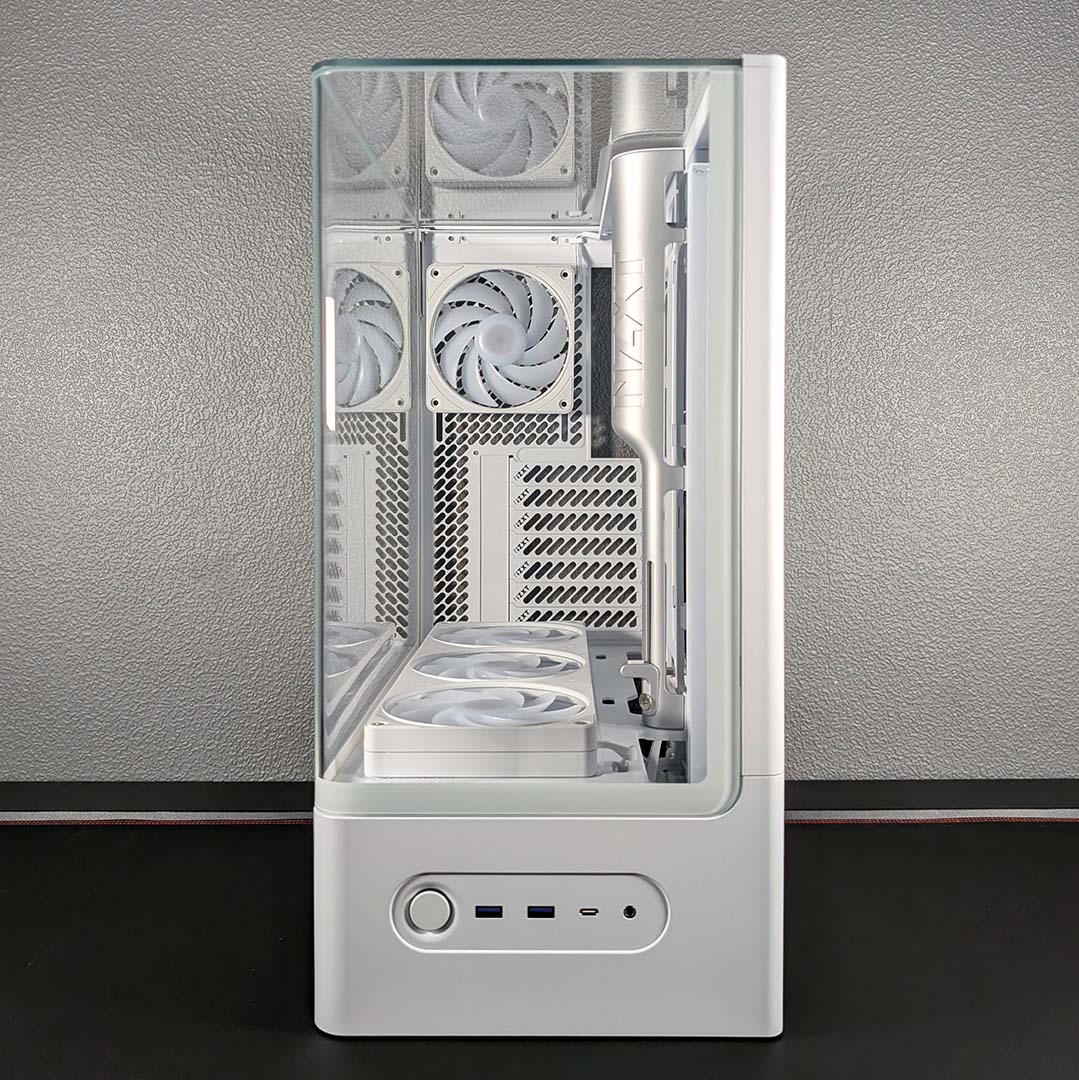
Before I get into what it’s like to build inside the H5 RGB+, let’s briefly discuss the case’s front I/O panel. You’ll find an assortment of USB ports, the power button, and a 3.5mm jack connection below the front panel. I usually prefer such connections to sit on the side, but the intake scoop makes that impossible in this case.
The two USB-A ports feature an unmistakable NZXT purple colour scheme and can each transfer data at up to 5Gbps. Meanwhile, the single USB-C connection is able to reach speeds of 20Gbps, making it ideal for nippy transfers between external storage and your PC.
In my initial exploration of this case, I found little to fault, bar the fan hub’s limited usefulness beyond managing the stock blowers. Build quality is of a high and attractive standard, as I’d expect from NZXT, and there’s lots of room for almost any component you could want to throw into a modern build. Almost.
Test components
The H5 RGB+ would look best with a 360mm AIO water cooler in my eyes, but that’s not what I’ll be using to test the case. Unfortunately, my usual go-to choice, an Arctic Liquid Freezer III Pro 360 A-RGB, is simply too thick to fit in this case’s slim radiator frame.
I’d encourage NZXT to include radiator clearance values as part of its product page specifications, as well as in the manual. There’s no mention of any such dimensions in the materials I have to hand, hence this rug-pull moment came to pass. I thankfully had the sense to understand the problem, but I can easily foresee a less-experienced builder pressing on in frustration.
Without any suitable alternatives to hand, I turned to the next best thing: a beefy air cooler. The Noctua NH-D15 chromax.black remains a beast in this arena, and snugly fits within the case’s CPU cooler clearance ceiling with 5mm to spare. Aside from this change, though, I’m using the same components you’ll find across my other case reviews.
Here is a list of the components I’m using to test the H5 RGB+:
- CPU: Intel Core Ultra 270K Plus
- Cooler: Noctua NH-D15 chromax.black
- RAM: G.Skill Trident Z5 RGB DDR5-7200 CL34 32GB
- Motherboard: Gigabyte Z890 Aorus Pro Ice
- GPU: Sapphire Nitro+ Radeon RX 9070 XT
- SSD: WD_Black SN8100 2TB
- PSU: be quiet! Dark Power 14 1,200W
Build experience
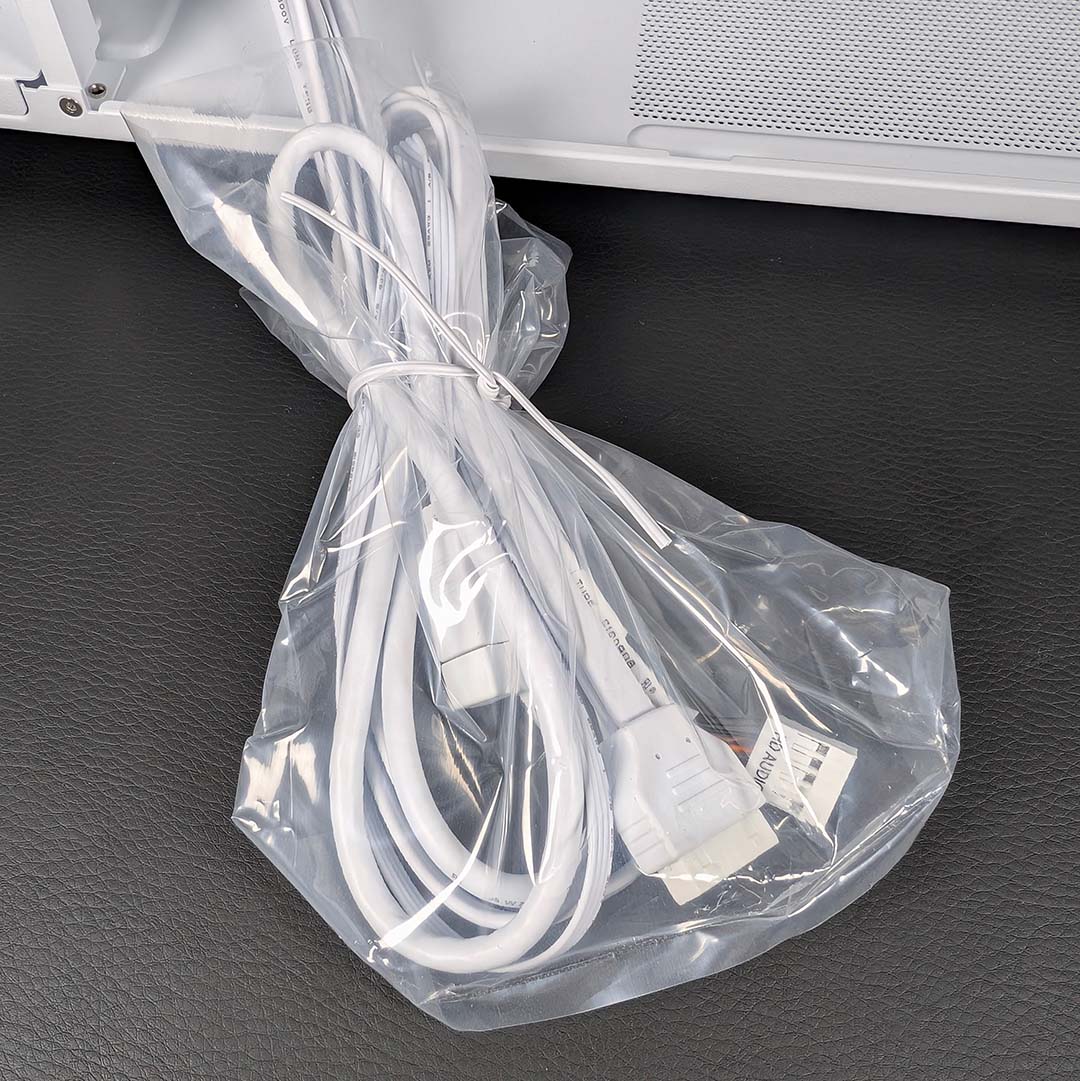
The H5+ RGB gets off to a good start with its cables and accessories. I’m glad to see the case’s front I/O panel cables all bunched together and protected in a neat package, and importantly not taking up a cable strap along the spine. This is a small convenience, but I’ll always appreciate little touches like this.
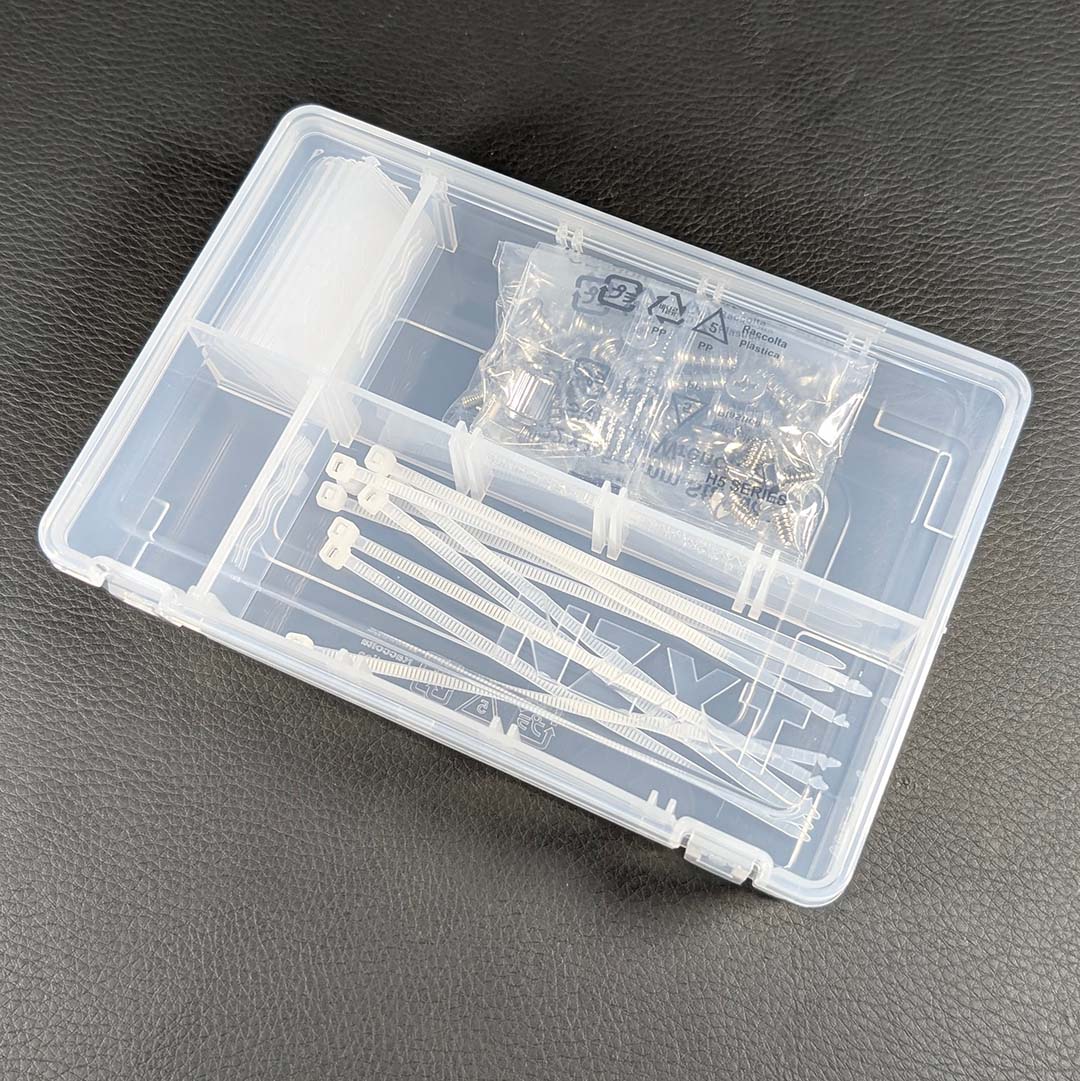
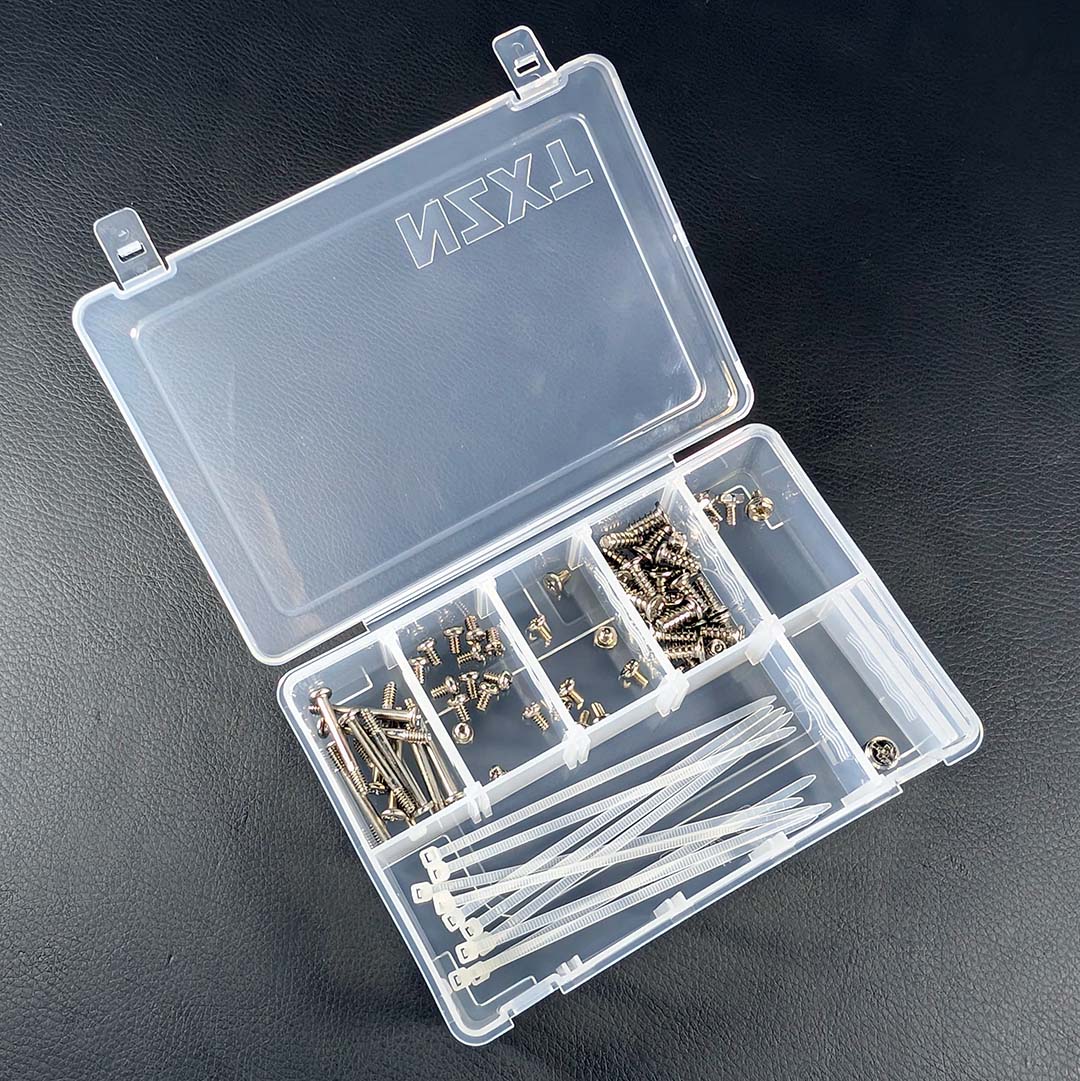
Speaking of which, the H5 RGB+ doesn’t leave its screws adrift inside a nondescript cardboard box. Instead, the case arrives with a small branded plastic tray, complete with dividers that help keep screws separate and tidy.
While NZXT isn’t the only case manufacturer to do this, I’ve been begging more companies to provide a similar accessory kit with their premium cases ever since reviewing the Arctic Xtender VG. Kudos to NZXT for doing it too.
Front and top panels to the side, I lay the H5 RGB+ on its back and then get to work on populating my motherboard outside the case. CPU, SSD, and RAM, all quickly slip into place, as does my board atop the ATX standoffs.
I then route the front I/O panel cables to their respective headers. Both USB connectors line up without issue, but the power button and front audio cables require a little more finesse.
The F360 makes plugging anything in at the base of the motherboard a touch fiddly, as the fan frames partially obstruct the case’s bottom portion. Navigating this inconvenience isn’t difficult, but it’s certainly a little tedious.
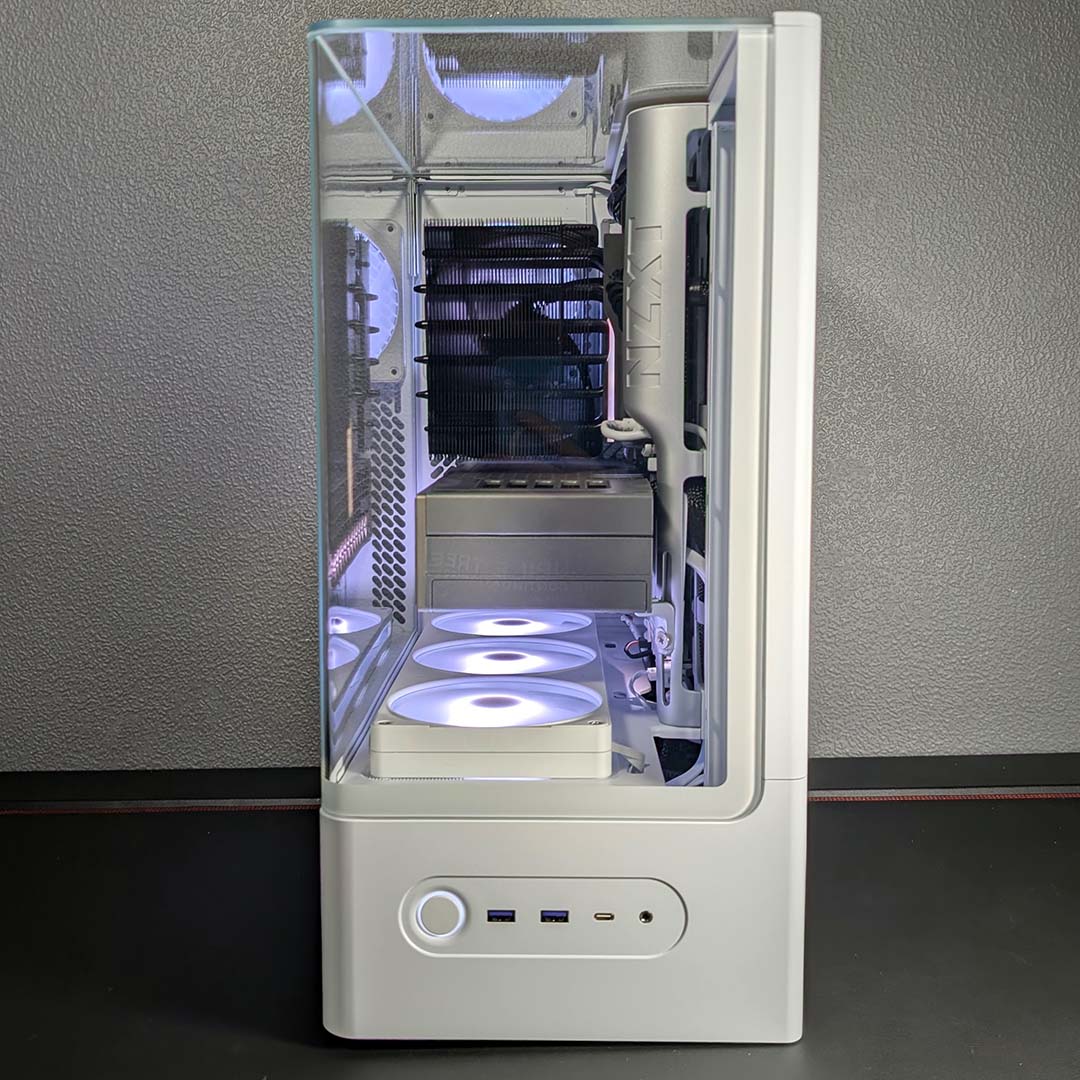
Next comes the power supply, which slides in from the side. I much prefer installing PSUs via a detachable bracket and inserting from the back, as finding the right angle for a side installation isn’t a smooth experience, as is the case here.
Routing my 24-pin ATX cable into the main chamber, I found the thickness of my wire meant it rubbed up against the cable shroud. I could squeeze it into position with a little bit of wiggling, but this marks another small bit of fiddling during installation.
I had no problems connecting the rest of my wires, though, including a dual 8-pin cable for CPU power, a 16-pin wire for the GPU, and a SATA power cable for the Control Hub Lite. Moreover, I’m very happy with the cable management the H5 RGB+ provides, with four Velcro straps being all I need for a tidy finish.
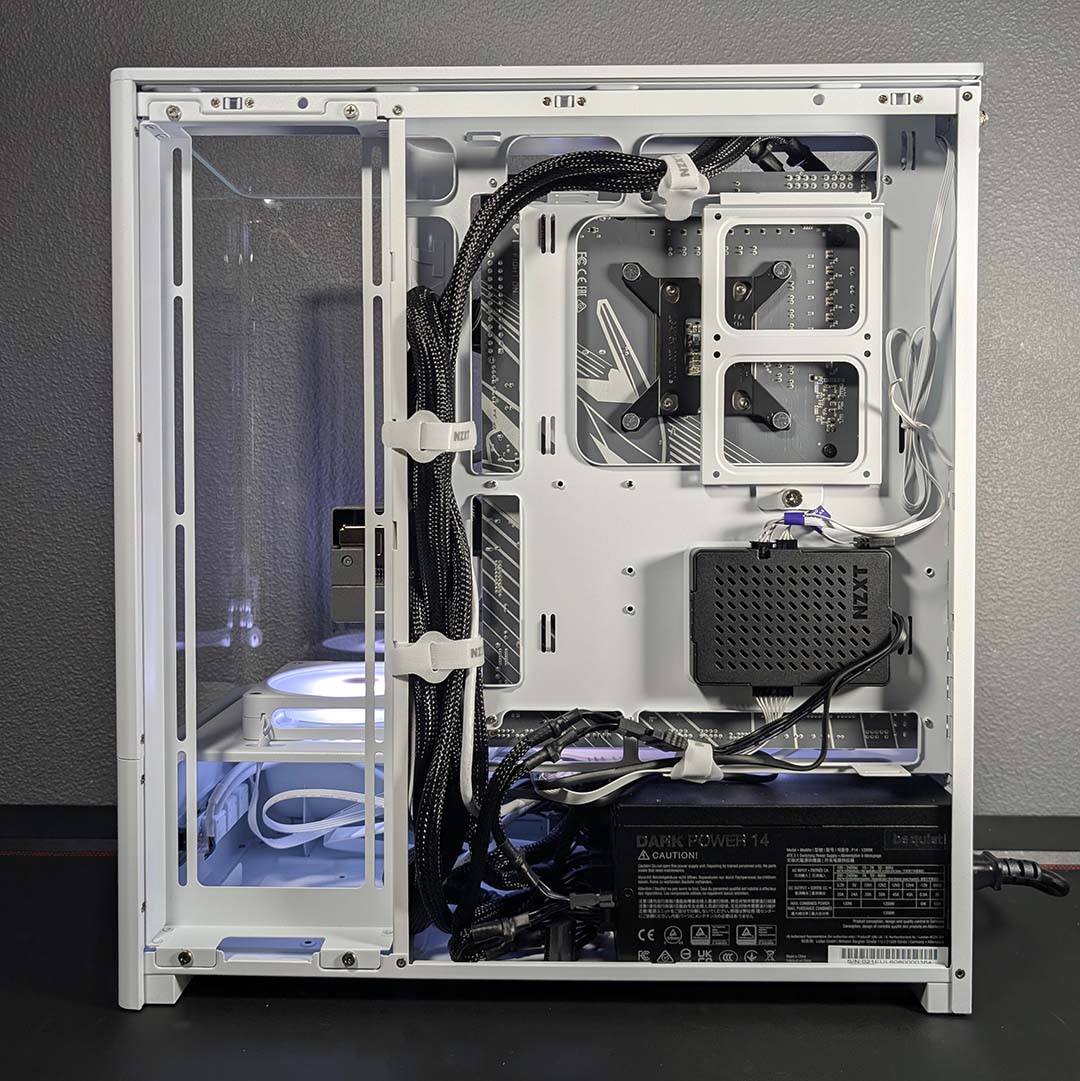
This is the unfortunate point in my tale where I attempted to install the Arctic Liquid Freezer III Pro 360 A-RGB to no avail. Initially I thought I needed to swap around the fans in some manner for a proper installation, but soon realised the issue was that the radiator was simply too thick.
Following this unpleasant surprise and a calming cup of tea, I tagged in the NH-D15 chromax.black which went into the build with no issues. I’m using this cooler with a single fan, despite having another blower available. Doing so only sacrifices 1-3°C of performance, as per Noctua’s own FAQ, and makes for a tidier appearance.
I will admit that the case does look slightly wrong, for lack of a better word, without any fans present on the side intake. In future, I may explore the effects of using the F360 on the side rather than bottom, but that’s beyond the scope of this review, which concerns as close-to-stock performance as possible.
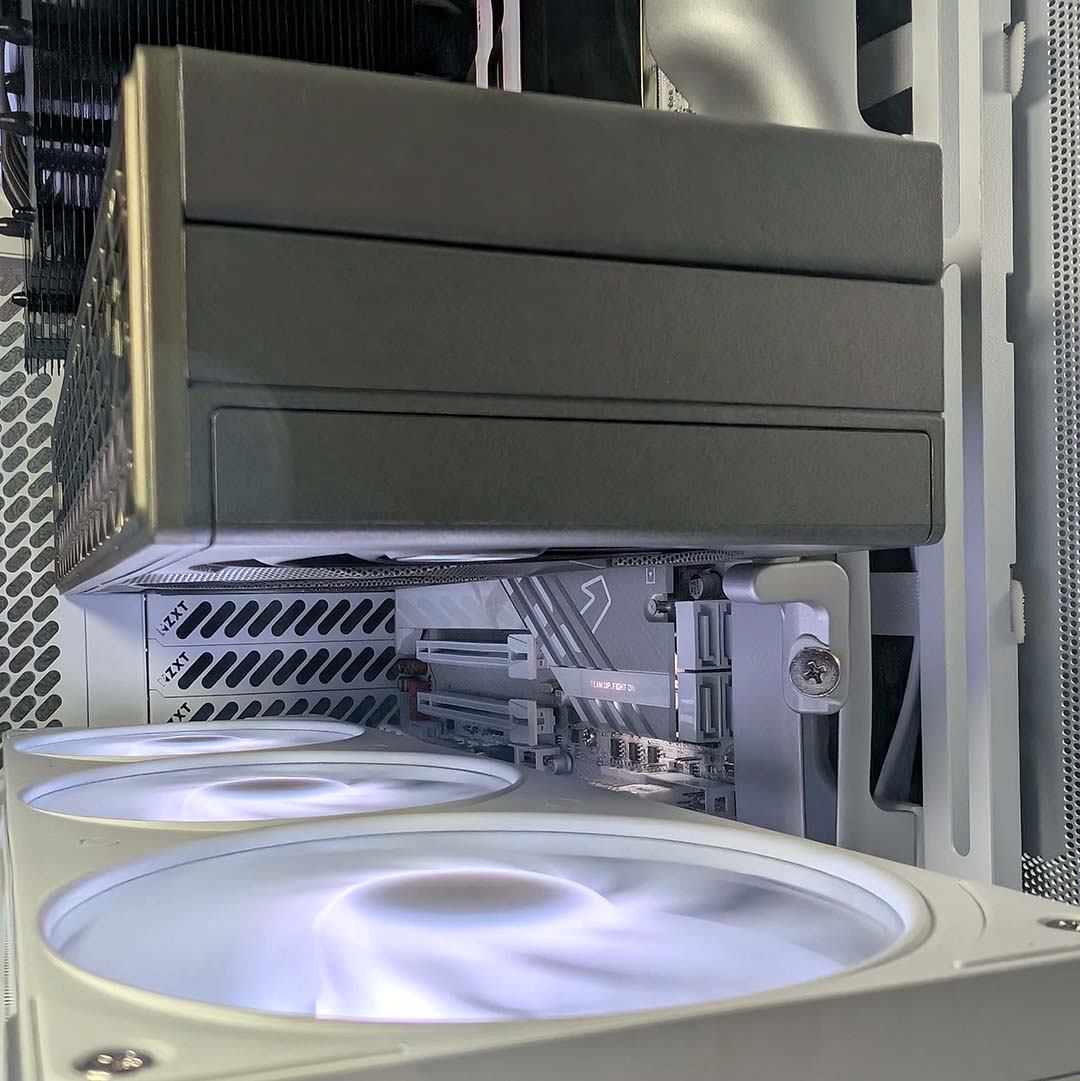
Finally, I unscrew three PCIe brackets and raise the cover to make room for my graphics card. The pixel pusher slots into place with a satisfying click, power cable hidden underneath its backplate, and I quickly reinsert the bracket screws.
Now comes time for the H5 RGB+’s GPU anti-sag bracket to shine. I usually find this well-intentioned feature both clunky and ugly in most cases, but NZXT’s approach is certainly neither.
This small silver nub and white rubber top subtly fold into the completed build, and remain easily accessible should you need to make any adjustments. My only problem with the bracket is that its screw initially sits behind the F360 and requires a little angling to reach, but this is a minor issue.
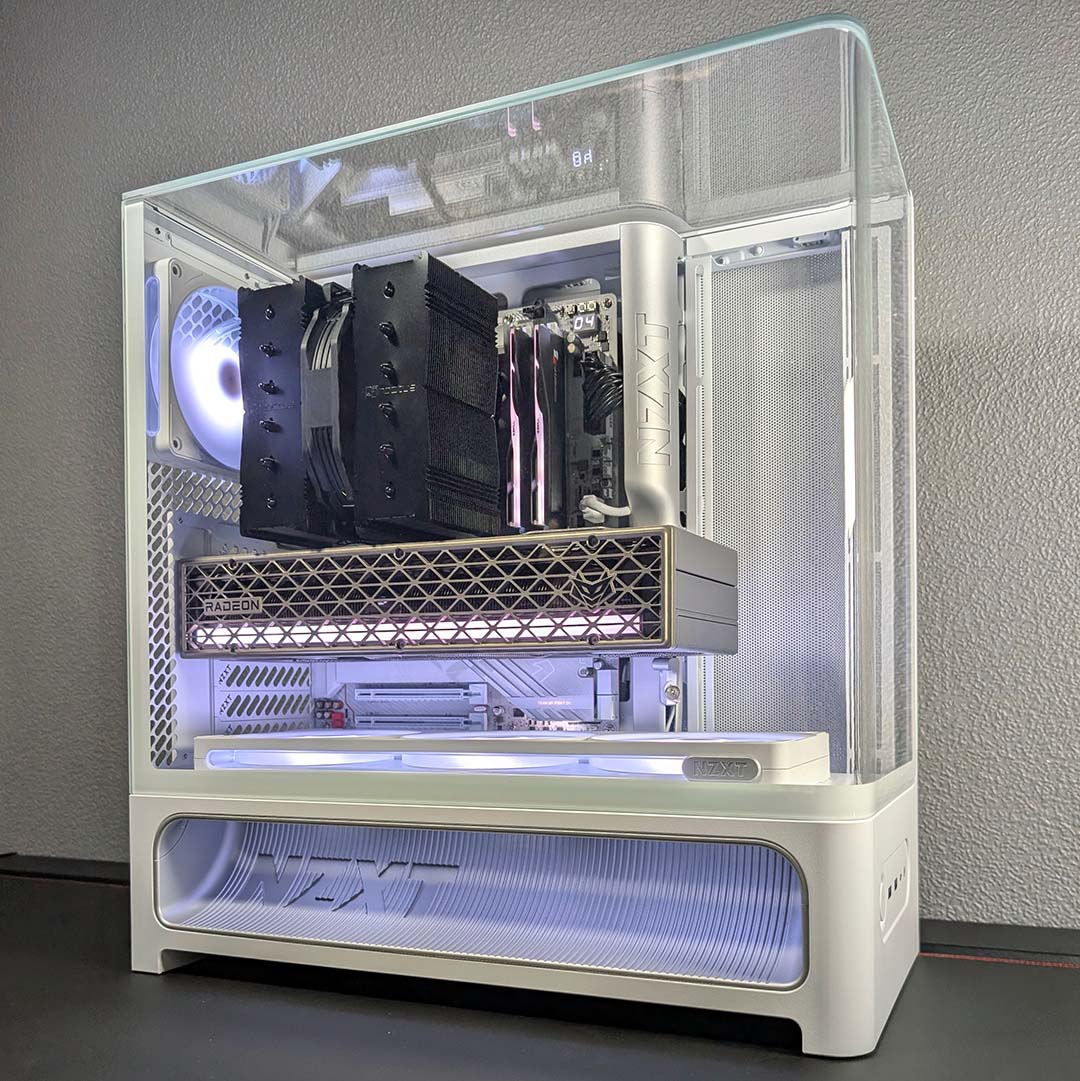
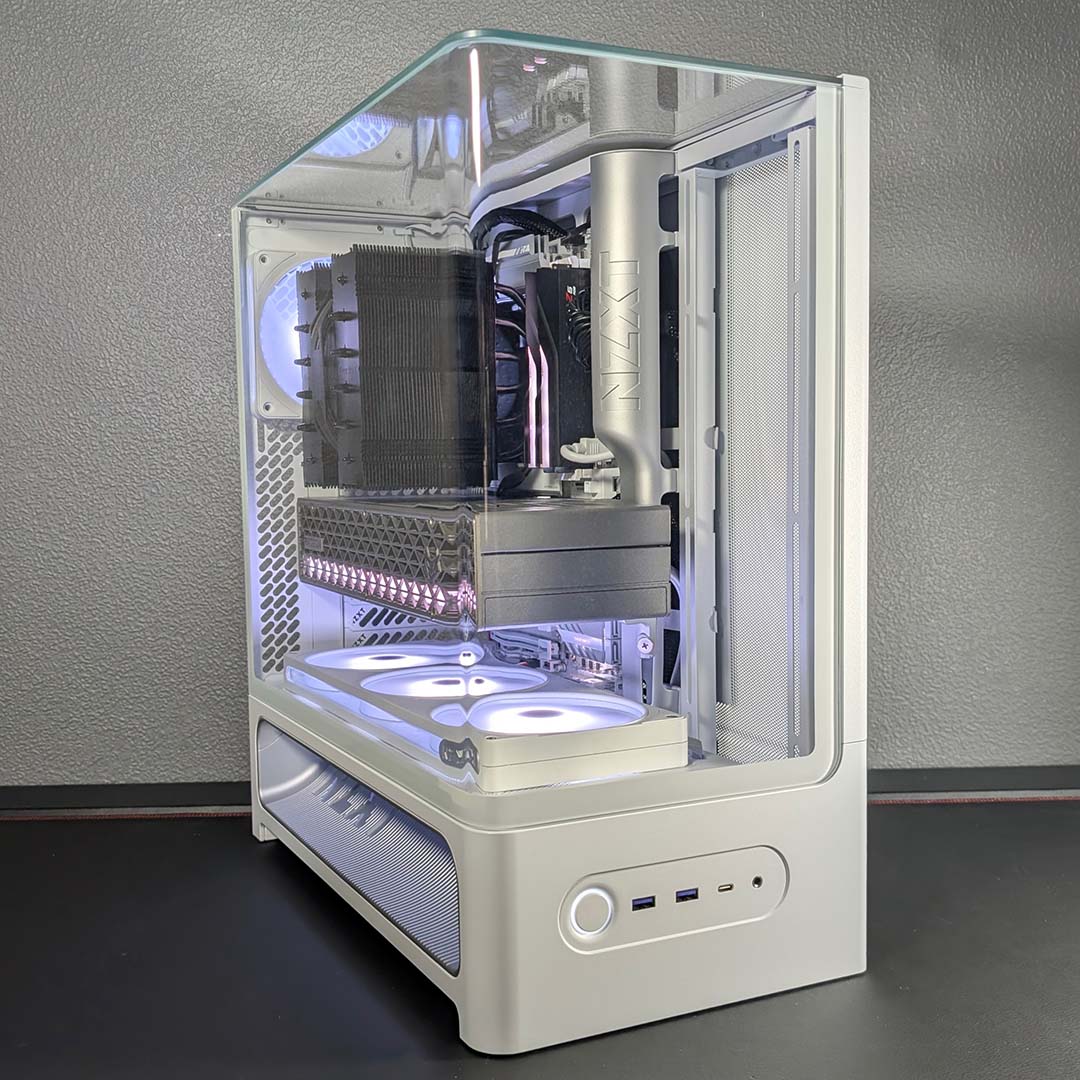
Despite my reservations about the lack of side fans, I’m happy with how the overall build has turned out. The tempered glass panels across the front, side, and top all help to give this collection of components a premium and powerful air.
My snafu with radiator clearance naturally impacted build time, but discounting that issue, I would have easily been able to get this system up and running from scratch within an hour. Building in the H5+ RGB isn’t particularly challenging but does come with a few fiddly moments.
Given the shallowness of the right chamber, I’m curious how cable management for a back-connect motherboard would fare. Regardless, my front-connect wiring has come together a treat.
Performance
As I’m not using my usual liquid cooler, I can’t simply carry across my usual fan speeds. Instead, after some preliminary testing to determine a suitable balance of noise and temperatures, I’ve settled on running the CPU cooler fan at 60% speed and the case fans at 40%.
Ambient conditions look favourable to the H5 RGB+, with my office sitting at a comfortable 20°C. As we’re using a different cooler and case fan speeds, I’m sharing this value for the sake of completeness rather than in service of calculating Delta T values.
With no side intake in play, I’ve instead measured noise levels from the system at a distance of 30cm straight on from the tempered glass side panel. My noise meter indicates my fan values have the case humming along at 34dBA, which while audible certainly isn’t bothersome.
Both CPU and GPU are lounging at just under 30°C sitting idly a little over five minutes after a cold boot. A dose of Cyberpunk 2077 sees both components grow warmer, but thermals remain well in check, as my Radeon RX 9070 XT peaks at 50°C while the Core Ultra 7 270K Plus temp rises to 64°C.
Cinebench 2026 really turns up the heat on the processor, with a 10-minute multi-thread run pushing temperatures up to 92°C. This result puts us close to thermal throttling territory, suggesting that an RPM ramp rather than a fixed value may be the way to go if we planned to use this build as a hybrid workstation. Adding a second fan to the Noctua cooler would help as well.
Given the lack of direct airflow to the processor, it doesn’t surprise me that we’re seeing such high temperatures in Cinebench 2026. This likely wouldn’t be an issue with a 360mm AIO water cooler, as the radiator would be able to source its own fresh air. However, when running an air cooler, thermal management becomes more challenging.
Conclusion
I’m head over heels for the H5 RGB+ when it comes to aesthetics, with that glass top elevating an already gorgeous glass wrap and steel frame. Having tidy cables in the back of the case and a subtle anti-sag bracket just sweetens the finish for me. It’s hard to think of a PC case that’s as comparably pleasing to the eye in this price range.
The included ARGB fans are welcome, as much as I wish their accompanying fan hub could service standard PWM spinners. An NZXT Kraken AIO cooler would be a smart play for this case, both for the sake of the Control Hub Lite as well as maintaining a cohesive aesthetic and, most importantly, fitting into that shallow radiator bracket.
There aren’t many other cases on the market that offer the same glass top finish as the H5 RGB+, but there’s plenty of competition worth considering around the £119 mark. The Arctic Xtender VG is much larger than NZXT’s offering but remains one of our favourite chassis, complete with a vertical GPU mount, for £117. If you’re after something smaller, the Hyte Y50 RGB is more barebones but packs plenty of tempered glass into a petite package for £99.
Perhaps the biggest compliment I can pay NZXT’s new case is that it’s easily the best-looking ATX chassis design in which I’ve had the pleasure of building a PC so far this year. That’s twice now the company has coloured me so impressed in 2026, with the H2 Flow remaining my favourite ITX design. Long may this string of hits continue.