
Building PCs has gotten simpler over the years with far less that can go wrong. RGB lighting, however, is still a bit of a mess. You need several hubs, multiple wires, and sometimes a subscription to a synchronisation software just to get everything working in harmony. Corsair iCUE Link wants to change that.
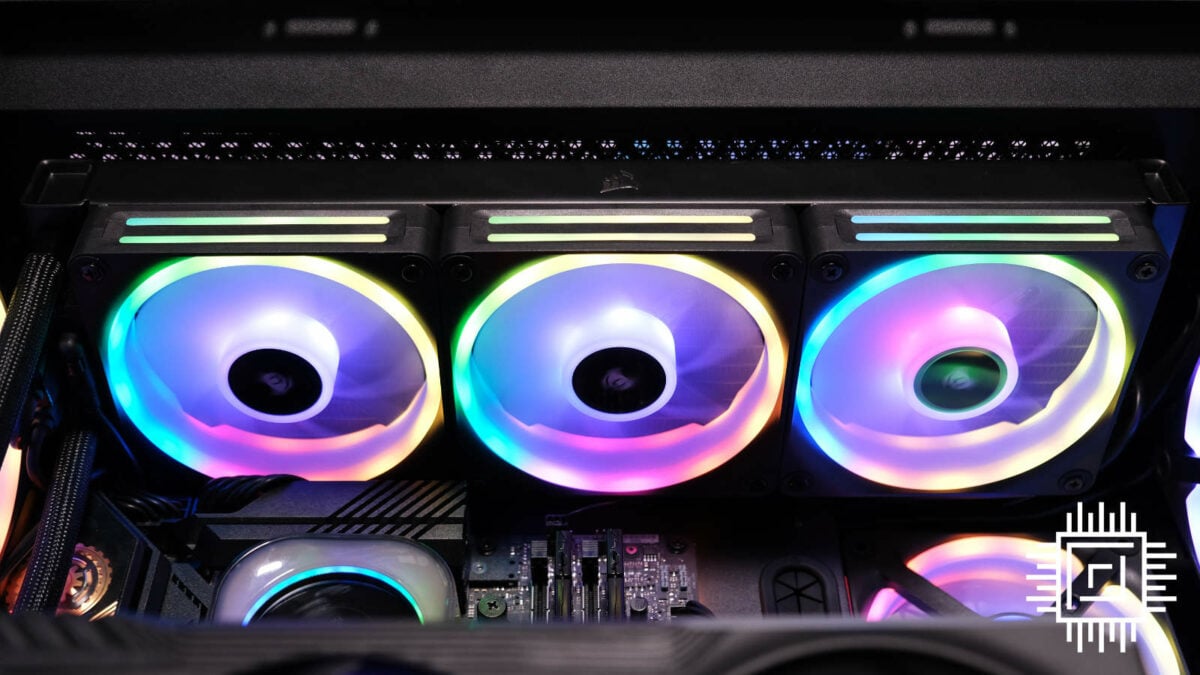
Corsair has long stood out for its RGB, with QL fans boasting particularly impressive lighting. Evolving the concept, iCUE Link keeps the dual-sided fans, now dubbed QX, but streamlines the approach considerably. There are some rules to follow so you’ll need to plan your build; this means it’s not quite as user-friendly on your first attempt, but once you get past the learning curve, it’s far more elegant. Just follow our guide below and you’ll be set up in no time.
What is iCUE Link?
Corsair iCUE Link aims to simplify the PC building process with a single RGB ecosystem. This means you’ll likely only need one lighting hub unless you run more than 14 fans in a system. You can also wave goodbye to the spaghetti mess that comes with too many cables.
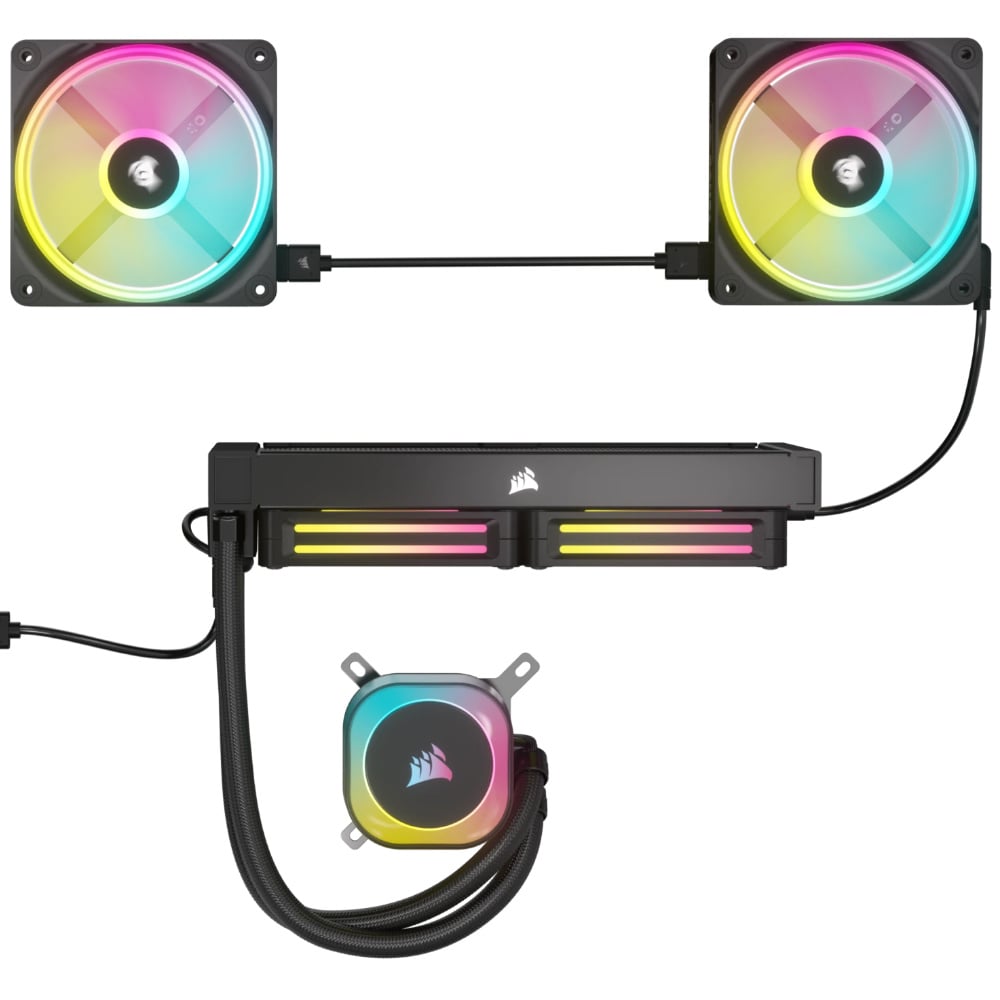
Even if you managed to choose a single brand, previous methods saw each wire desperately trying to reach the next cable grommet as every device needs to plug into a hub. Corsair iCUE Link condenses the data and power into one connector, letting you daisy chain fans and AIO radiators together in a sequence.
Fans can connect magnetically if on the same side of the case, while the next in the series plugs in using a short wire. In the end, you’re left with a maximum of two cables feeding through to the iCUE Link system hub rather than the tangled trouble you’re used to. A full loop tidies your system and synchronises your PC lights.
How to set up Corsair iCUE Link
1. Choose your devices
The key to setting up iCUE Link is all about planning. It’s a more efficient approach but one with a few constraints to consider.
Corsair iCUE Link
Say goodbye to tangled cables and complicated connectors with a revolutionary smart component ecosystem that makes PC building a breeze.
First, figure out how many devices you can fit in your case. Corsair offers a fair few products, from different fan sizes to AIO CPU coolers and DIY liquid cooling. There is a difference between the QX fans in a starter kit and an expansion kit. Starter kits let you plug iCUE Link cables in either end, whereas expansion kits are one-way. This distinction becomes a lot more important in step two where you plan your daisy chain route.
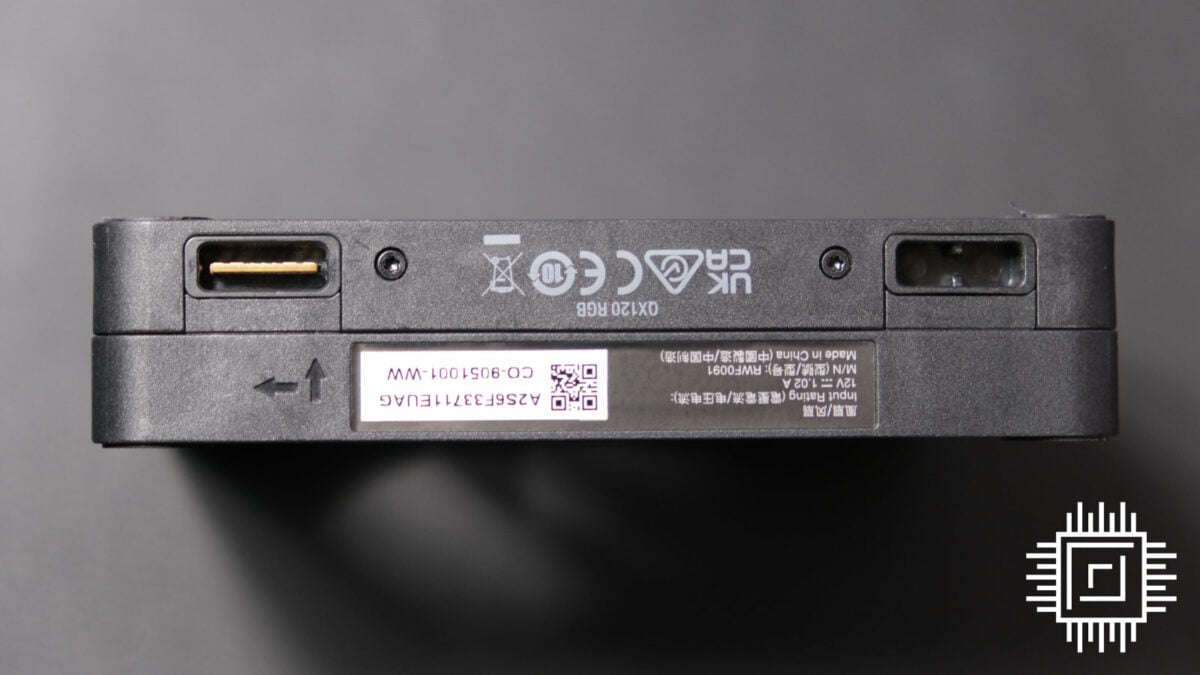
No matter what, you’ll need at least one iCUE Link system hub, which comes in a starter kit or AIO bundle. Each hub can handle up to 14 fans in total. You can always use a second one if you somehow exceed that count, but that will take up another internal USB 2.0 slot, and we all know how stingy motherboards can be nowadays. In that case, a splitter or internal expansion hub will do you just fine and Corsair includes one in its AIO bundles.
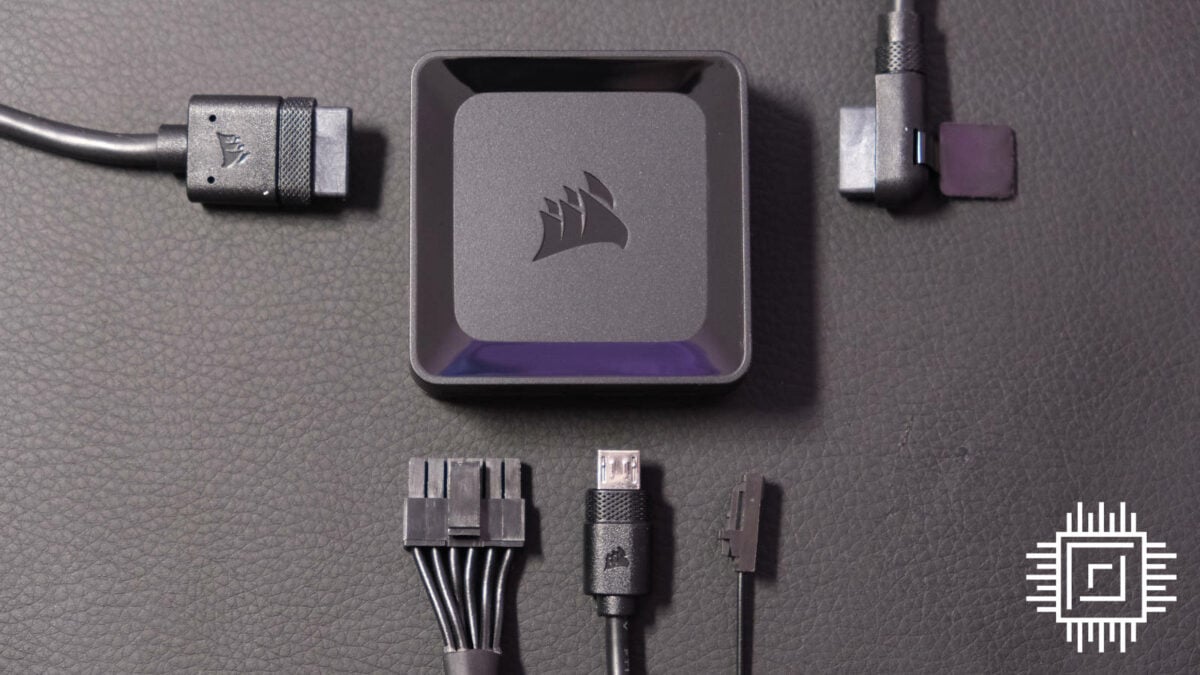
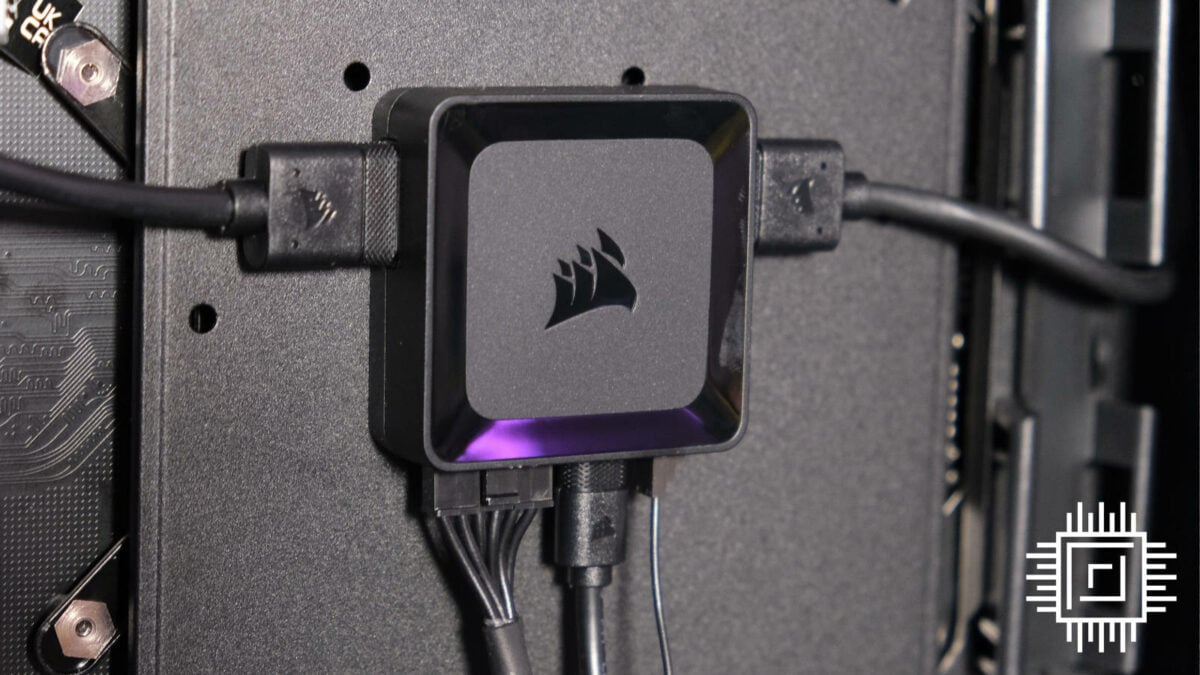
In the spirit of cable management, system hubs magnetically stick to your chassis. If you feel it’s just not sticking or you don’t own a metal case, there’s also an adhesive strip in the package.
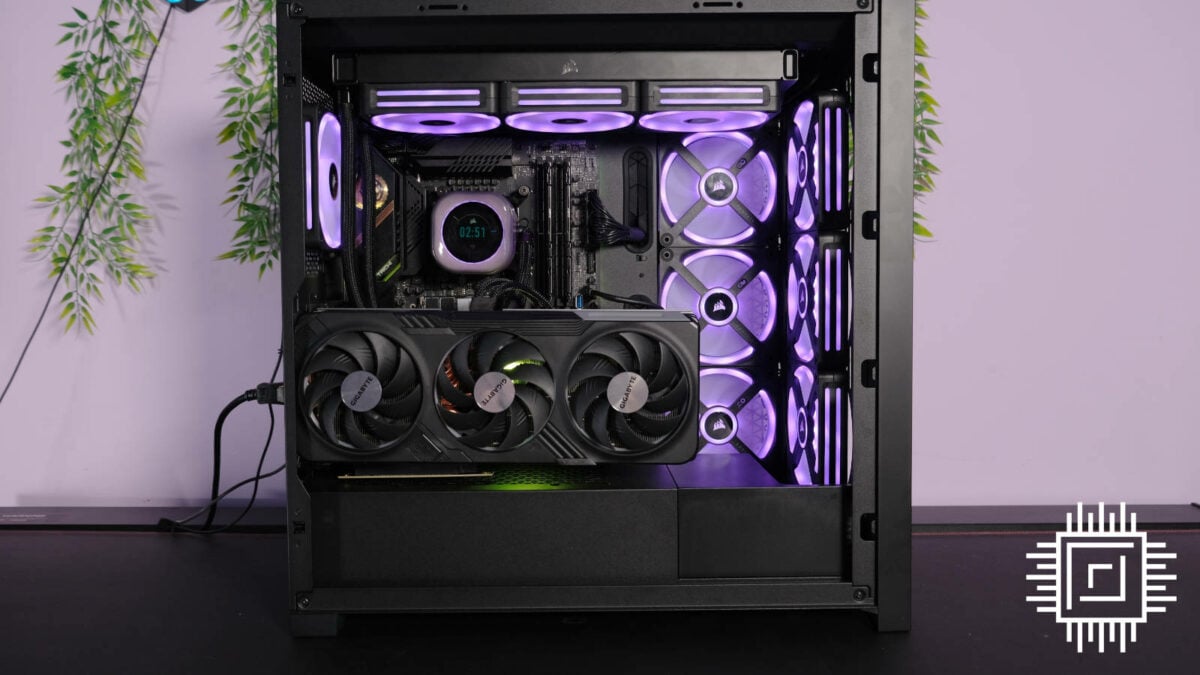
When selecting your fans, keep in mind that positive airflow means more air pushing in than out. In our rig, I’ve opted for six intakes and four exhausts. This helps prevent dust building up and avoids creating a vacuum like negative airflow would.
2. Plan the positions
Next, figure out where you want to position your fans and iCUE Link devices. The system hub has two ports, each handling up to seven iCUE Link devices, such as fans or, for that matter, an AIO. If you exceed seven fans in a single chain, they may still cool your system, but they won’t light up. With two separate sequences running into the hub, I split ours into one port for intake and the second for exhaust simply so I can visualise the flow better.
The most important parts are knowing where the chain starts and ends. As I mentioned above, expansion kits are one-way, meaning they need to be at the start of a sequence. Starter kits are better at capping off a chain because they can feed iCUE cables both in and out. Ideally, you want the two sequences to finish near the same cable grommet so you can position the system hub close by. If your chains end on opposite sides of the case, you might struggle with cable lengths.
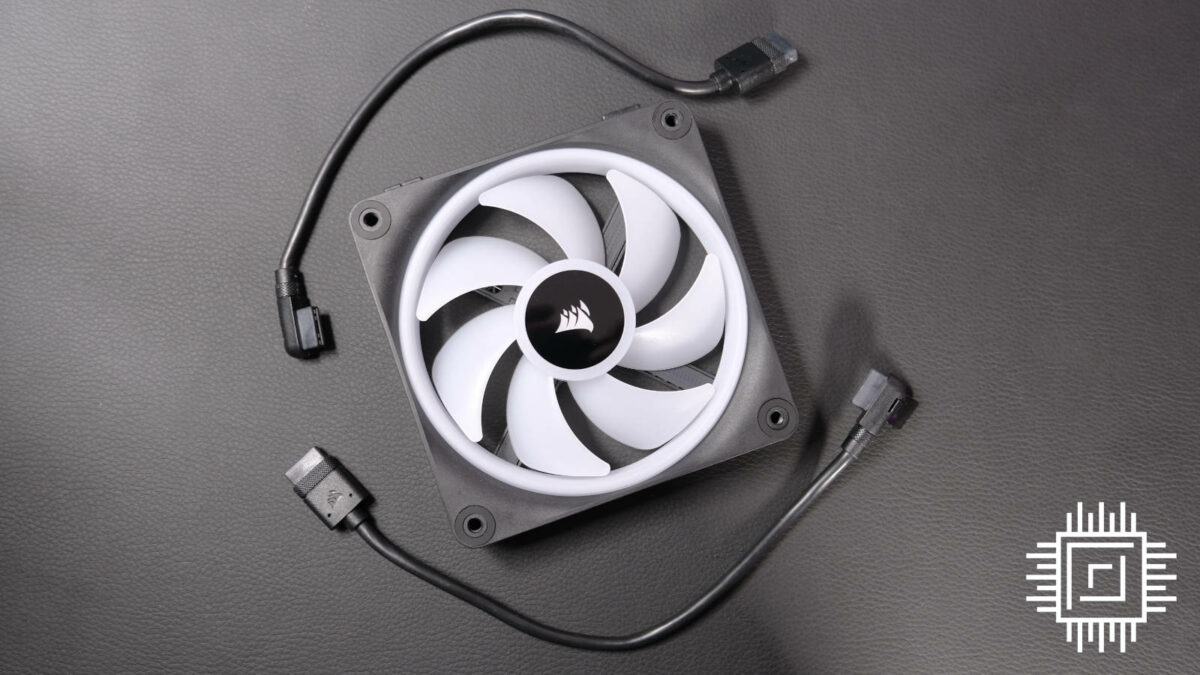
Corsair fans are bundled with shorter 135mm connectors, so it’s important to know whether they can reach the next in the sequence. There’s a 600mm cable bundled with Corsair iCUE Link H150i RGB AIO, which comes in clutch if you fall a little short. Corsair also sells 100mm, 135mm, 200mm, and 600mm cables separately if it makes your life easier. With good planning, however, you likely won’t need to buy any more.
If minor details matter to you, make sure all Corsair logos face the right way up. The benefit of QX120 and QX140 fans is that the LEDs shine on the front and back, but the rear logo is static on the frame. I don’t know about you, but I’m a stickler for the little things.
3. Start the build
Once your plan is in place, it’s time to start building. Starter kits and AIO coolers come pre-assembled, so there’s a lot less hassle involved. You can add or remove any directly neighbouring fans magnetically, and they fit together flush with no bulging wires.
The iCUE Link cables are much like thicker USB Type-C. It’s easy to plug them in with reversible connectors but can be tough once fans are secured to your case. I recommend slotting the cables in before screwing your fans to your chassis to make it a little easier.
If you’re running Corsair iCUE Link H150i RGB, first attach the waterblock using the correct bracket. Corsair pre-applies thermal paste, so it’s good to go out of the box. It’s worth plugging the CPU power cables into the motherboard before mounting the rest of the AIO. Otherwise, you might find it cumbersome to navigate behind the radiator.
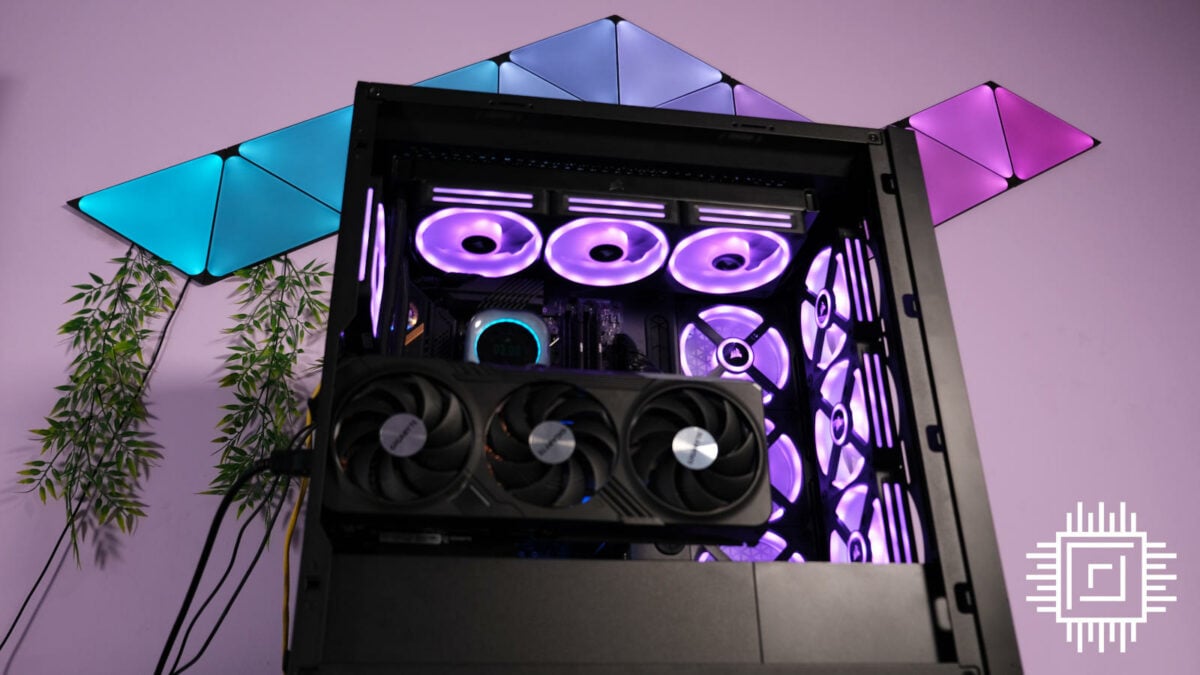
One of the best things about Corsair iCUE Link AIOs is that there are no cables extending from the pump. The RGB shines beautifully, uninterrupted. Instead, you need to plug a USB Type-C cable from the fans into your motherboard. If, like me, you’re running a board with just one USB 2.0 connector, Corsair kindly supplies a splitter so you can run it alongside the system hub without issue.
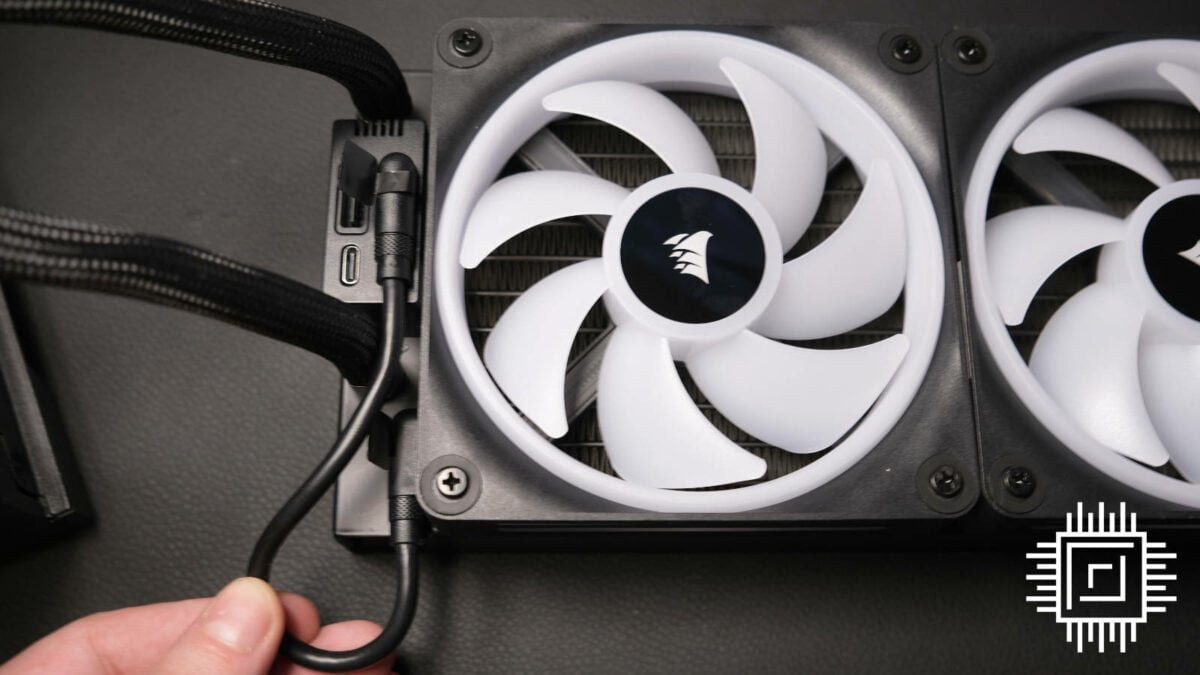
Next to the Type-C port are two iCUE Link connectors, but you’ll only be able to use one of them in your chain. The other needs to close the loop between the fans and radiator. This tripped me up on my first attempt, as it’s something I thought would be baked in. There are likely technical limitations as to why it can’t be baked into the design.
You’re free to use the second port in your sequence, and there’s another on the opposite side. In my build, I ran the rear expansion fan (exhaust) into one of the dual ports, then plugged the final radiator port into the system hub to complete my first chain. My second began with three magnetically-attached expansion fans feeding into the starter kit, then into the system hub.
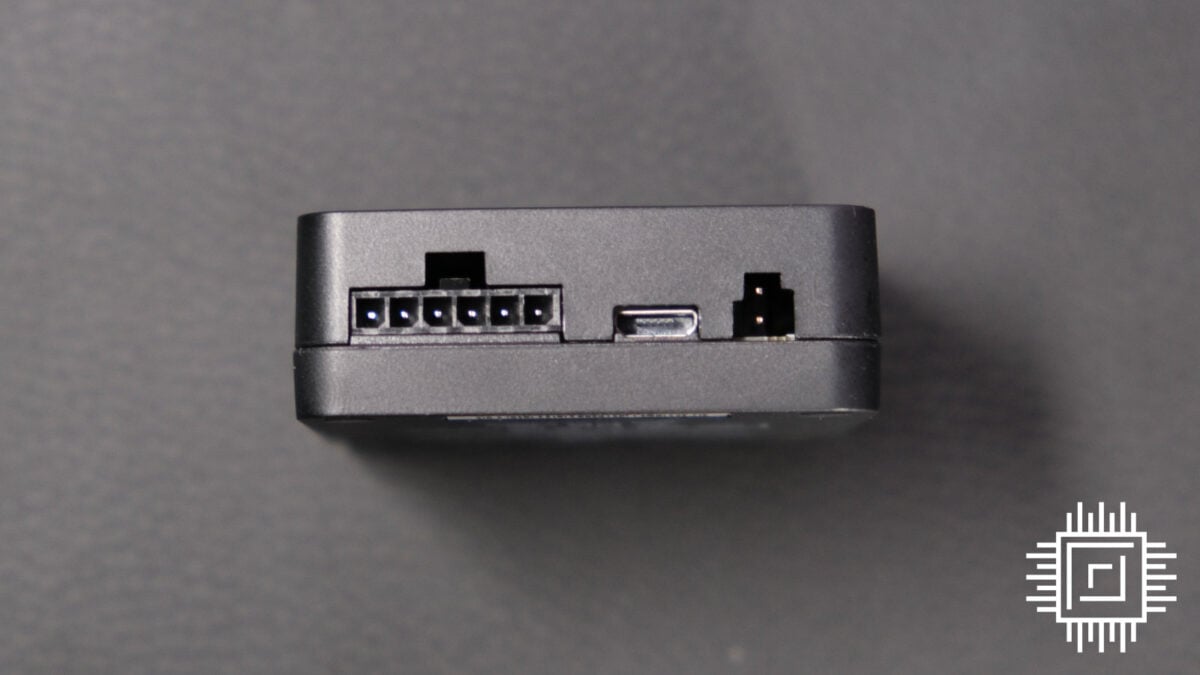
With both sequences set up, there are three more cables to plug into your hub:
- PCIe cable – connect it to a six-pin GPU cable directly in your PSU. This powers all your iCUE Link devices.
- Micro-USB – connect it to the USB 2.0 port of your motherboard or the second header in your splitter. This lets your computer communicate with the hub and control your devices.
- Tach cable – AIO users will need to feed this through to the motherboard’s CPU fan header. Connecting it via the system hub is what keeps your pump nice and neat.
4. Testing and troubleshooting
After you press the power button, give your PC a moment to get past POST (power-on self-test). If everything’s working smoothly, your rig will light up like a pastel-coloured Christmas tree by default. If it doesn’t, something has gone wrong along the way.
During my first attempt, three fans refused to light up. This is because I tried to thread all ten fans into a single sequence. Since each port has a seven-fan limit, the last three in the chain surprisingly continued to spin but without lighting up.
If the problem lies with your AIO, you’ll either see a red exclamation mark on the LCD screen or the lighting flash red. In this instance, I recommend reverting to step 2 or boot into Corsair iCUE. The software might give you a notification explaining what’s wrong, and you can also see what fans it detects.
5. iCUE software
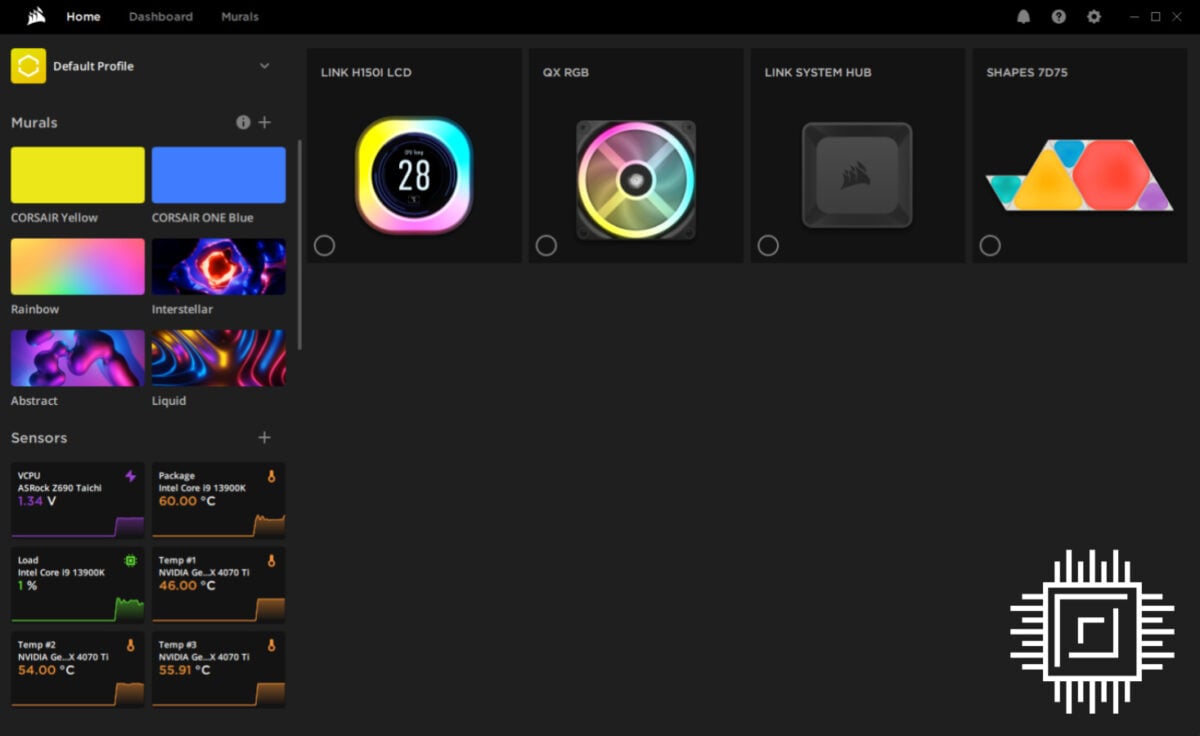
Corsair iCUE is your one-stop shop to control the individual fan speeds and lighting of your entire rig. On top of system sensors that track your component temperatures and usage, this is where you’ll create profiles and give your gaming PC a bit of personal flair.
On the left side of the home page, you’ll see profiles that you can apply to all your devices with a single click. Corsair has premade some to get you started, but you can create and save your own. To the right, you can choose which device you want to customise.
Selecting the Link System Hub is mainly for updating the firmware, which is the first thing you should do. It’s also the only place to adjust fan brightness. Not only is this an odd choice to remove it from the fan customisation section, you can only adjust brightness uniformly across all devices rather than individually.
QX RGB fans
The QX RGB fans option lets you customise the RGB and speed of your fans.
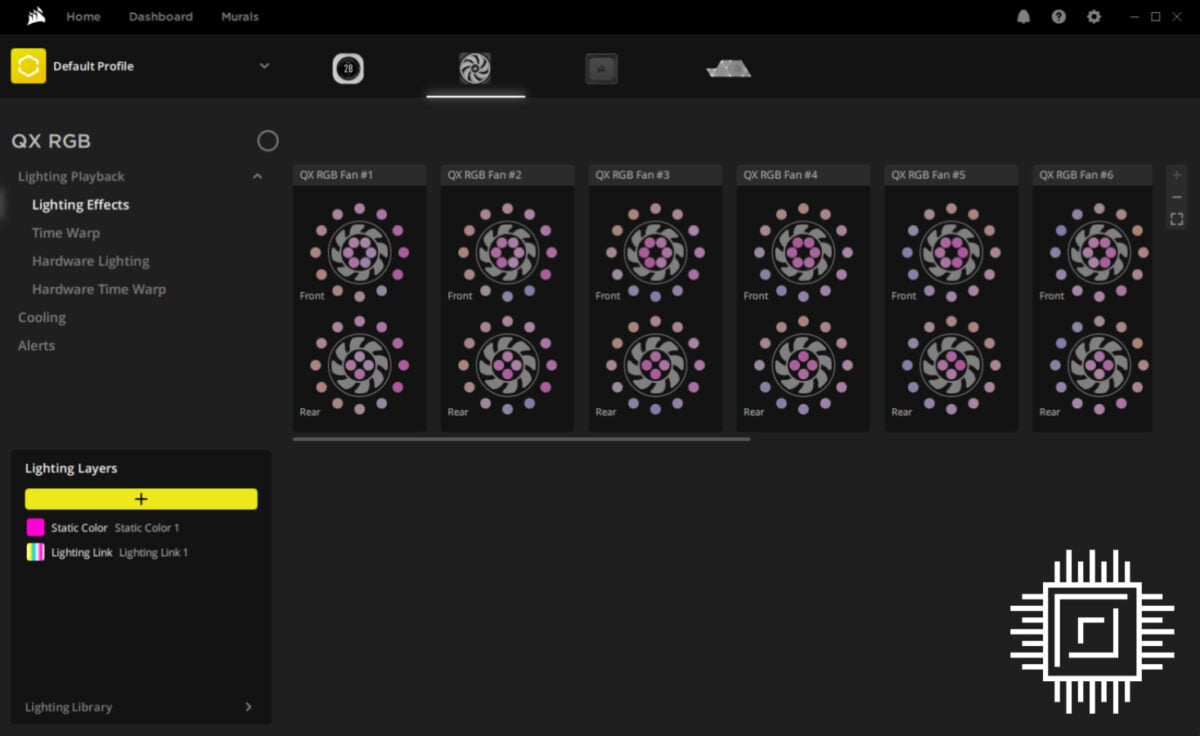
Lighting Effects lets you choose between 23 different animations, including colour wave, rainbow, and static. You can even overlay multiple animations and adjust the opacity of the top layers to create unique effects you won’t see with other brands. If you’re more about function than form, the temperature animation is particularly useful as it shifts from green to red when components run a little too hot.
Time Warp is a bespoke effect to some iCUE Link devices that makes the blades look almost static. It truly looks distinctive but comes at the sacrifice of brightness, dimming the fans below half. Still, it’s eye-candy even if it isn’t as much bling.
You’ll need iCUE open to run either of the above profiles unless you adjust Hardware Lighting or Hardware Time Warp. You’re forced to apply the setting to all devices in the sequence with these two options, but animations and colours will stick even when you close the software. This is usually our preference, as fewer background processes mean fewer problems and more frames in games.
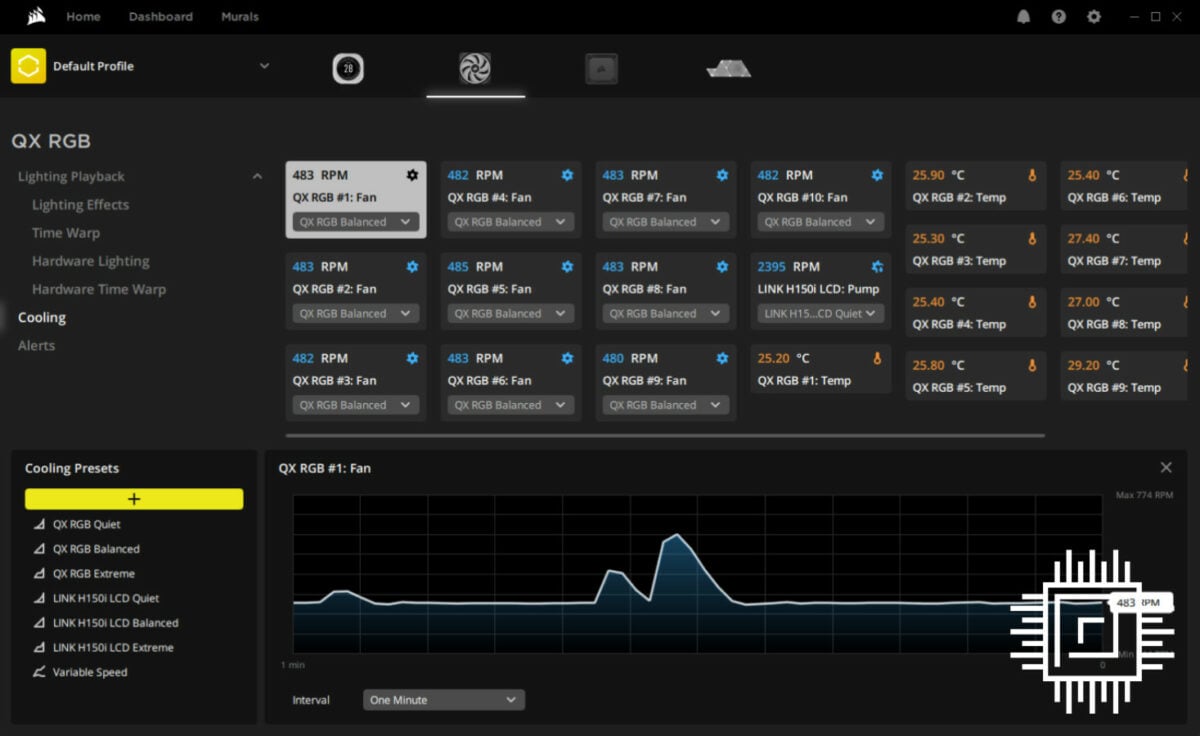
The cooling tab is surprisingly robust, letting you prioritise between quiet, balanced, and extreme cooling presets. There’s even a real-time gauge to keep an eye on everything and an alerts tab to warn you when devices go a little too far over the line.
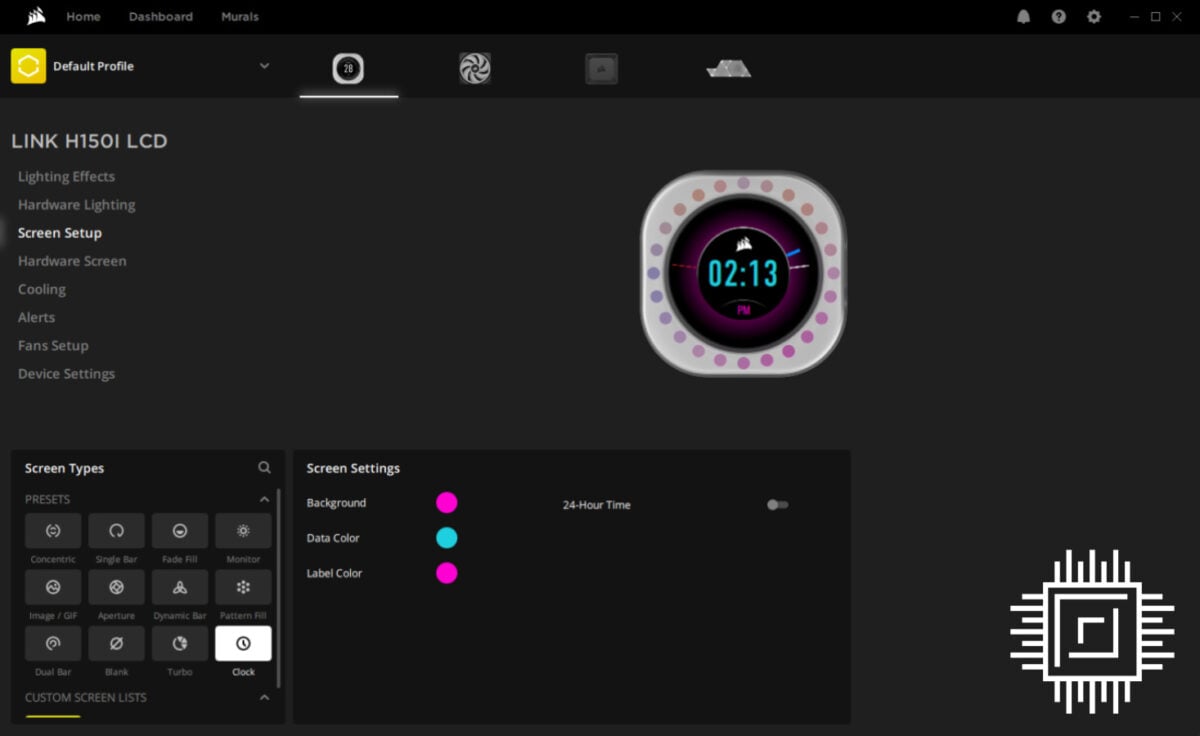
Link H150i LCD
Options within the screen-clad AIO cooler are much the same as QX RGB fans, but with a few additions. Here, you can adjust the display layout, including what information it shows. If you’re a gif person, you can even customise the frame rate from zero to 30fps. And no matter what orientation you put the waterblock, you can rotate the screen so it faces the right way up.
Integrations and plugins
It’s all well and good sticking to a single brand, but it’s likely you have a few in your setup. Corsair iCUE lets you integrate Nanoleaf and Philips Hue devices, and connect with Lenovo, Asus, MSI, and Nvidia via plugins.
Your mileage may vary compared to the native apps, though. Nanoleaf panels are surprisingly easier to pair with iCUE than its own brand, but you can’t rotate the design, making it difficult to customise. Synchronisation also seems non-existent, as you need to set animations independently. Assigning both Nanoleaf panels and iCUE Link to colour shift never quite matches up. It’s handy to have an all-in-one software to customise, but the only way you’ll see all devices complement each other is by using a static colour or a well-planned gradient.
Conclusion
Corsair iCUE Link has a learning curve that makes it a little tougher to set up at first. This isn’t just because it goes against the grain and tries something different, but because it comes with constraints.
“Corsair iCUE Link is nothing short of a visual spectacle”
Each port is limited to seven devices, meaning you need to be extra careful with your planning. Expansion fans are one-way, forcing them to be at the start of a sequence. The included cables can be a little on the shorter side, although that’s a two-way street since it keeps things neat without any excess.
Generally, it’s worth the extra expense and effort, though. Corsair iCUE Link is nothing short of a visual spectacle that’s more customisable than most alternatives. It’s the first innovation in RGB lighting that gives you a reason to go the extra mile and stick with a single brand. A slightly convoluted initial setup is a small asking price for one of the best-looking systems you can create. After all, you only need to set things up once.
Corsair iCUE Link
Say goodbye to tangled cables and complicated connectors with a revolutionary smart component ecosystem that makes PC building a breeze.