
Windows 11 is sadly a bit of a bloated pig at the moment, being stuffed full of unnecessary apps and features you didn’t ask it to install, and even bombarding you with ads, even though you paid up in full for your operating system. To make matters worse, some of this fluff hogs valuable resources that could instead be used for tasks you care about.
The good news is that you can remove much of this superfluous bloat without impacting the core features of Windows 11. However, going too far and stripping out every annoying bit may end up causing more problems down the line, as other aspects of the system may be dependent on features you’ve removed.
In this guide, I’ll discuss how to debloat Windows 11 while remaining careful about going too far. While the best way to debloat Windows 11 is to begin from the ground up with a customised installer, many machines, especially laptops, come with pre-installed versions of Windows, plus some users may prefer to optimise their system instead of starting from zero. For this reason, I’ll take you through ways to debloat an already working Windows 11 machine, while improving privacy by reducing Microsoft’s access to telemetry data.
Note that I’m going to be covering different apps that have overlapping features, just to give you more options in case one of them stops being updated/supported. While using one on top of the other shouldn’t cause any issues, it’s better to focus on just one.
Bear in mind that the performance reclaimed from this process may differ between PCs, depending on what’s installed on them in the first place, as well as the power of their hardware. A faster machine will be less bothered by a bloated Windows install, after all. That said, even users of superpowered PCs will benefit from a cleaner Start Menu, fewer intrusive ads on their news feeds, and potentially a snappier navigation experience.
Windows Startup apps
Your first job is to stop any unnecessary apps that launch alongside Windows. These can range from Microsoft software, such as the Edge browser or Copilot, to third-party software, such as unnecessary drivers for old hardware, or RGB control software app.
To do so, simply type “Startup Apps” in the search bar near the Start Menu, or go to Settings > Apps > Startup.
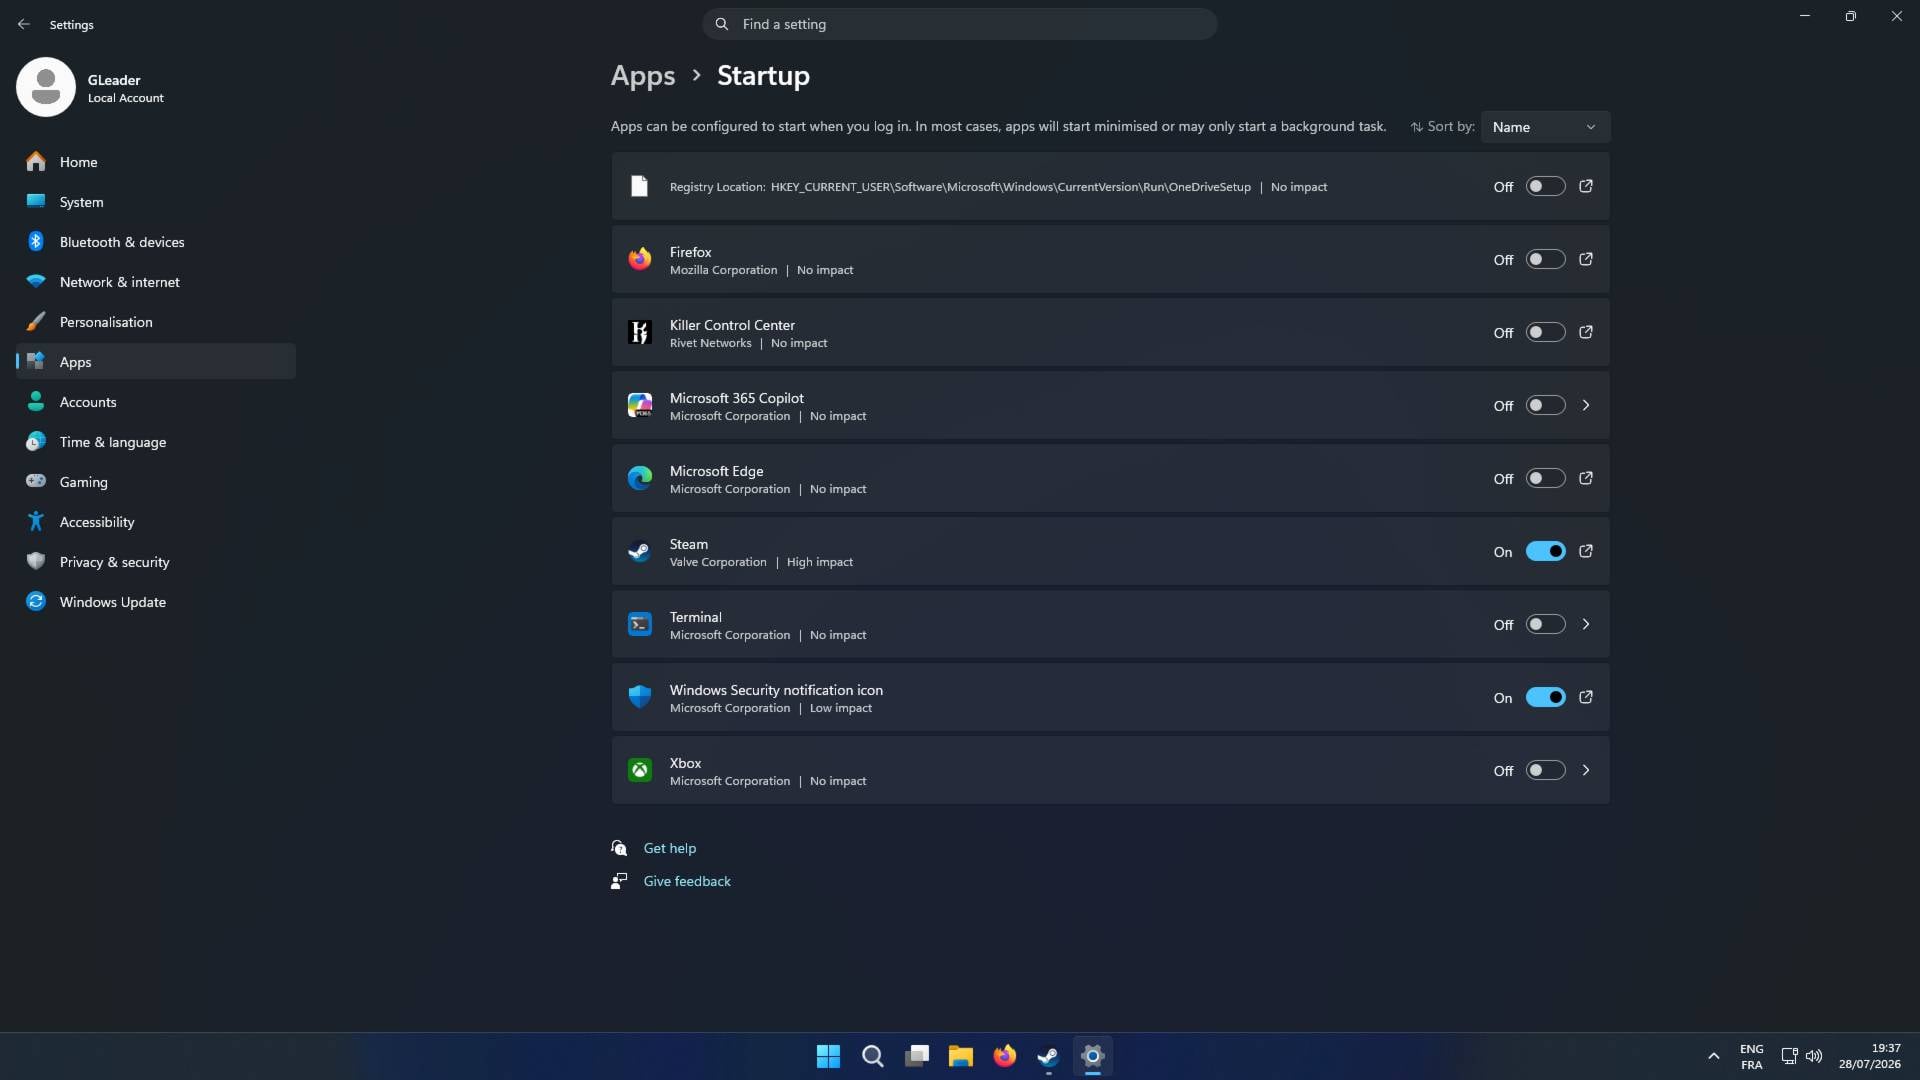
Uncheck anything you don’t need when Windows starts up. You shouldn’t be able to do any harm to your system, even if you turn everything off, though it’s better to verify if some of these apps are useful. For example, you may have a wireless headset that needs an app in order to tweak sound EQ. This part merely stops the apps from launching with Windows, so nothing is preventing you from launching any of this software when you really need it, unlike the following tools.
CTT Windows Utility
Chris Titus Tech’s Windows Utility is the simplest tool to use if you want to debloat Windows 11 in a hurry. You don’t have to download or install any software; you just run a command line in Windows PowerShell. You can get this tool in an installer form, but since that comes at a $10 cost, we’ll make do with the free PowerShell-executed version, which has the same tool set.
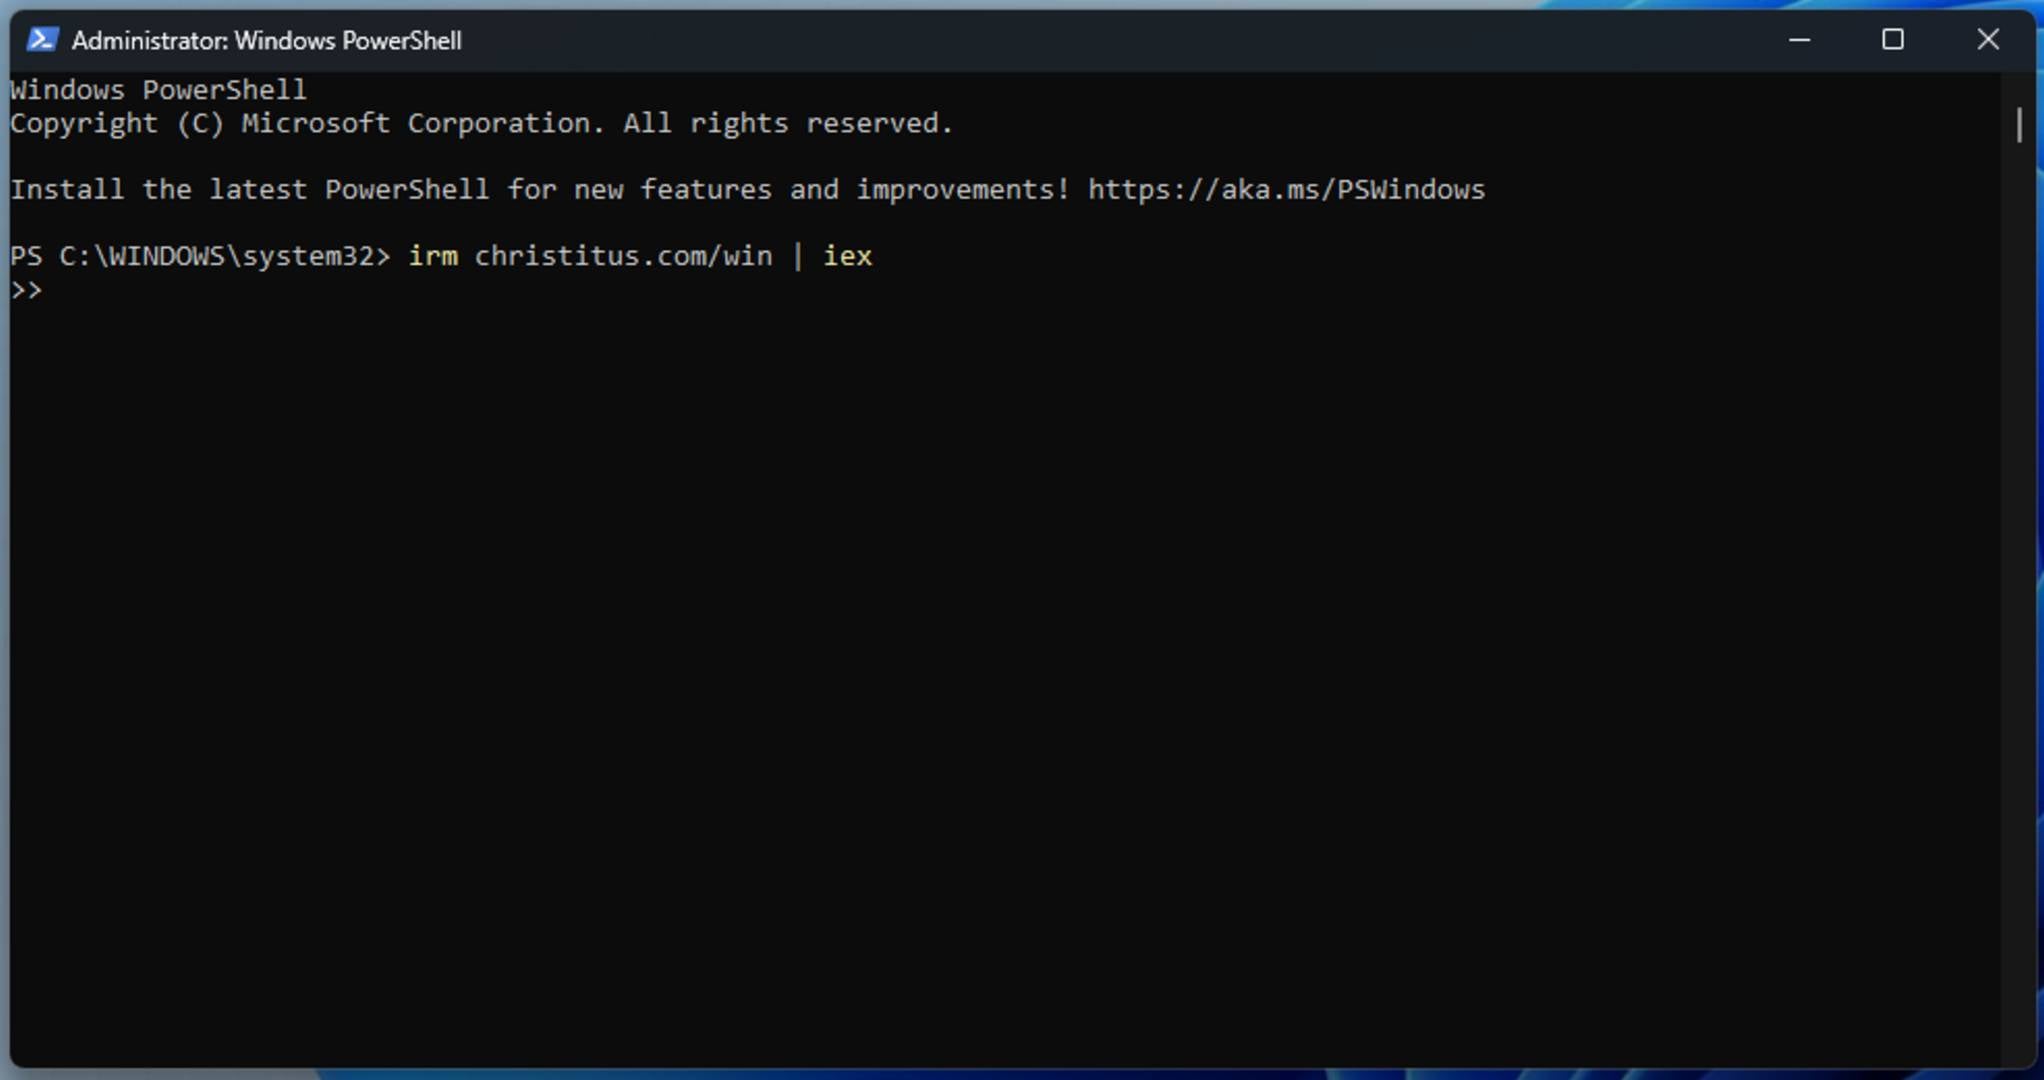
To do so, type Windows PowerShell in the Windows search bar, then right-click on Windows PowerShell and run it as an administrator. Inside the Shell/command window, copy or manually write irm christitus.com/win | iex and press Enter. After a few seconds, you’ll see a new window open with plenty of options. Don’t close the initial Shell window, though.
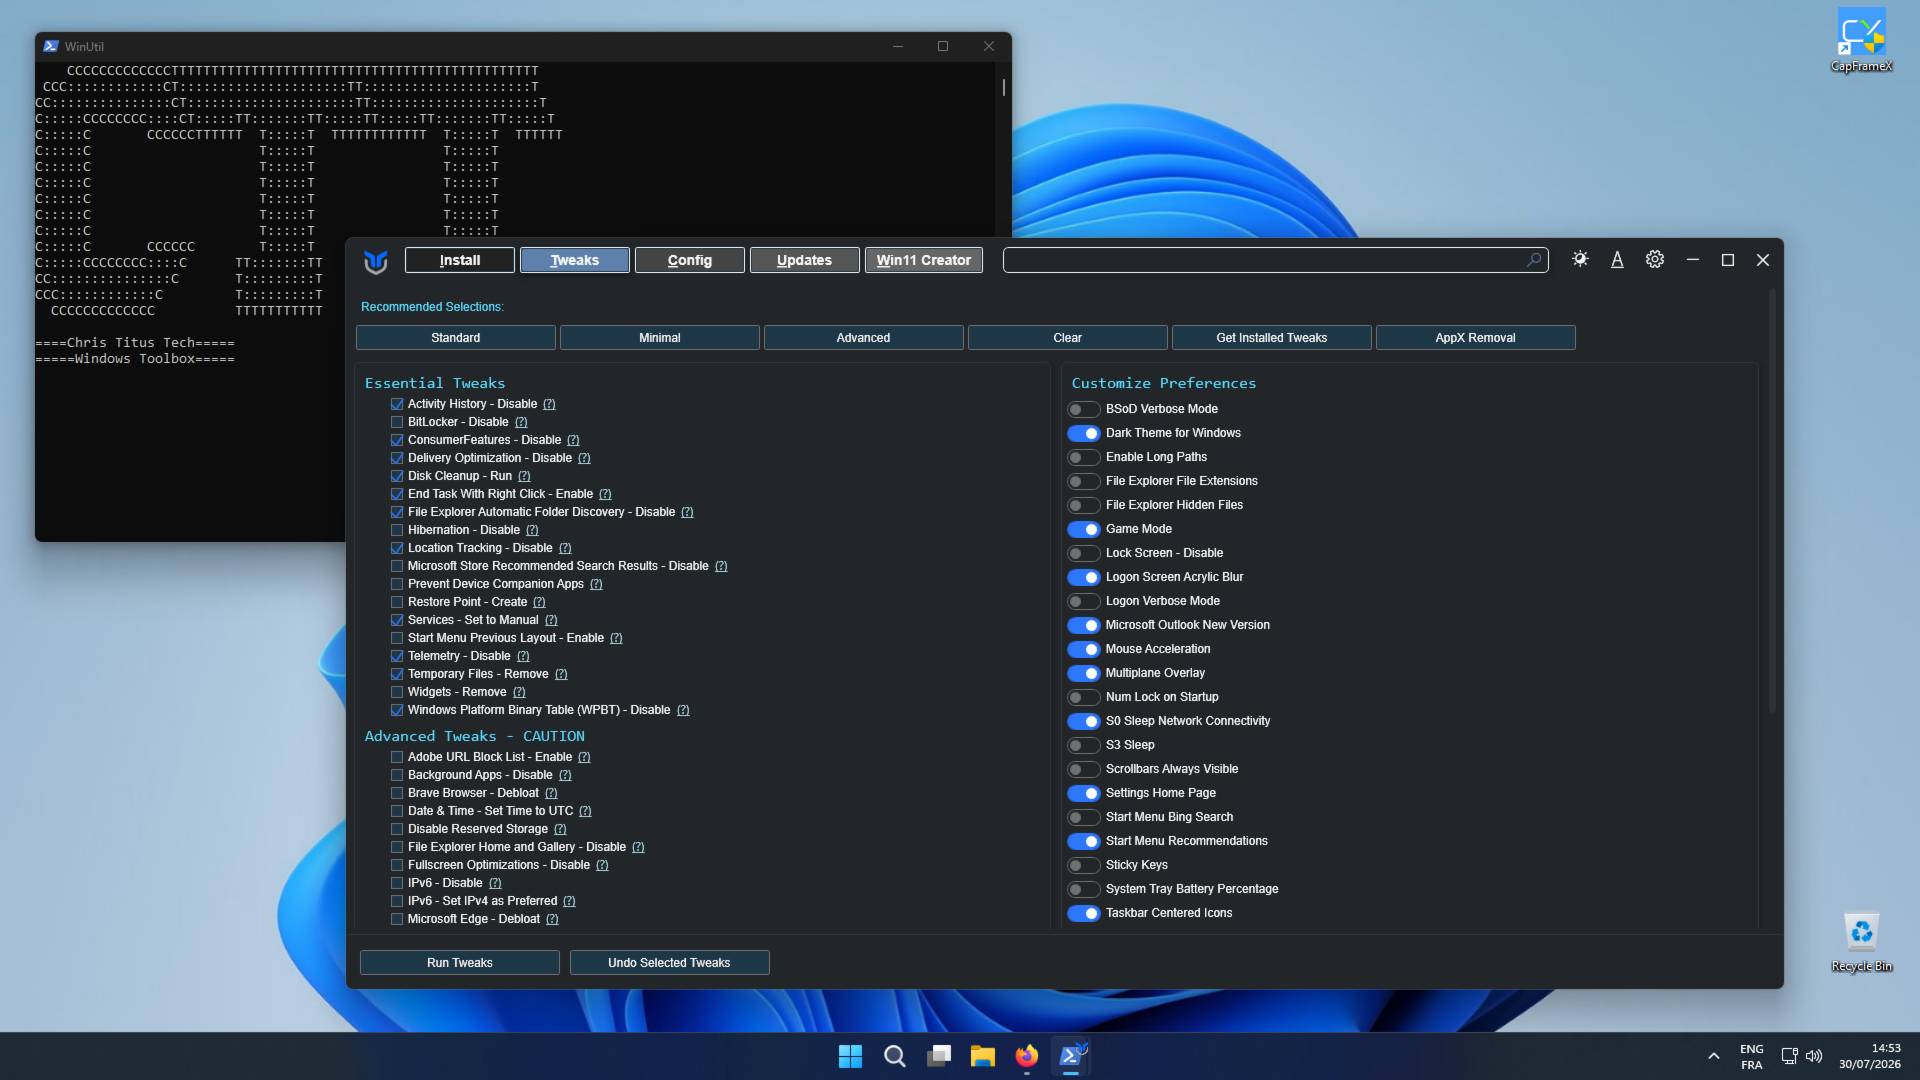
In the new window, click on the Tweaks section to switch tabs. Here, you’ll find plenty of options, from disabling location tracking and telemetry to removing widgets and temporary files. The best option if you just want a clean system – and don’t have time to learn the function of each option – is to select the Standard or Minimal buttons below Recommended Selections – the tool will then select the best settings that suit most users.
After this, you can manually add or subtract any features you want, from Detailed BSoD (Blue Screen of Death) to Automatic Folder Discovery. For instance, Run Disk Cleanup is an option you may want to disable from the Standard selection, as it could take a long time on PCs with hard drives. Its main task is to remove old Windows update installation files to free up disk space. After selecting and deselecting the parts you want, simply press the Run Tweaks button and wait for the tool to do its job. Restart your computer for the changes to take effect.
On a fresh Windows 11 install, the Standard selection removes around 70 unnecessary processes, including AI-related services. Most importantly, it won’t touch any important bits, which makes it more of a small debloat, akin to what you would expect from a clean Windows 7 install. You can learn more about it on the GitHub repository here.
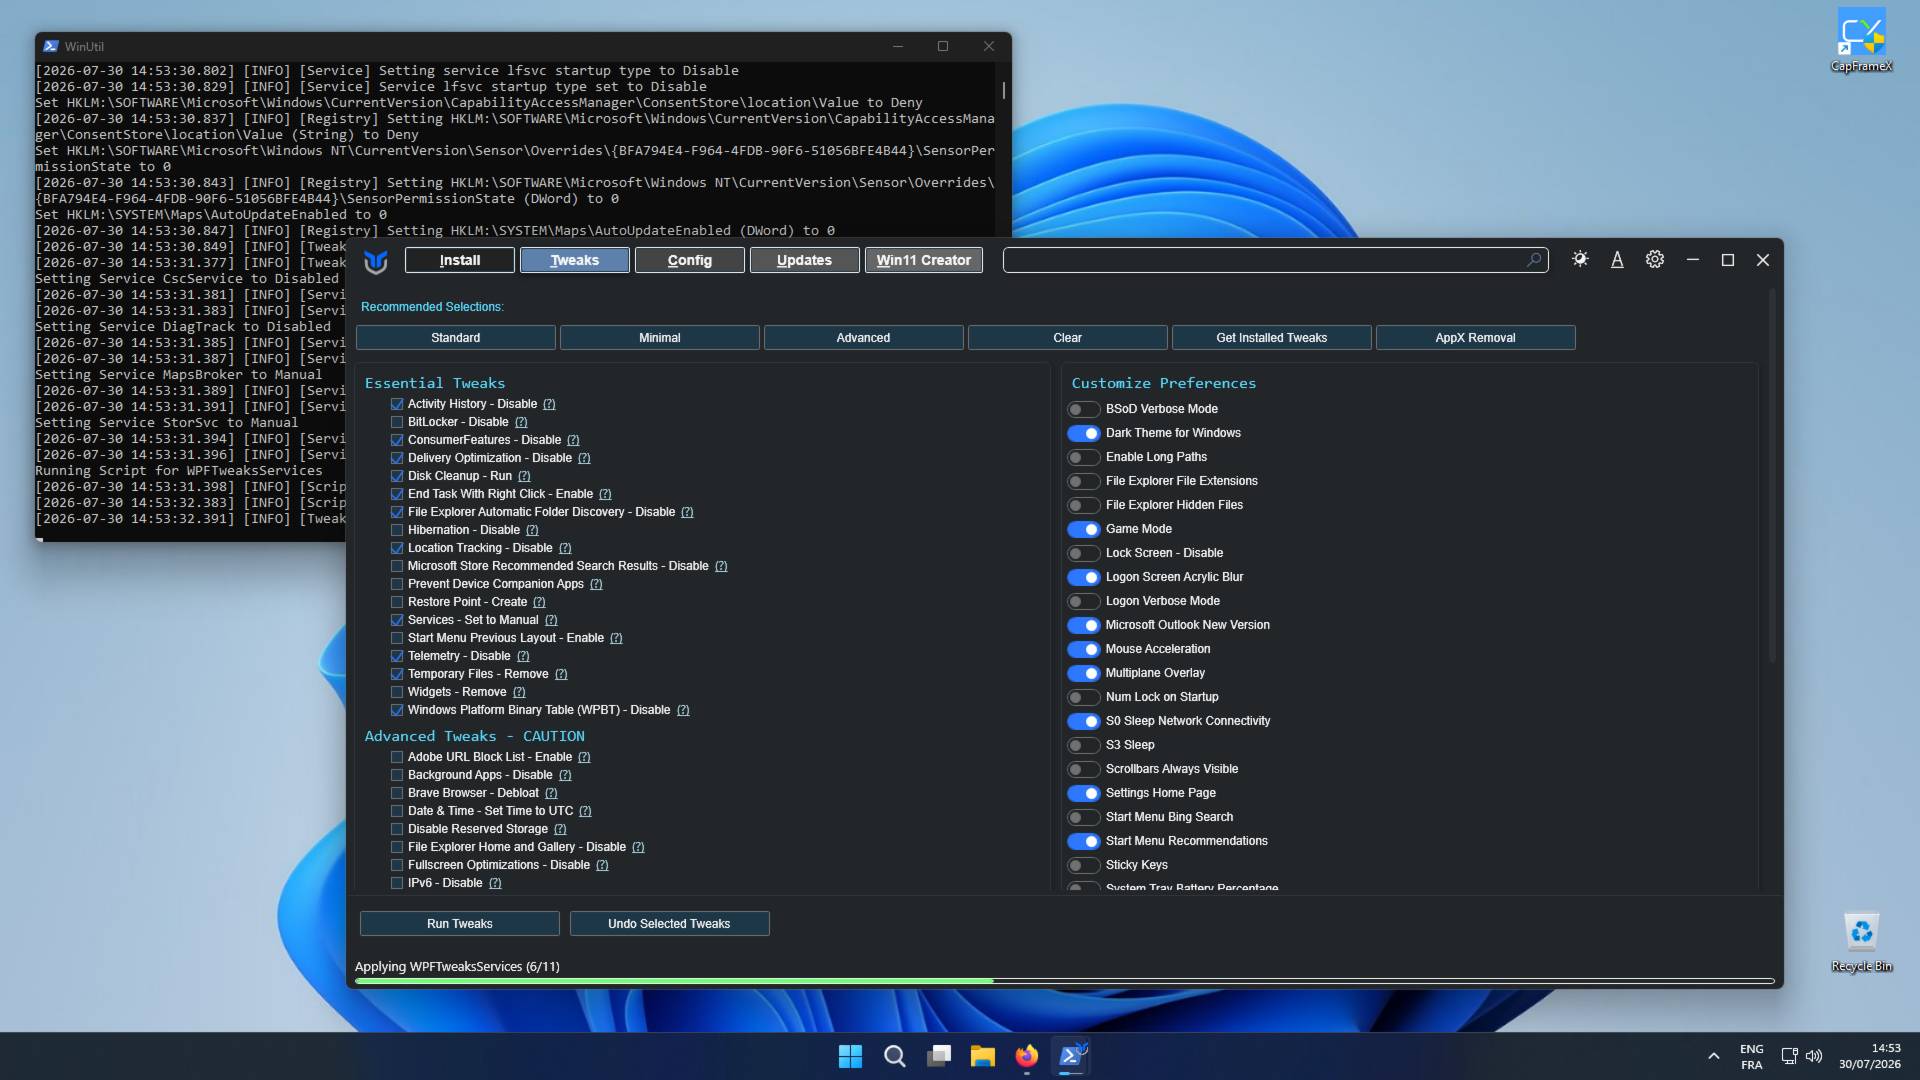
Chris Titus Tech’s Windows Utility has many other features, such as old Windows control panels and a one-click network setting reset, but those are outside of the scope of this guide. The one I like the most is an option in the Updates section, which forces Windows to delay security updates for four days, in case there is a major bug. That gives Microsoft enough time to remove the update from its distribution pipelines.
Speaking of which, note that after major Windows 11 updates, Microsoft may undo some of your cleanup work. This makes this procedure necessary from time to time, so keep this command line handy.
Win11Debloat
Like Chris Titus Tech’s Windows Utility, Win11Debloat is a PowerShell script that allows you to quickly declutter and customise your Windows experience, without needing to install anything. However, there is an option to download an installer if you want to use it on offline machines. To run it via PowerShell, type Windows PowerShell into the Windows search bar and run it as an administrator.
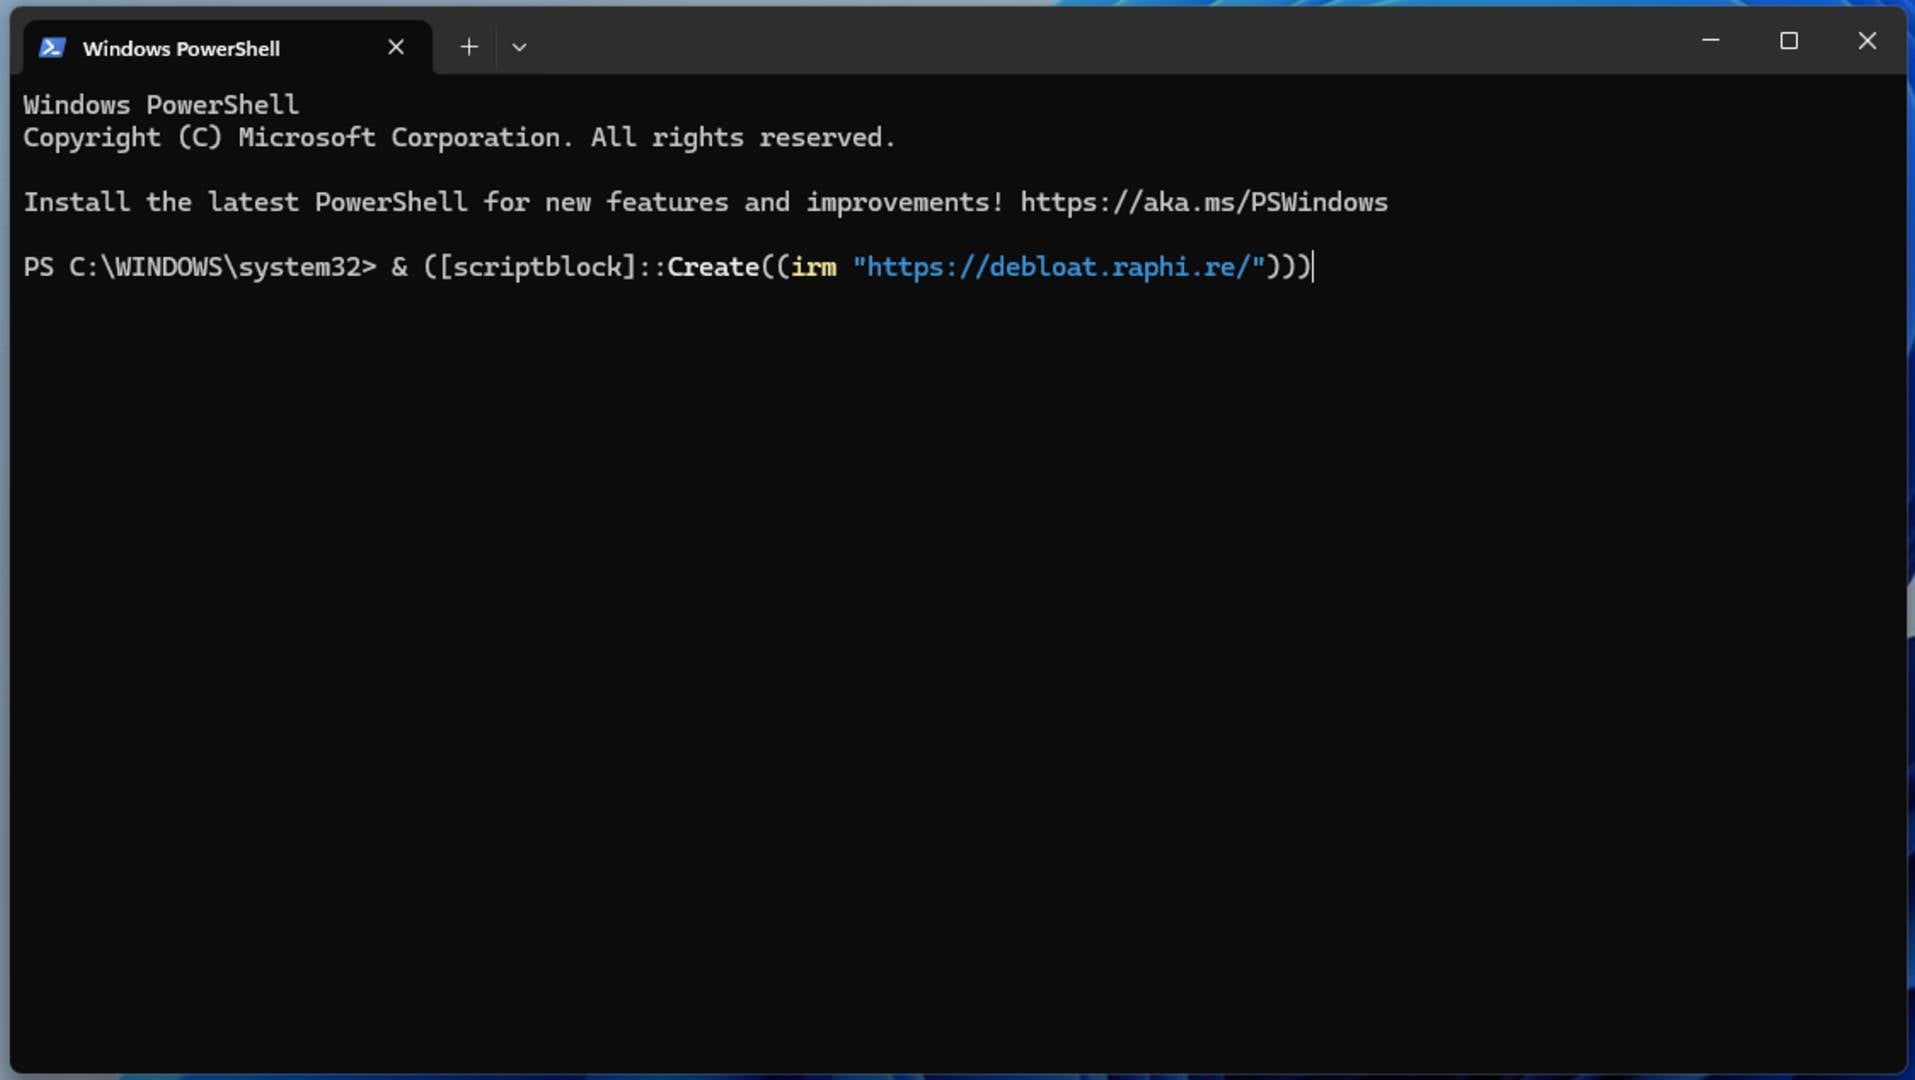
Paste the following & ([scriptblock]::Create((irm “https://debloat.raphi.re/”))) and press Enter. An interface will appear after a few seconds.
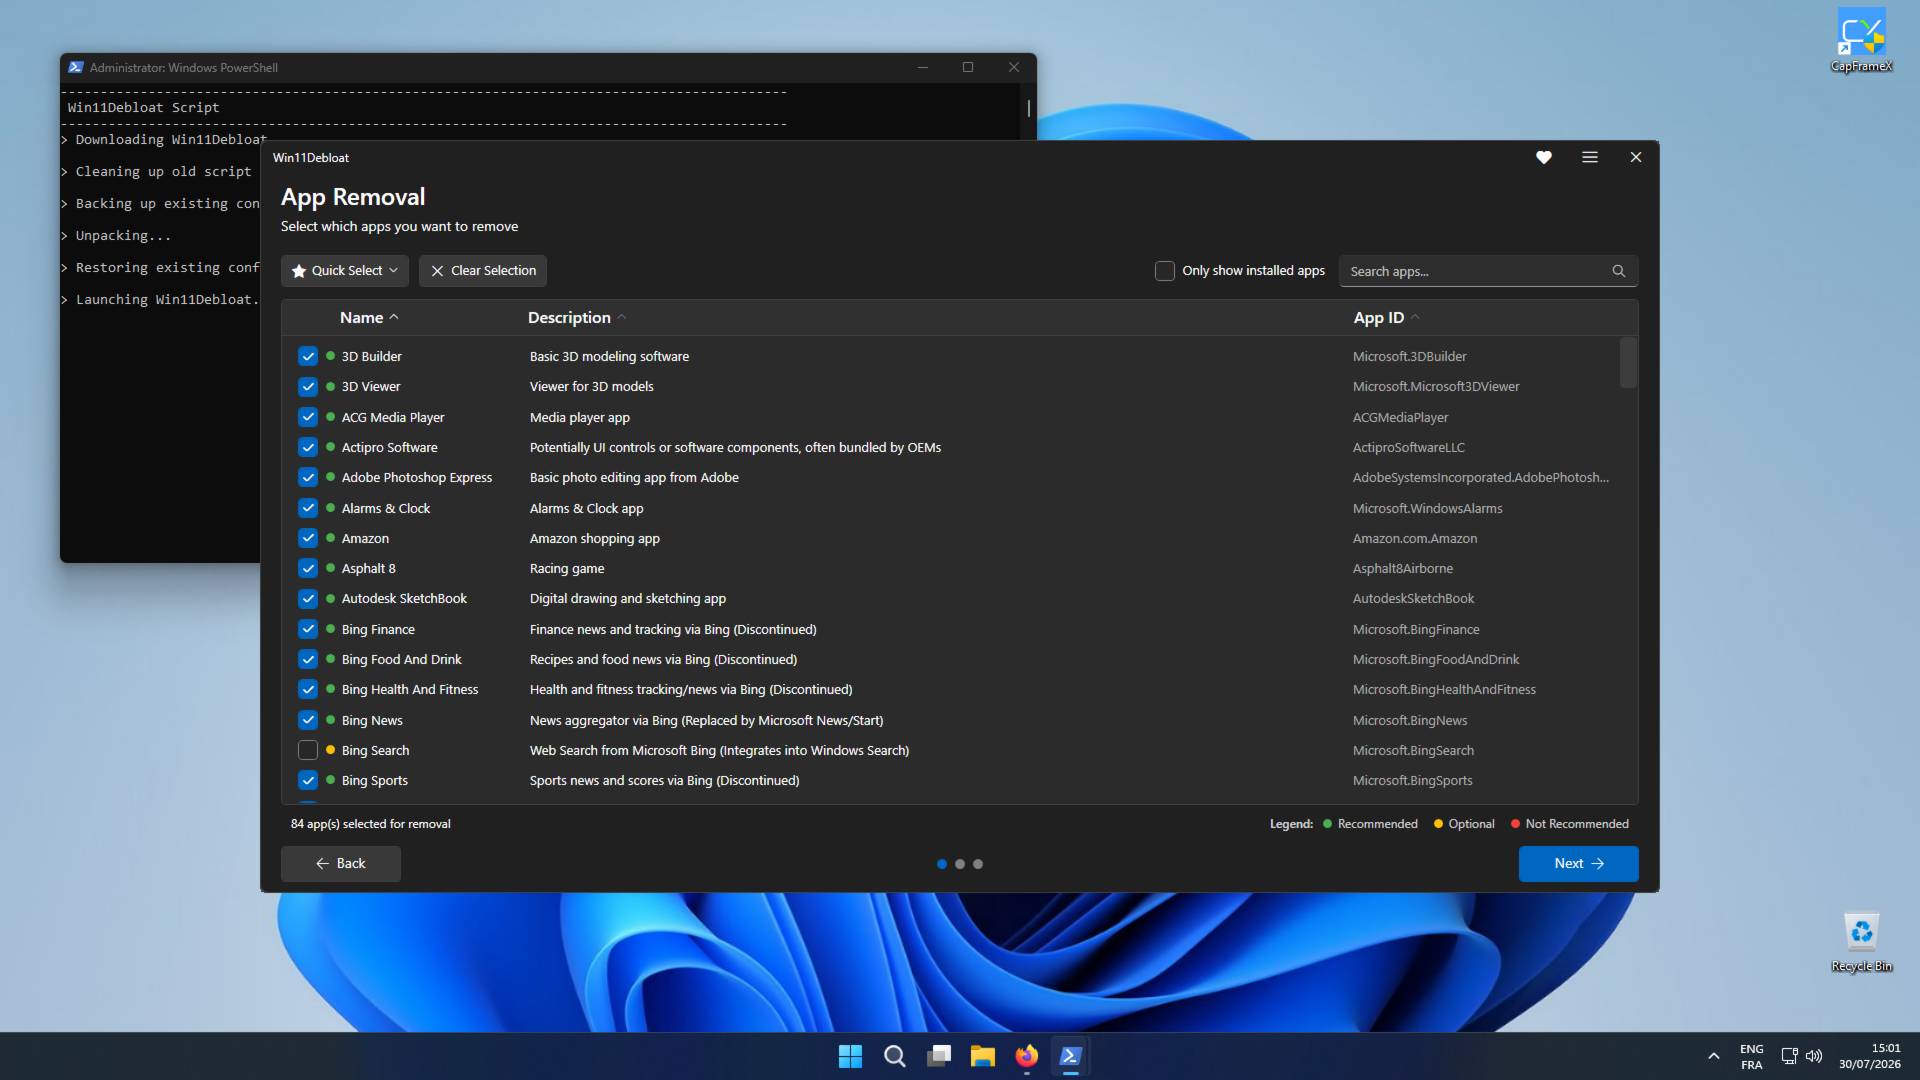
In the new window, choose Custom Setup. The next page will let you select parts of Windows you don’t want to keep, such as Bing News or Candy Crush. Press the Quick Select button and choose Default apps in the top-left corner if you don’t know which ones to keep and which ones to remove. Click Next on the bottom right to move to the following page.
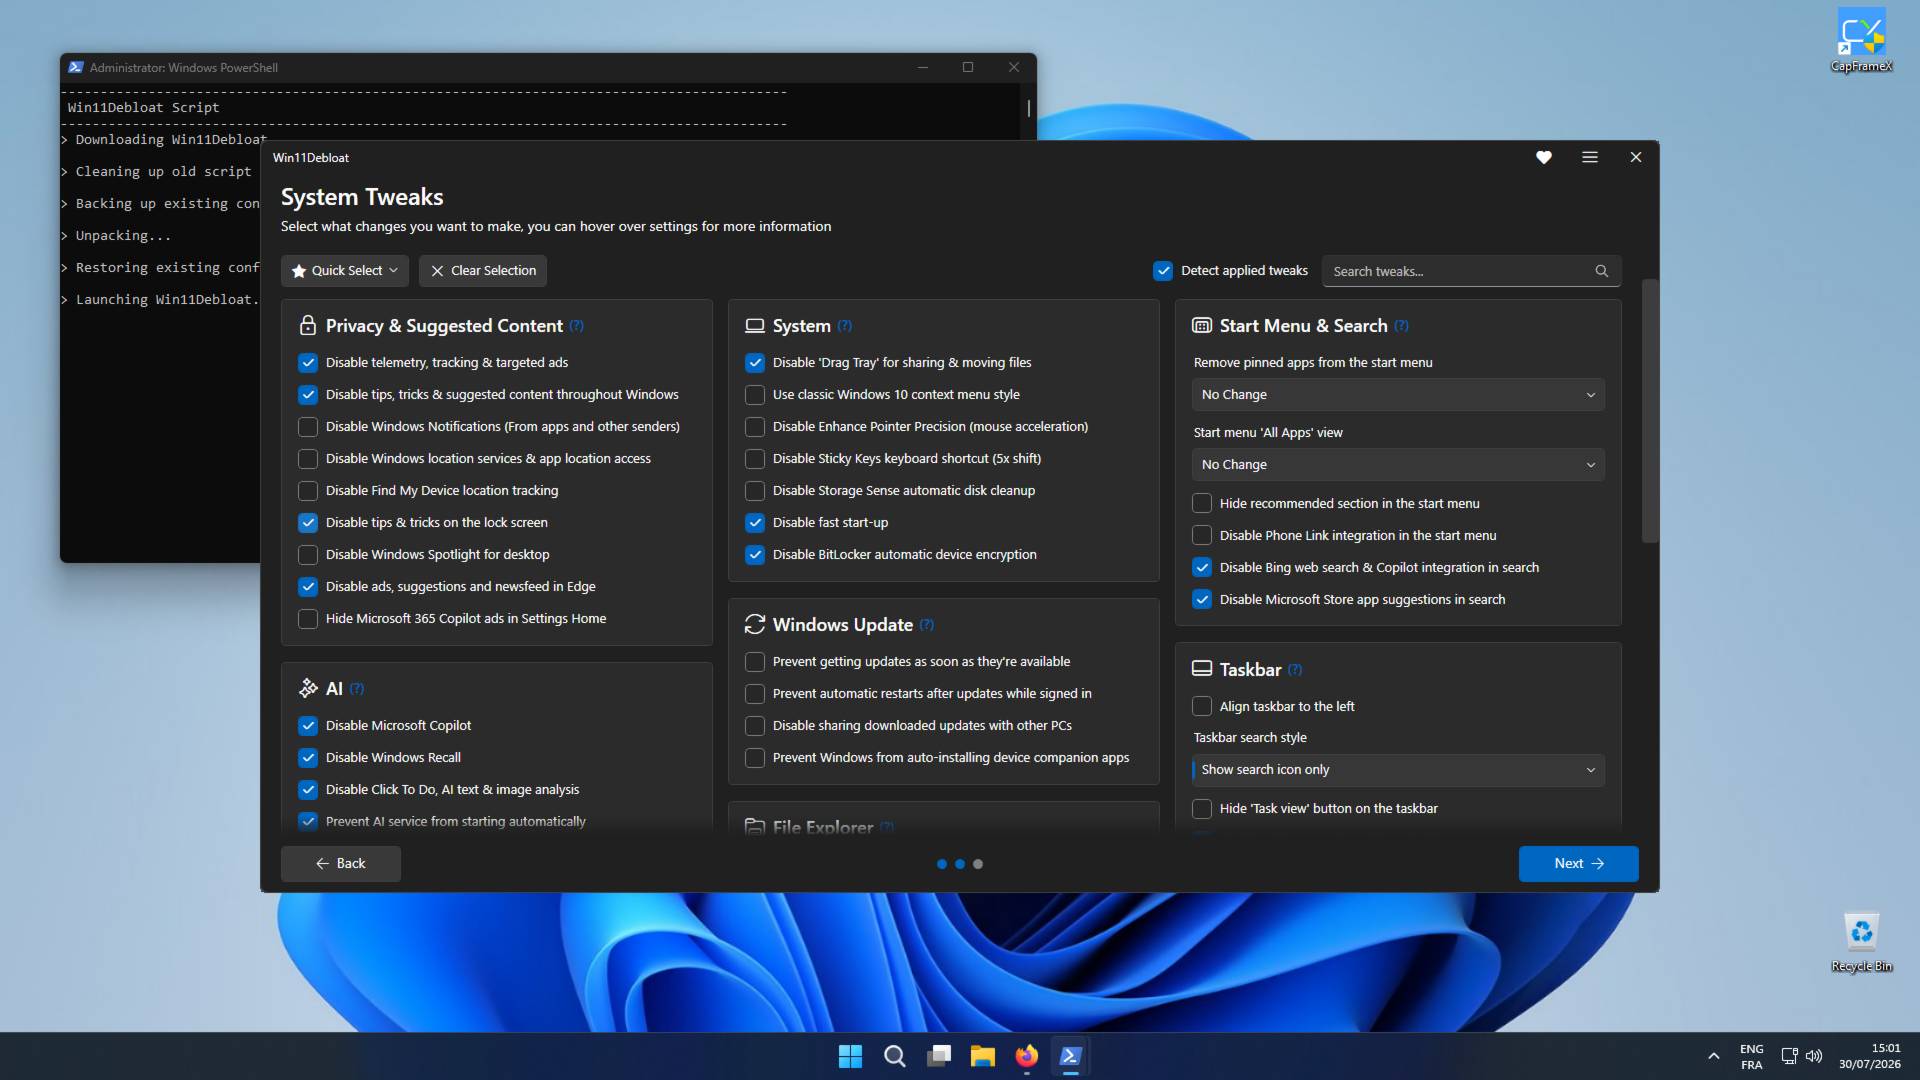
This next section is where you choose what aspects of Windows you want to be removed, such as AI and user tracking. Once more, you can either select Default from the top-left menu or manually choose what you want to remove. I recommend disabling everything in the Privacy and AI sections; the rest will depend on your preferences.
Removing tracking services may improve system performance and responsiveness, although more can be gained from disabling aesthetic Windows effects, especially on old or slow machines. The System section is also noteworthy, as it helps you bring back the classic Windows 10 Menu UI, which many prefer to the new one.
In the Start Menu & Search section, disabling Bing and Copilot search can be handy if you don’t like Windows’ web search popping up when you search for locally stored files. One important note here, however, is to avoid disabling BitLocker unless you know what you are doing. When you’re finished, click the Next button on the bottom right to move on.
On this page, you’ll be able to select whether to apply these changes to just one user or all, and whether you want to create a restore point. I recommend selecting all users and creating a restore point just in case. Press Apply Changes and wait for it to do its magic. Restart the computer for the changes to take effect.
O&O ShutUp10++
O&O ShutUp10++ is a portable anti-spy/privacy management utility that allows you to control telemetry, disable data collection, and manage hidden tracking settings in Windows 11. You can either download it from the official website or launch it through Chris Titus Tech’s Windows Utility.
For the latter method, first launch Chris Titus Tech’s Windows Utility using the aforementioned irm christitus.com/win | iex PowerShell command, then click on the O&O ShutUp10++ – Run button at the bottom of the Tweaks tab. After a quick download, a new window will open.
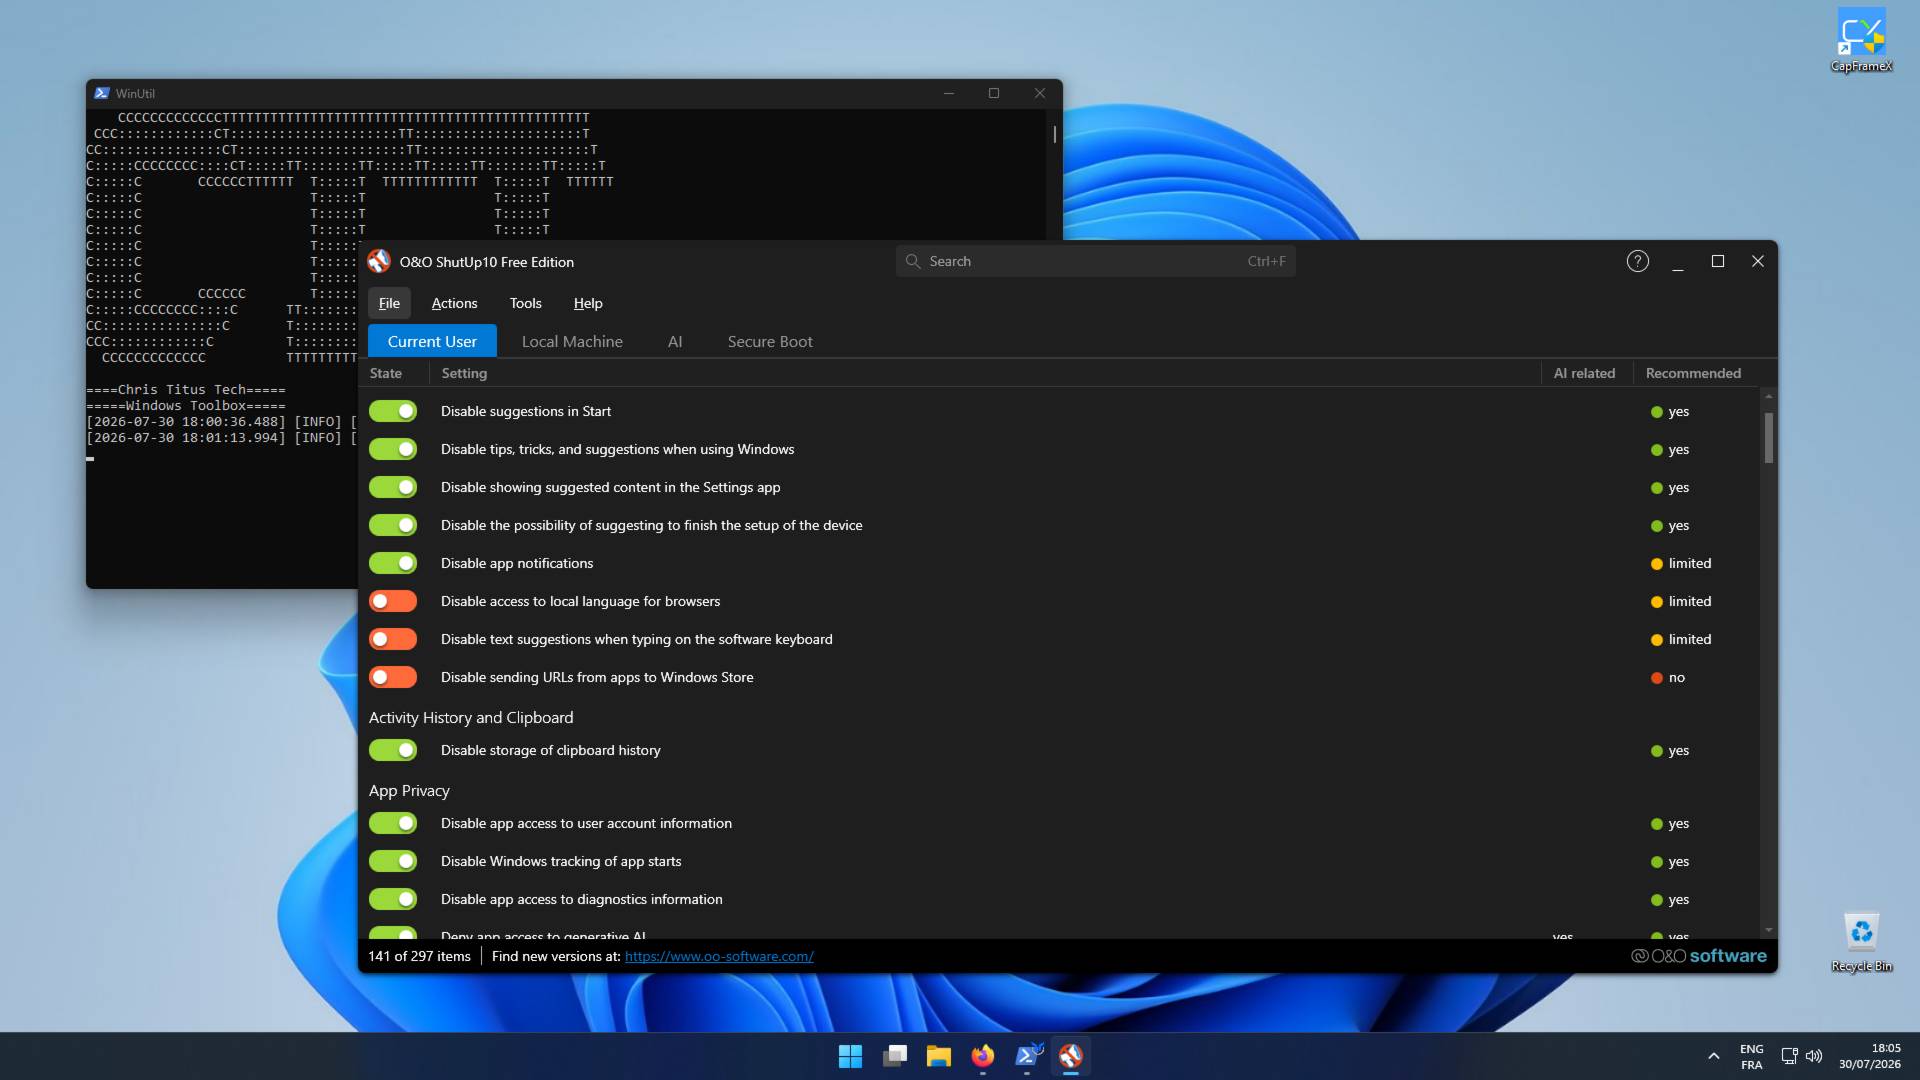
Here you’ll see a plethora of privacy options, controlling areas such as app tracking and what information is accessible. As with the previous tools in this guide, O&O ShutUp10++ also offers a novice-friendly option to hide Windows 11 from Microsoft’s prying eyes, without breaking anything in the process. To find it, click on the Actions Menu in the top row and select the ‘Apply only recommended settings’ option.
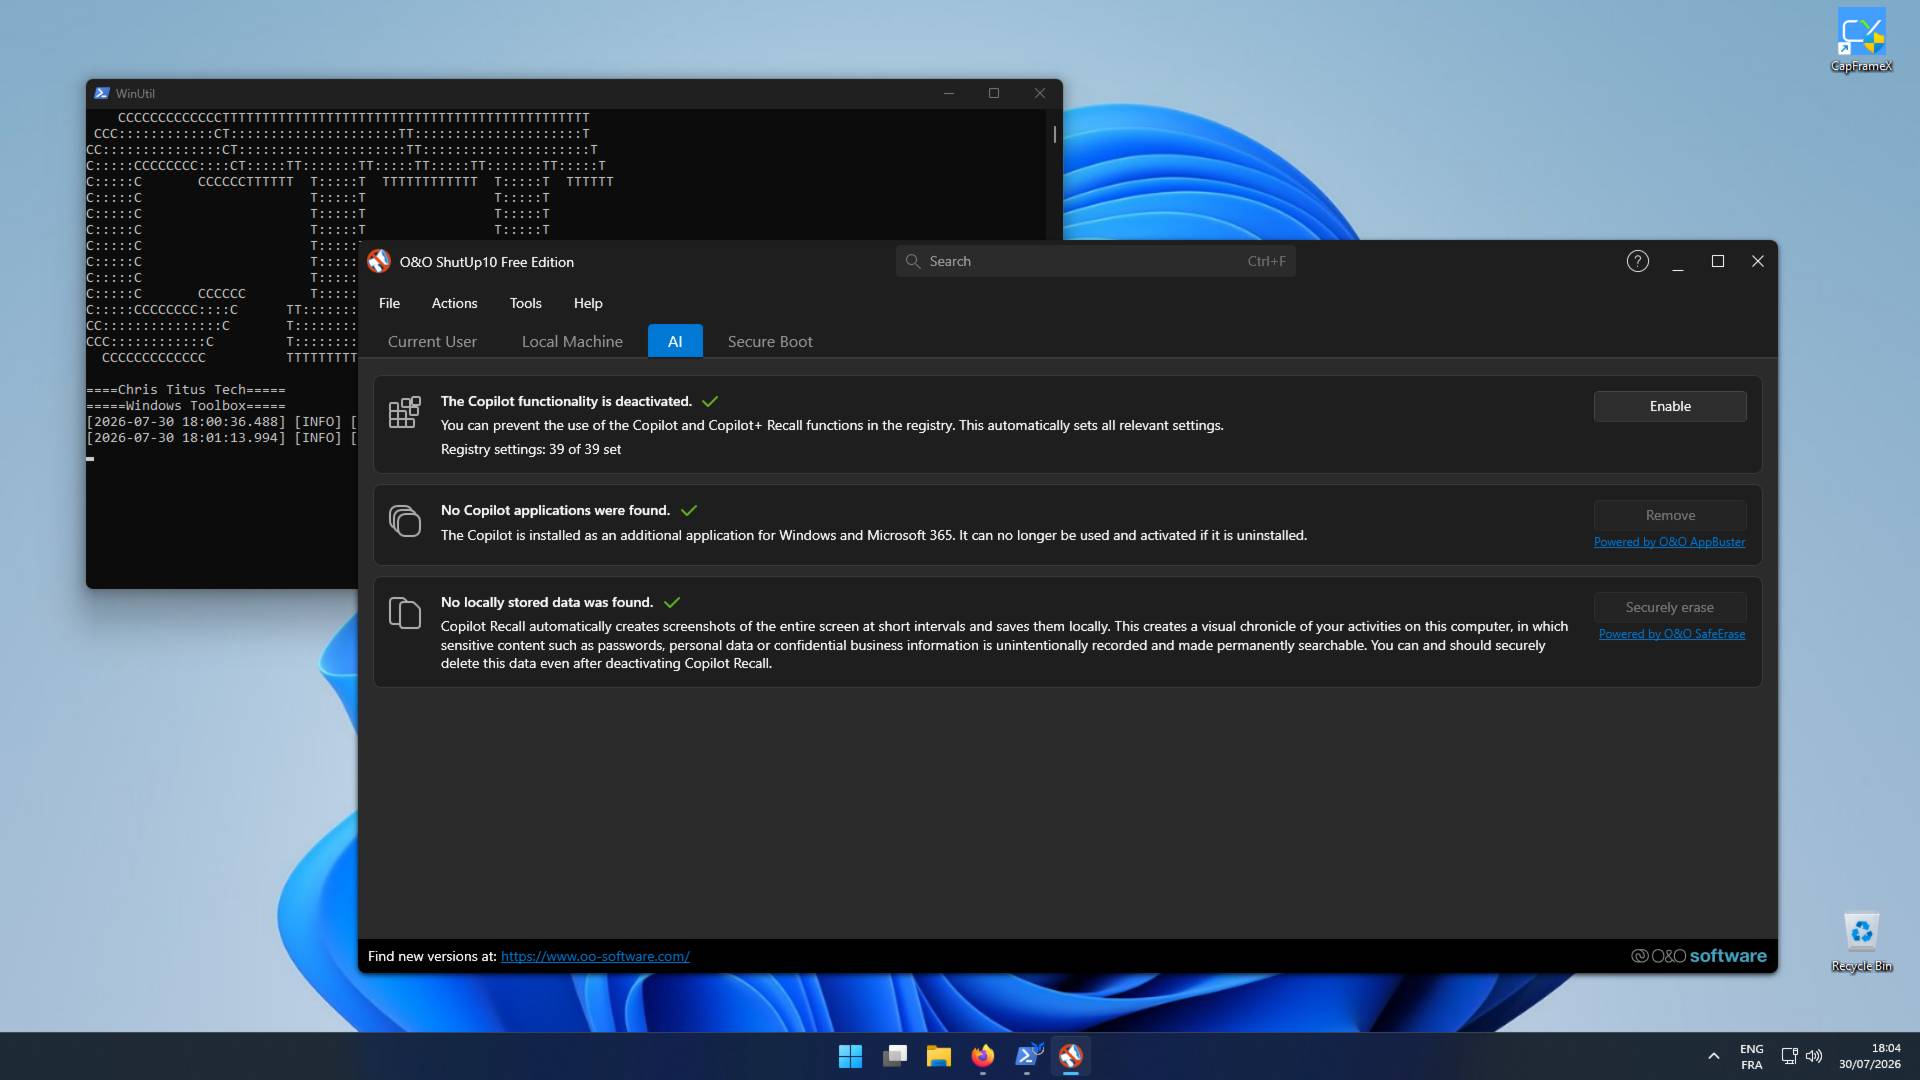
If you want to disable some other features, you can manually select the privacy options you want from a list of nearly 300 available items. That’s a lot of spying. Likewise, if the automatic option disables a tracking service you need for something, you can simply manually re-enable it. All modifications are instant. There is also a section dedicated to Copilot, where you can see at a glance if Microsoft’s AI tech is disabled.
And there you go, now you have a clean system free of unnecessary bloat, and your PC will be running smoother as a result. While the performance gains will vary depending on how much bloat was installed on your system at the start, at least you’ll have limited how your system can be tracked.