

Learning how to take a screenshot in Windows 11 could one day save your life. More likely, it’ll probably just win you that arduous week-long argument with your mates. Either way, it’s a handy tool that can help you in your day-to-day and there are a few ways you can go about it.
While we mainly focus on Windows 11, some of these solutions may also work on Windows 10 or older. Whether you want to snap a picture of your whole screen or a section of it, there’s something for everyone.
1. Windows built-in tool
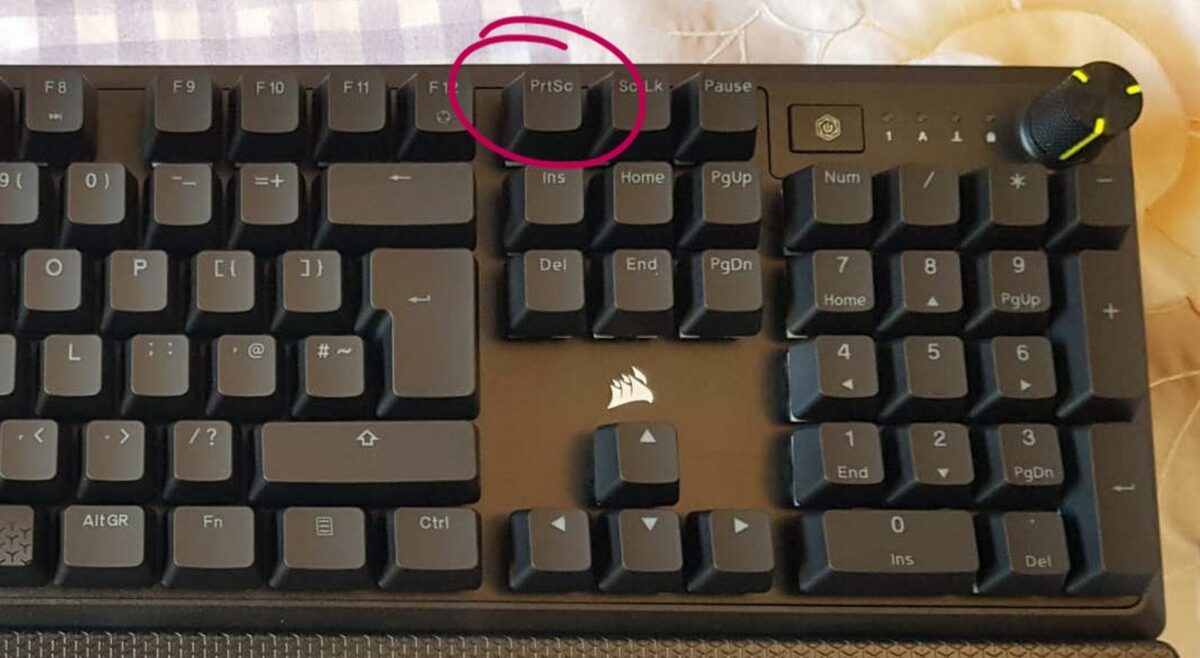
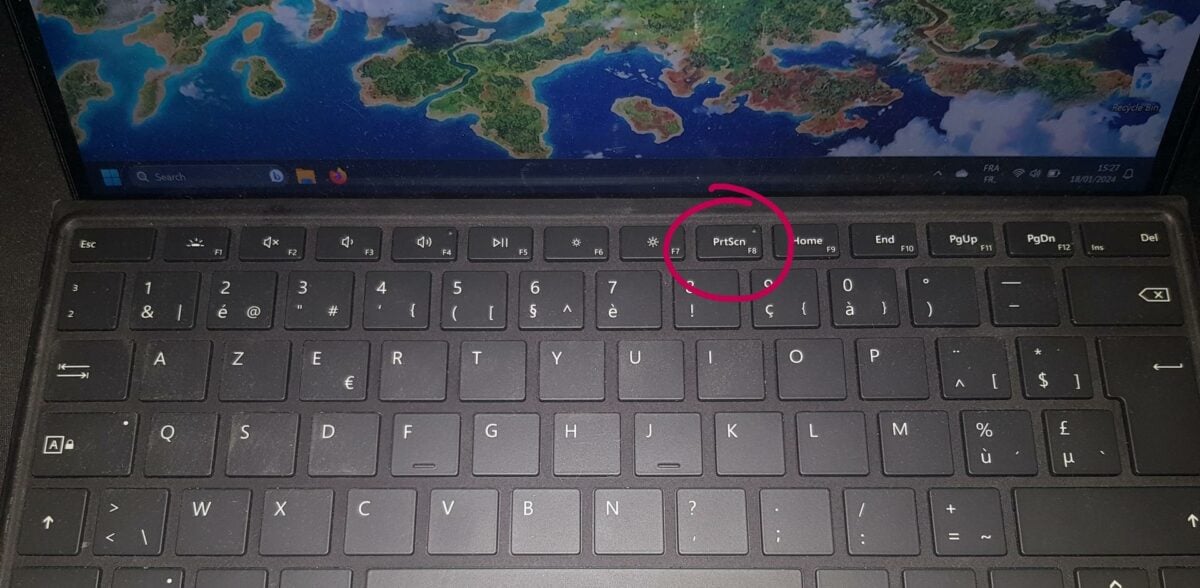
The fastest and easiest way to take a screenshot on Windows 11 is using the PrtScr (Print Screen) key on your keyboard. It’s generally located above the arrow keys on regular full-size desktop keyboards or as a secondary action on the F keys of laptops. See the pictures below.
For the simplest and quickest way, press the Windows + PrtScr keys on your keyboard at the same time. This snaps a picture of your entire desktop and sends it to your Pictures folder. Boom, you are good to go.
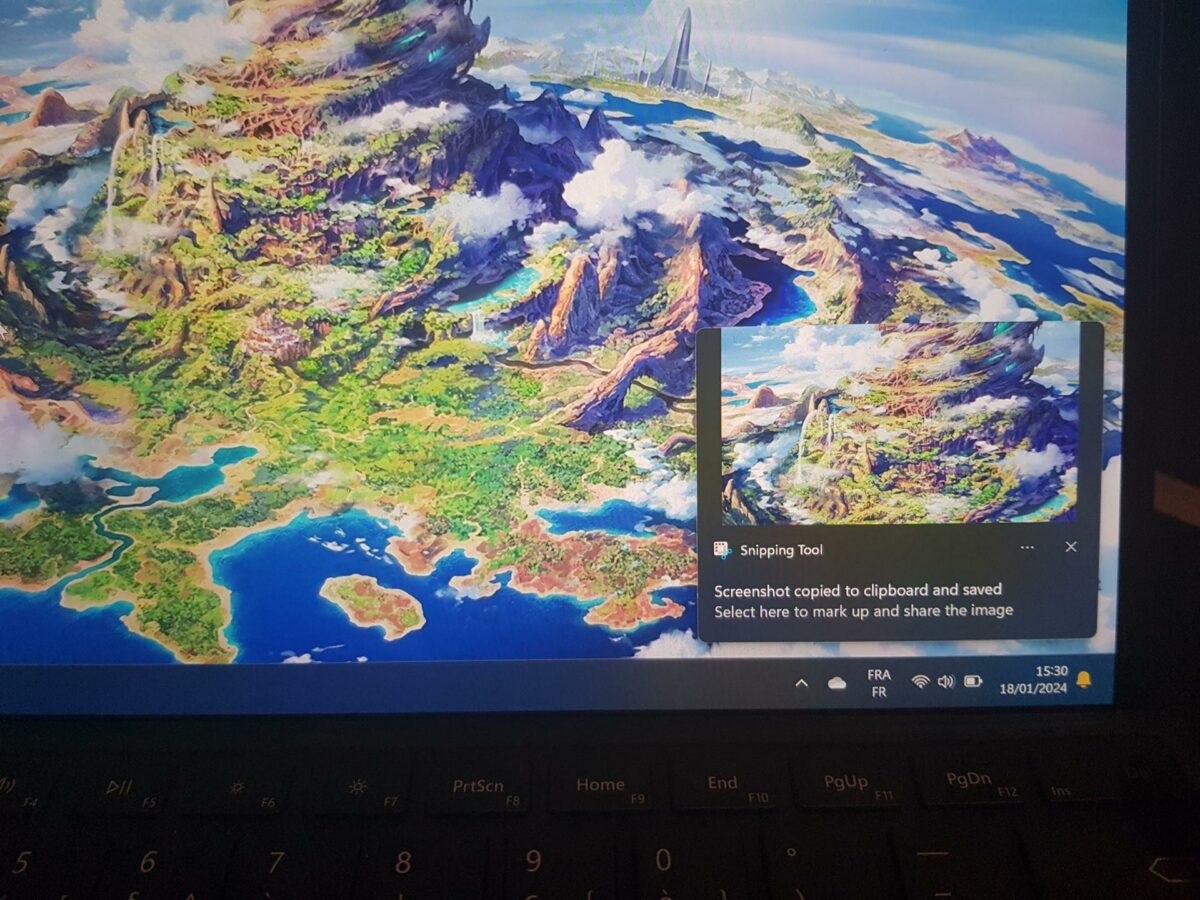
For a more advanced way that gives you control over what you want in the screenshot, just press the PrtScr key on its own. This should summon the Snippet Tool on the latest Windows 11 update. You can also access this built-in app using the Alt + Shift + S shortcut on older updates or operating systems, or type Snippet Tool into the search bar. Note that if PrtScr shares the same space as a function (F) key, you may need to hold the Fn button at the same time.
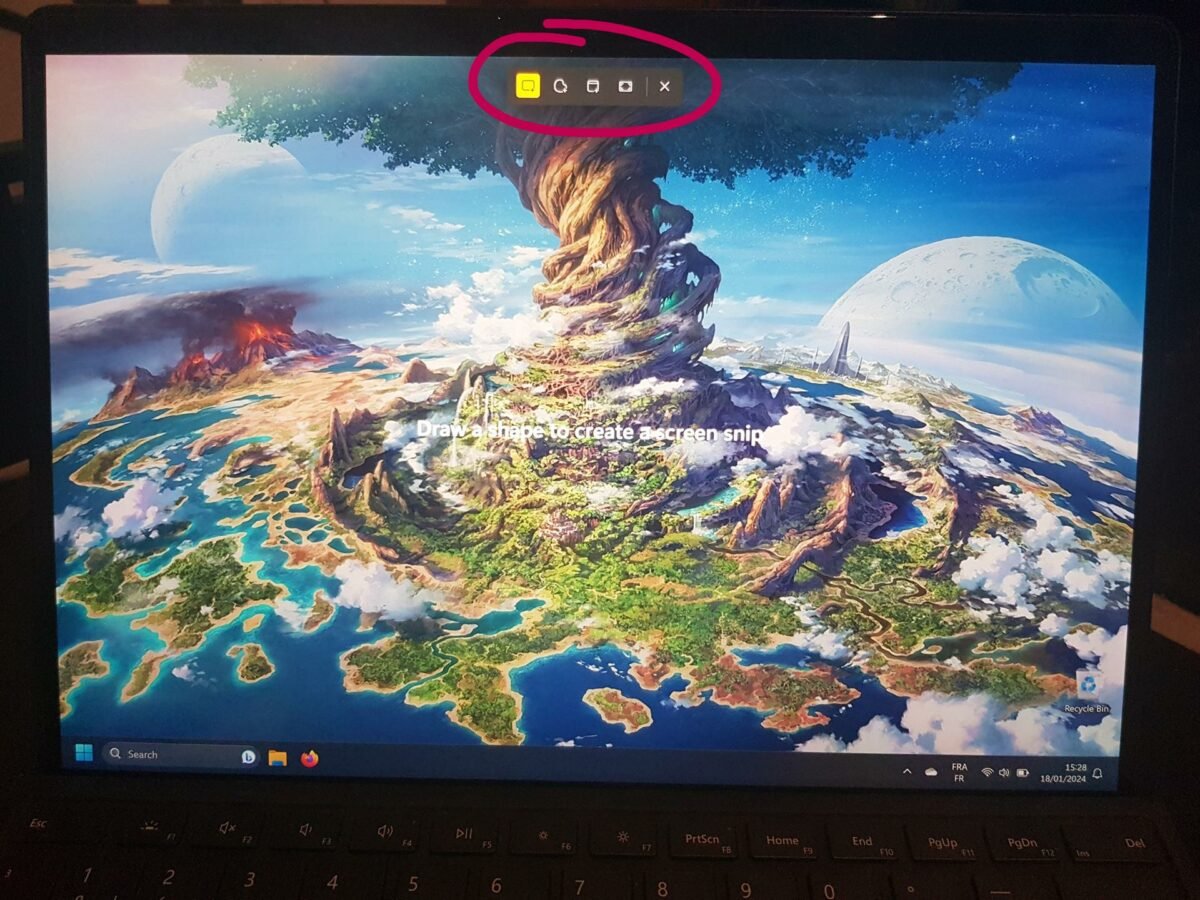
Your screen should become a bit darker and you will see a menu pop on the top. These options will let you select the type of screenshot you want. From left to right you have:
- A rectangular selection that allows you to only capture the area you want – handy for guides or to avoid showing sensitive information.
- A freeform mode that lets you select any shape you like.
- A window mode that detects the outlines of a window and only captures that – handy if you have multiple monitors.
- A fullscreen mode that captures everything you see on your screen – equivalent to Win + PrtScr.
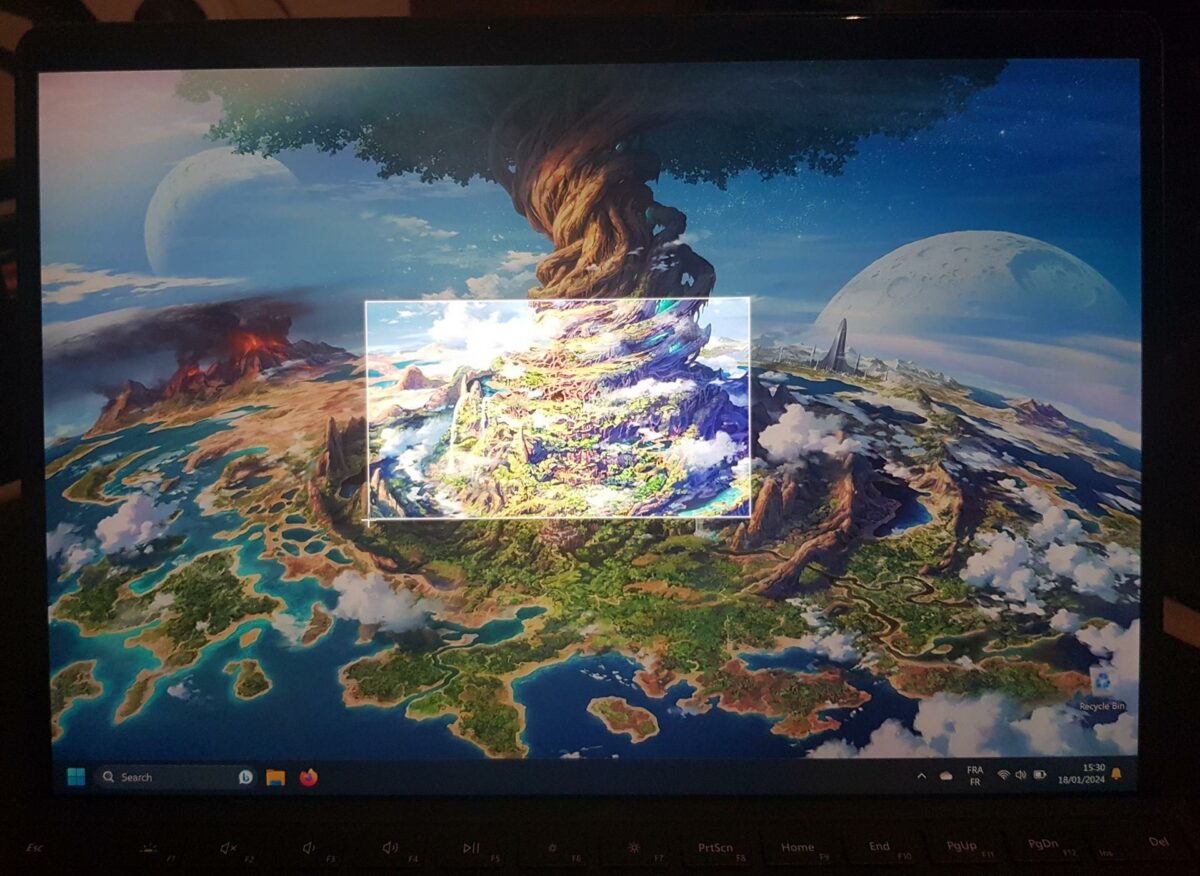
Click on your preferred method, hold down left-click, and select the area you want to capture. Selecting fullscreen mode directly takes a picture since you don’t need to highlight anything.
If you have notifications enabled, Windows will indicate that you took a screenshot. Clicking on this lets you edit it further using the Snipping Tool editor.
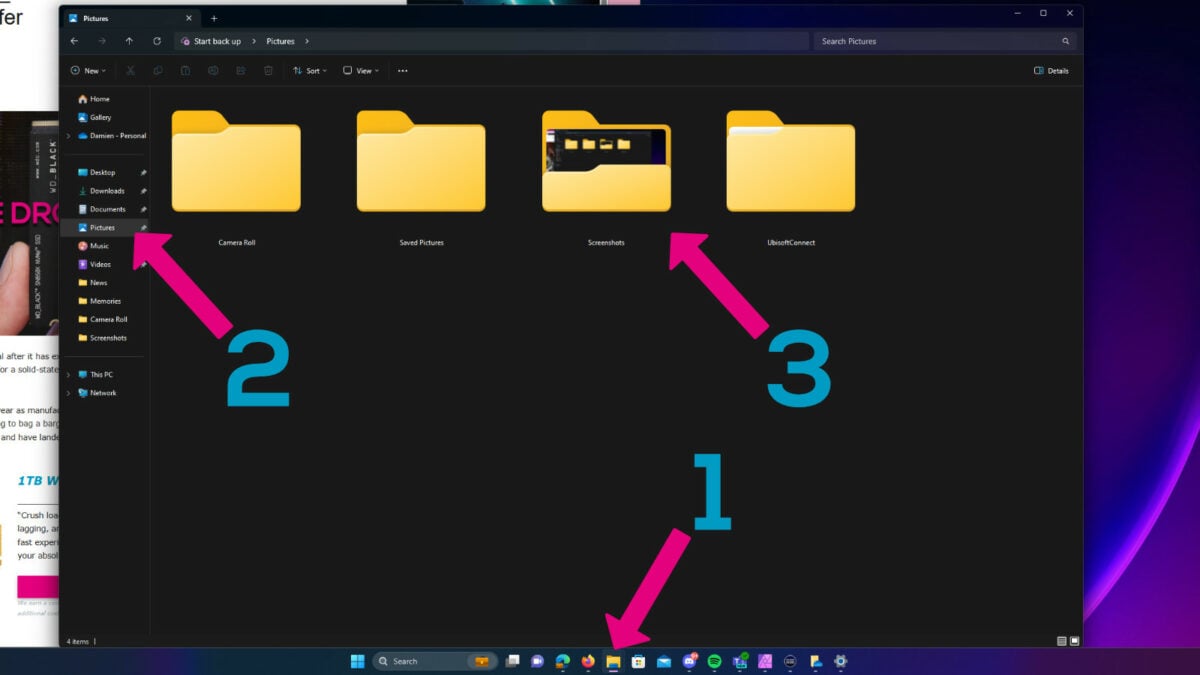
If you’re happy with it as it is or prefer to use your own editing software, open up File Explorer, navigate to the Windows Pictures folder and click on Screenshots.
Here you go, you have captured a screenshot.
Just a couple of notes before we move to other methods. This technique should work in most cases, however, some games may lock you from using it. In particular, games and videos with High-bandwidth Digital Content Protection (HDCP) may black out sensitive areas on your screenshots.
The Snippet Tool also isn’t infallible. A colleague here at Club386 has witnessed the shortcuts stop working and screenshots refuse to save without manually saving them. Fortunately, there are a few other methods you can select if you experience this, too.
2. Game Bar
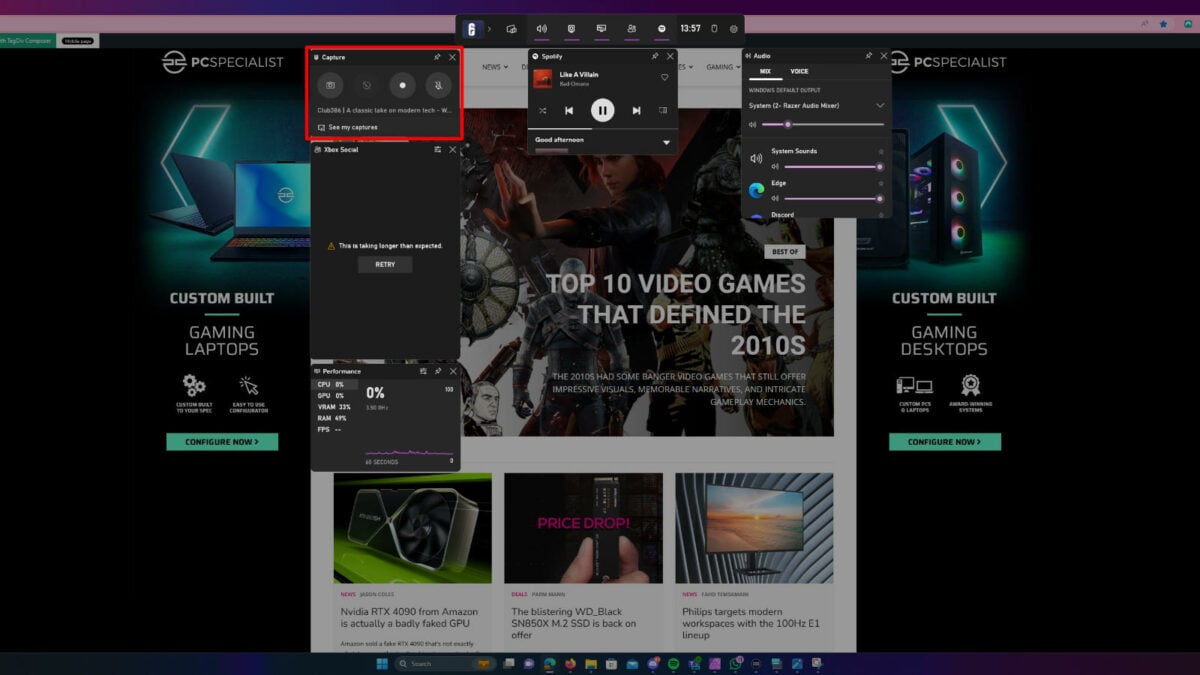
Microsoft packs Game Bar into every Windows 11 PC, and you can use it just about anything, not just games. Opening the tool is as simple as pressing Windows Key + G. Here, you can check your PC performance, launch games from the controller bar, and most importantly capture screenshots or video.
- The shortcut to screenshot using Game Bar is Windows Key + Alt + PrtScr.
- By default, screenshots save into Videos > Captures. You can view your images in the Game Bar app.
Game Bar is more limited than other methods here. You can’t change the default image folder and the tool only screenshots the active window you’re using. For example, if you have two browser windows open side by side, it’ll only capture the one you’re currently using.
You can pin widgets from Game Bar so they don’t minimise when you close the application. This makes them sticky on your desktop and easier to access.
You can also create a meme directly within the Game Bar folder, which lets you add text to the top and bottom of your image. It’s pretty basic, but more than most.
3. GPU driver software
Those of you fortunate enough to run the best graphics cards over the past decade have another way of taking screenshots. You just need to download your brand’s software to get started.
Nvidia = Alt + F1
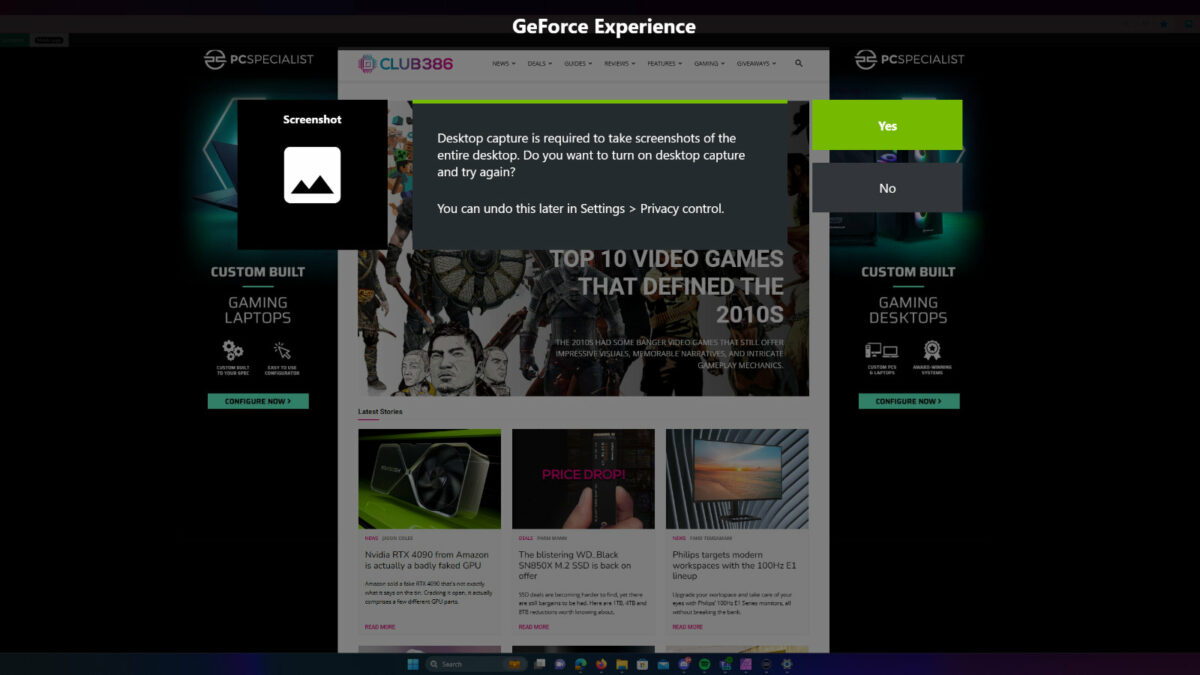
Installing GeForce Experience is entirely optional, but it has a good few benefits. Formerly known as Shadowplay, the software lets you download new drivers, optimises games, and captures screenshots and video. The first time you use the shortcut, it’ll prompt you to enable desktop capture in the settings if you haven’t already. Then, it’ll capture your entire desktop on your primary monitor when you press it thereafter.
By default, files save into Videos > Desktop. You can customise this by opening the menu using Alt + Z, selecting the cog, heading into Recordings, and changing the bottom file path.
AMD = Ctrl + Shift + I
Team Red users need to download AMD Radeon Software Adrenalin in order to screenshot. Much like Nvidia, all screenshots are of your full desktop on your primary monitor, with no option to select individual windows. All the settings you’ll need are in the cog icon in the top-right under the Record & Stream tab. Here, you can enable instant replay and instant gifs for videos. We recommend only switching these on when you’re about to use them. They’re a bit of a resource hog otherwise.
By default, you’ll find the files in Videos > Radeon ReLive. You can change this using the save location option.
4. Third-party apps
When it comes to screenshots and video recording apps, the choices are endless. My personal preference is Lightshot, since it has no obnoxious watermarks or subscriptions. It’s also a very light app that you can leave on the system tray without worrying about performance impact.
To use Lightshot, first download, install, and launch the app. Nothing complicated here just your typical next, next, next.
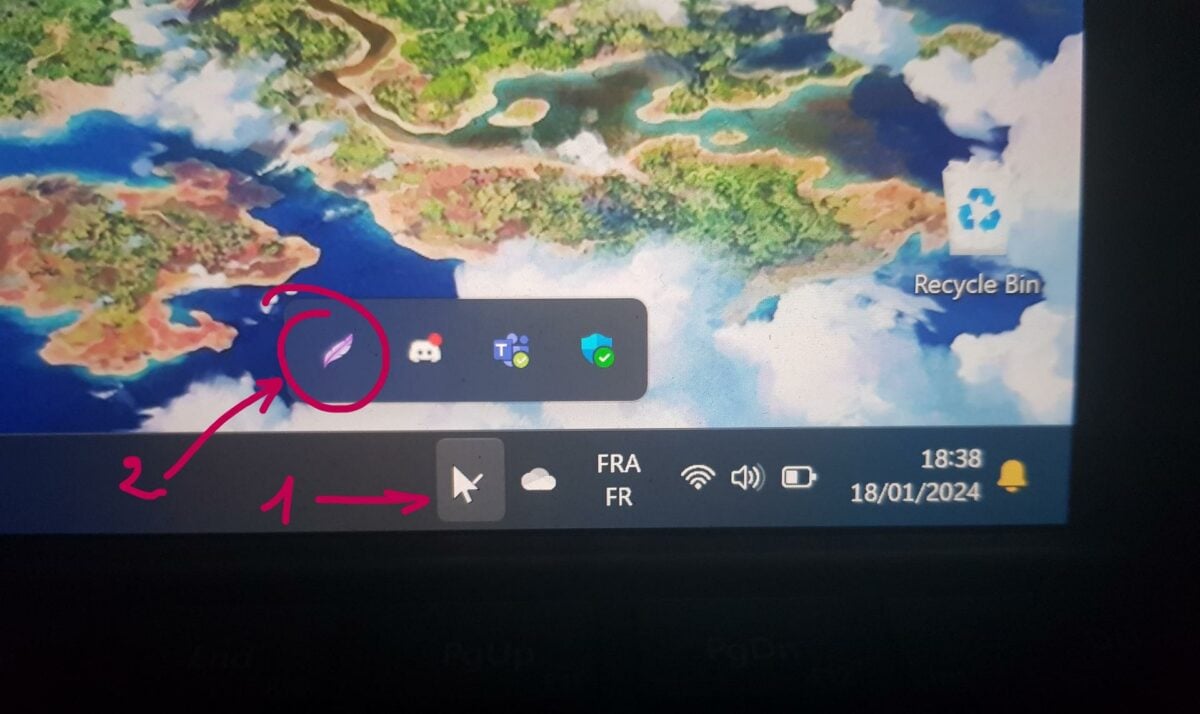
When the app launches, you should have a feather-looking icon on your system tray.
To take a screenshot, you have two methods:
- Click on the feather icon with your mouse pointer.
Or
- Use the shortcut by pressing PrtScr key on your keyboard.
Note that when the app is running, it takes over Windows defaults, i.e. the PrtScr button activates Lightshot instead of Windows capture. That said, you can change this in the app’s settings.
Now you can select the area you want to capture by dragging your mouse pointer while pressing the left mouse button.
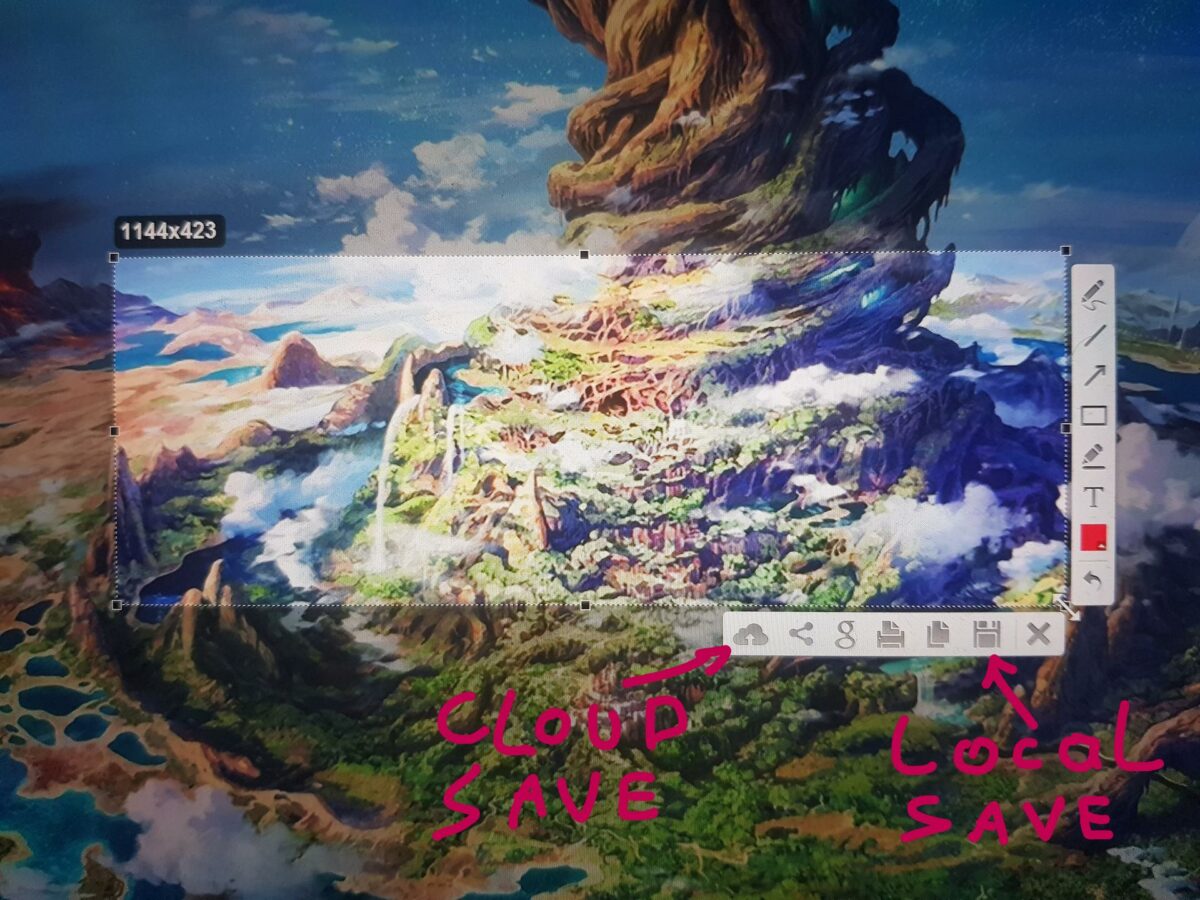
After selecting a capture zone, the app will add some new tools on the side. You can use these to put notes on top of the image. Hover your mouse cursor over each icon to have a small definition of what each one does.
On the bottom row, you’ll see multiple ways of saving the image. You have the usual save file which asks you where you would like to store the image, share on social media, and (the one I use the most) upload to the app’s servers. The latter presents you with a sharable link after uploading the image. Note that you can connect the app using a Google or Facebook account to access your pics later from a library instead of saving each link.
I bet you’re wondering why would someone use this one over the Windows default. There are at least three reasons. First, Lightshot lets you choose the file format and quality. It allows you to directly and seamlessly upload your screenshot to an online image host so you can share it effortlessly with friends. And, most importantly, it doesn’t care about content protection, it just takes the picture. Gemoo snap and Sharex are also nice alternatives to Lightshot.
Here you go. Now you have multiple ways to take your screenshots. Enjoy.