
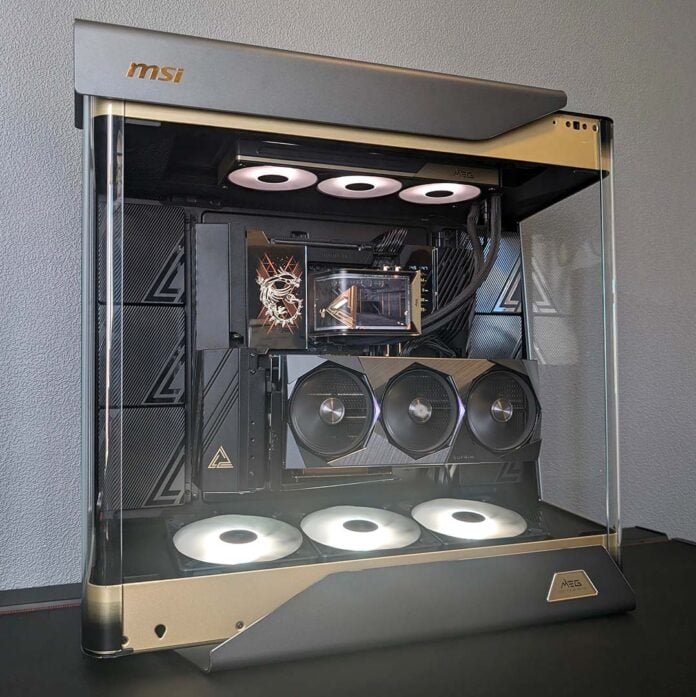
Until now I had never experienced a case like the Maestro 900R, and I’m not sure I ever will again. This is simultaneously one of the most extravagant and eye-catching PC cases in which I’ve ever built a system, but all that splendour comes at enormous cost. I’m speaking both literally, regarding the massive £799 MSRP, as well as figuratively in terms of usability.

MSI MEG Maestro 900R
£799
Pros
- True showpiece aesthetic
- Ample cooling potential
- Loads of USB ports
- Useful accessories
Cons
- Woefully expensive
- Enormous and weighty
- Inconvenient cable management
Club386 may earn an affiliate commission when you purchase products through links on our site.
How we test and review products.
In short, MSI’s flagship PC case is truly unique among other PC chassis on the market, but that isn’t always a positive thing. A large part of me greatly respects the company taking a big swing, crafting an unorthodox but undeniably pleasing design. While that quality is admirable, though, it’s impossible to ignore the many hurdles that come up during the build process, as well as those that arise with a finished system.
Specifications
While the exceptionally large packaging materials clue you into the fact that the MEG Maestro 900R is large, it isn’t until you’ve freed the PC case from its cardboard that you come to appreciate it’s in fact huge. Measuring 671mm tall, 379mm wide, and 695mm deep, this chassis absolutely gobbles up desk space and exudes an undeniably imposing aura.
With such gargantuan measurements, it’s no surprise that the case is heavy too. Clocking in at a whopping 38kg, picking up this chassis is like carrying a small kitchen freezer with a few kilograms of food inside, and that’s before you’ve populated either chamber with any components. Don’t be afraid to ask for a helping hand from a friend to initially shift this thing.
Catching your beath after placing the case, it’s difficult not to soak in the three tempered large tempered glass panels that curve around the MEG 900R, each marrying to the case’s frame via peg connections. This toolless approach carries across the rear panel too. All look and feel premium, with the asymmetric top and bottom panel covers providing an attractive frame for the whole ensemble.
| Specifications | MSI MEG Maestro 900R |
|---|---|
| Dimensions (H x W x D) | 671 × 379 × 695mm |
| Motherboard support | E-ATX, ATX, micro-ATX, mini-ITX |
| Back-connect compatible | Yes |
| Included fans | Bottom: 160mm, with RGB (x3) |
| Fan support | Bottom: 120mm (x4) / 140mm (x3) / 160mm (x3) Left: 120mm (x3) Right: 120mm (x3) Top: 120mm (x4) / 140mm (x3) / 160mm (x3) |
| Radiator support | Bottom: 120 / 140 / 240 / 280 / 360 / 420mm Left: 120 /240 / 360mm Right: 120 / 240 / 360mm Top: 120 / 140 / 240 / 280 / 360 / 420mm |
| CPU cooler height | ≤170mm |
| PSU length | ≤200mm |
| Graphics card length | ≤440mm |
| Connections | 3.5mm audio-out/mic-in (x1) USB-A 5Gb (x4) USB-C 10Gb (x4) USB-C 20Gb (x1) |
| Drive bays | 2.5in (x9) 3.5in (x5) |
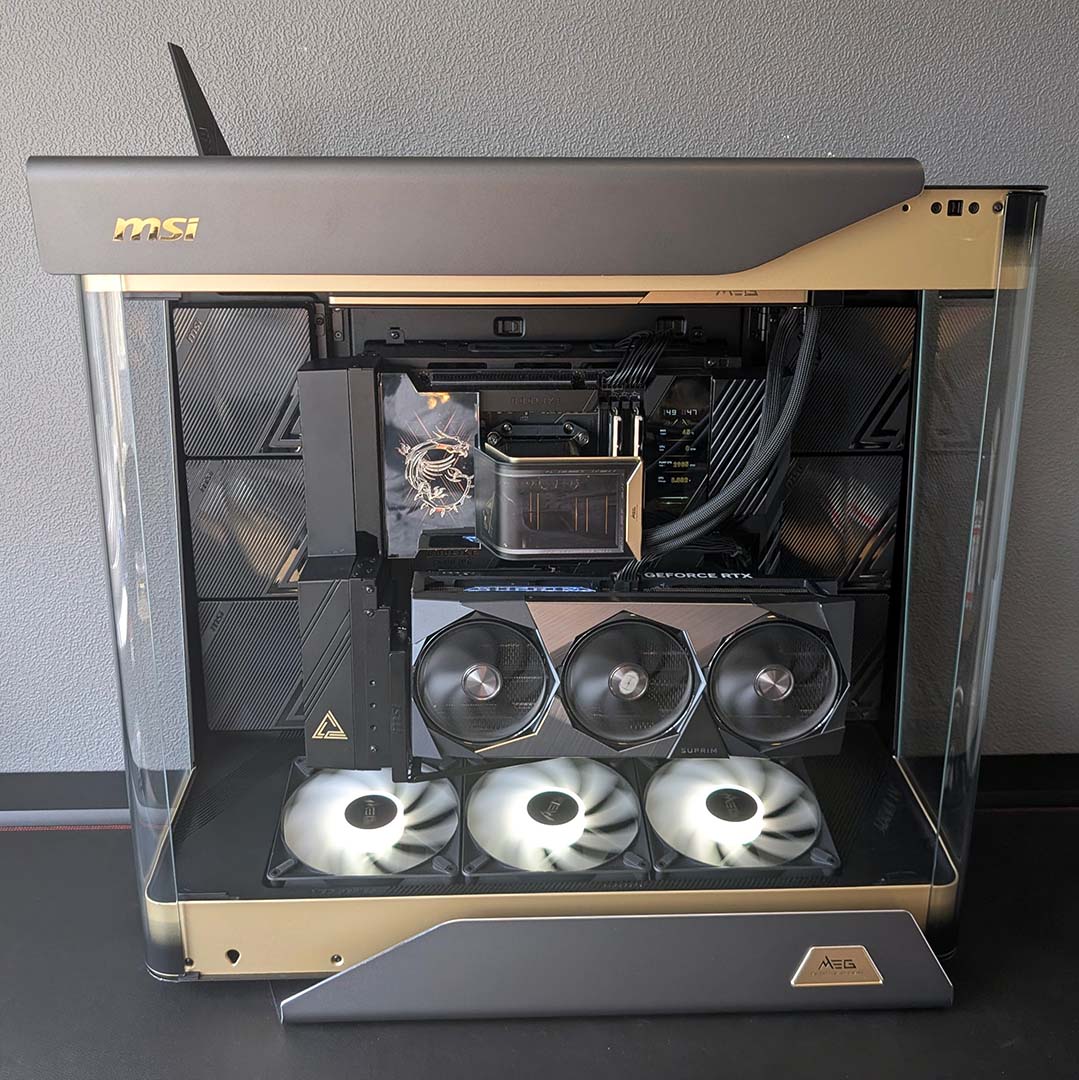
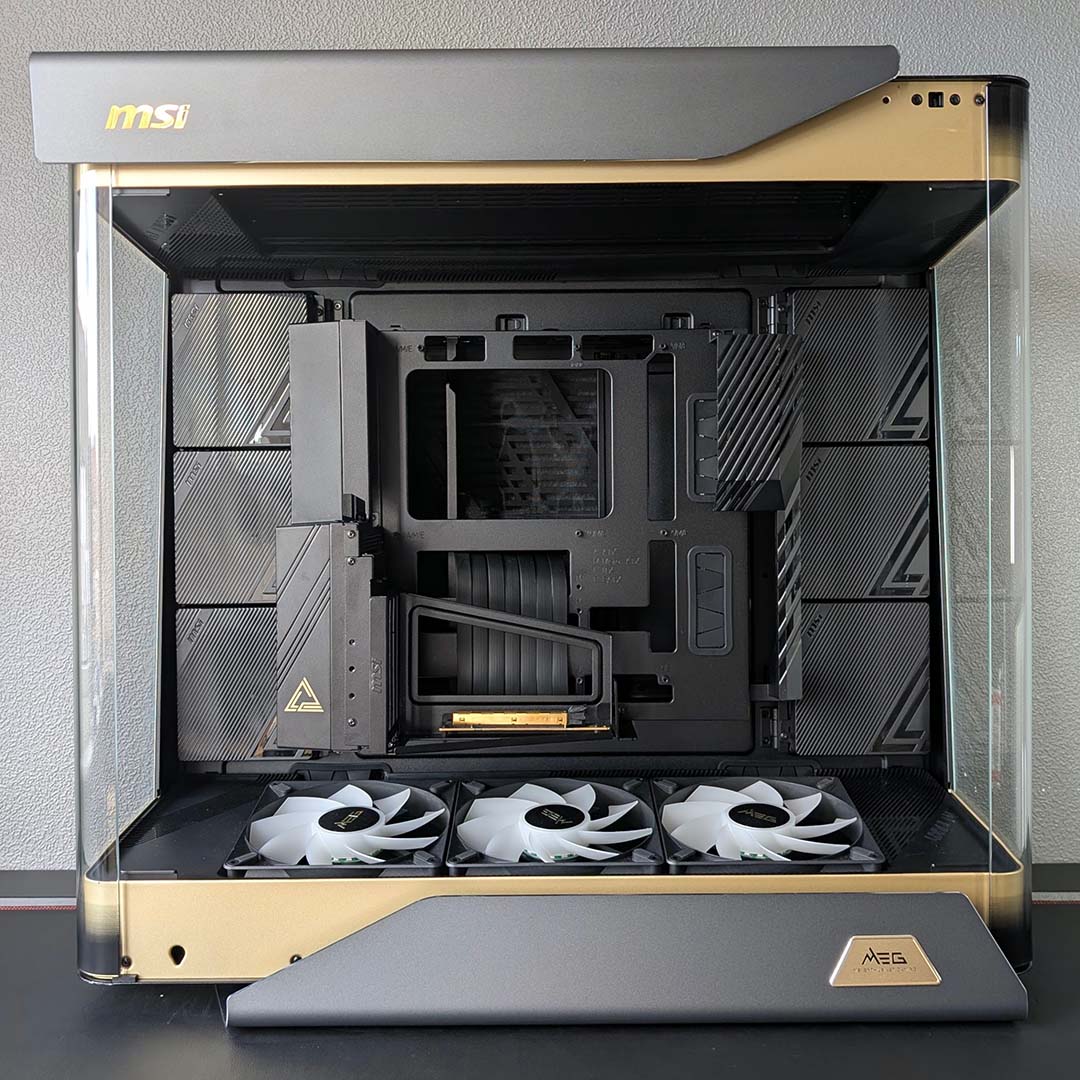
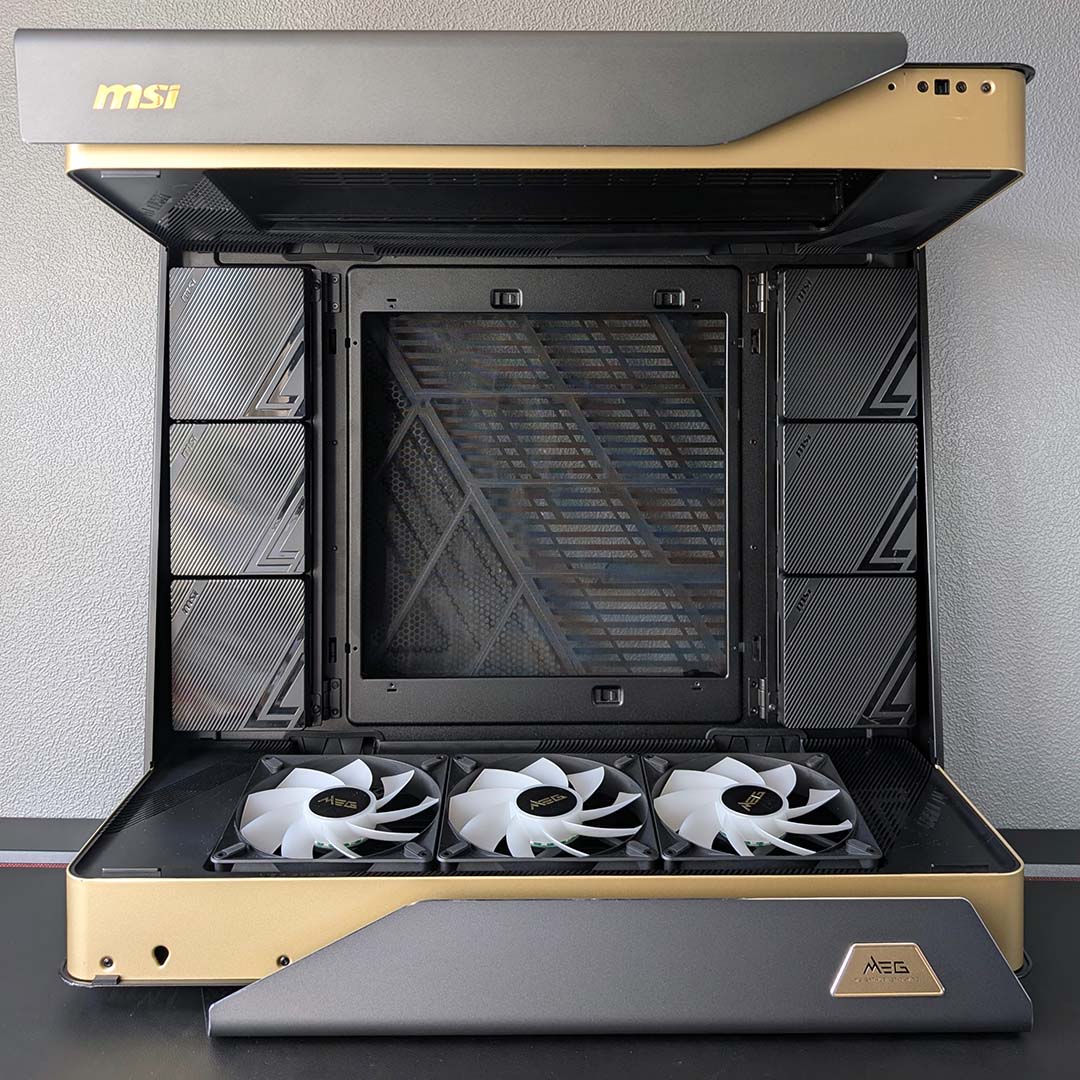
There’s oodles of space in the main chamber, which feels refreshingly airy upon first introduction, as you don’t have to contend with any of the typical horizontal case surrounds. MSI’s decision to centralise the motherboard within the MEG Maestro 900R exemplifies this approach, as it’s easy to work around your board from left, right, and centre.
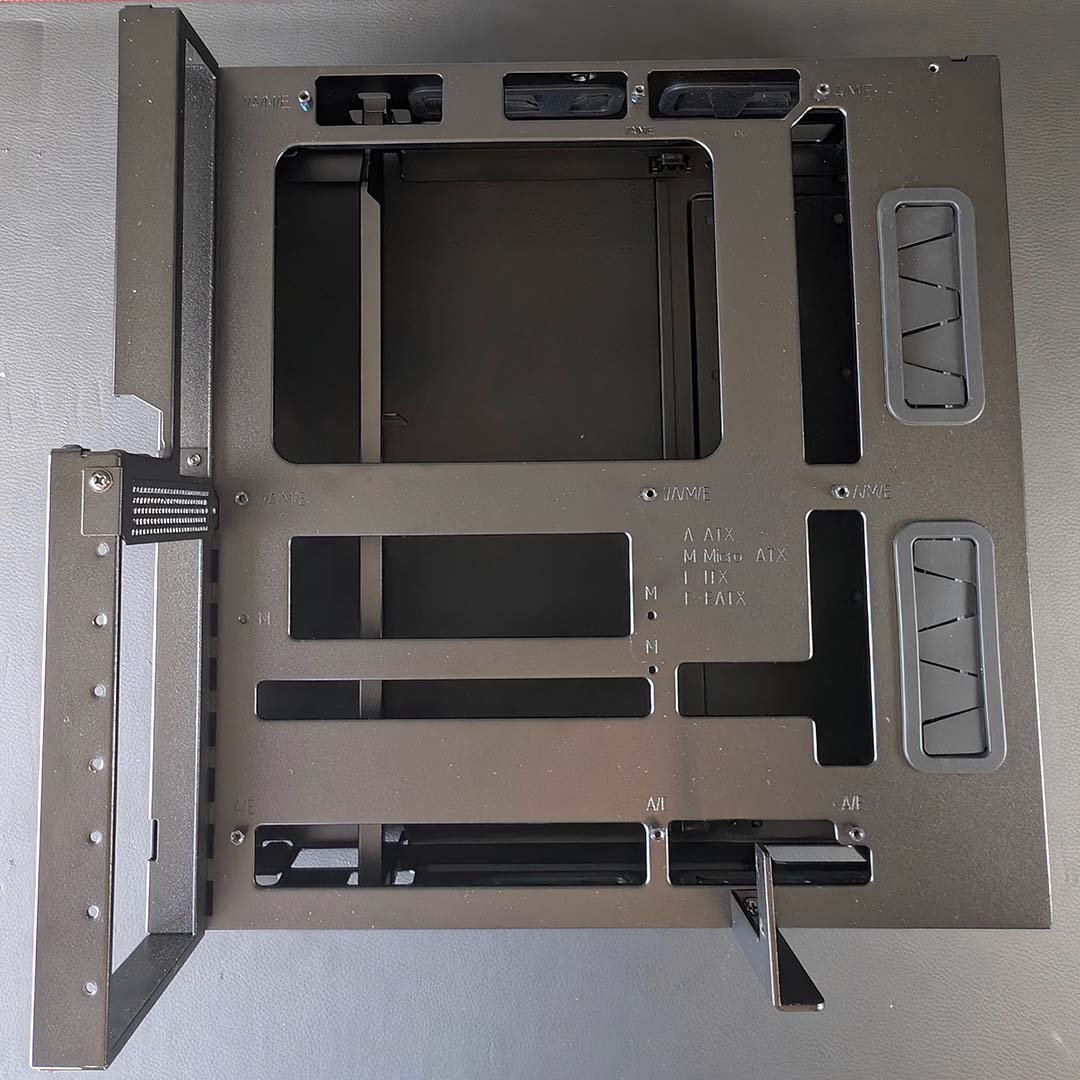
The case arrives with standoffs that will accommodate E-ATX and ATX motherboards without any adjustments. It is possible to run a micro-ATX or mini-ITX board, but the idea of using such a small form factor PCB in such a large space is a bit silly. You’ll also find cutouts that make back-connect builds possible.
Given the space in play, there’s a generous amount of wiggle room when it comes to supported component sizes. The MEG Maestro 900R will happily welcome graphics cards up to 440mm in length, in addition to accommodating CPU coolers up to 170mm tall. That’s enough space to run a Noctua NH-D15 G2 chromax.black and any GPU that takes your fancy with comfortable room to spare. Meanwhile, power supply length tops out at 200mm, owing to a compact shroud.
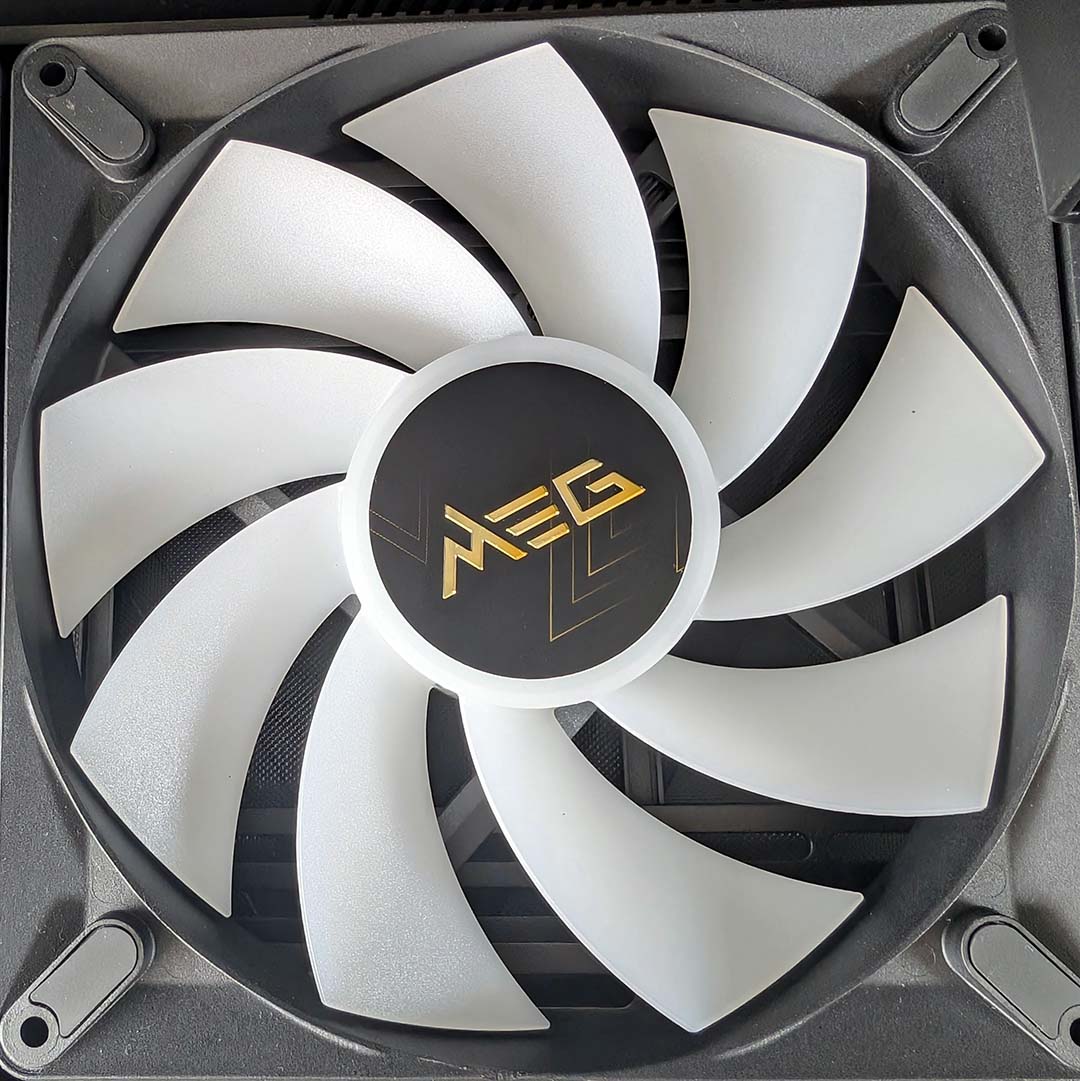
A trio of 160mm reverse-blade A-RGB fans run along the bottom of the main chamber, serving as the air intake for this case. A floating foot design with a slight incline, which the blowers mirror, provides a solid airflow channel from which to cool the main chamber. I’m happy to see a dust filter complement this setup, though I would like to see some extra stock spinners considering the chassis’ price.
There’s a great amount of cooling potential to realise with the MEG Maestro 900R. Building on the three included fans at the bottom, you can throw another three 120mm spinners on both the left and right of the main chamber, in addition to four 120mm or three 140mm/160mm up top. That’s up to 13 fans on the go at once.
Radiators are where the case really shines in this regard, though, with the ability to mount a 360mm rad on both the left and right of the main chamber. The top and bottom of the chassis take this further, with space for up to 420mm designs. The space is practically begging for an elaborate custom water-cooling loop.
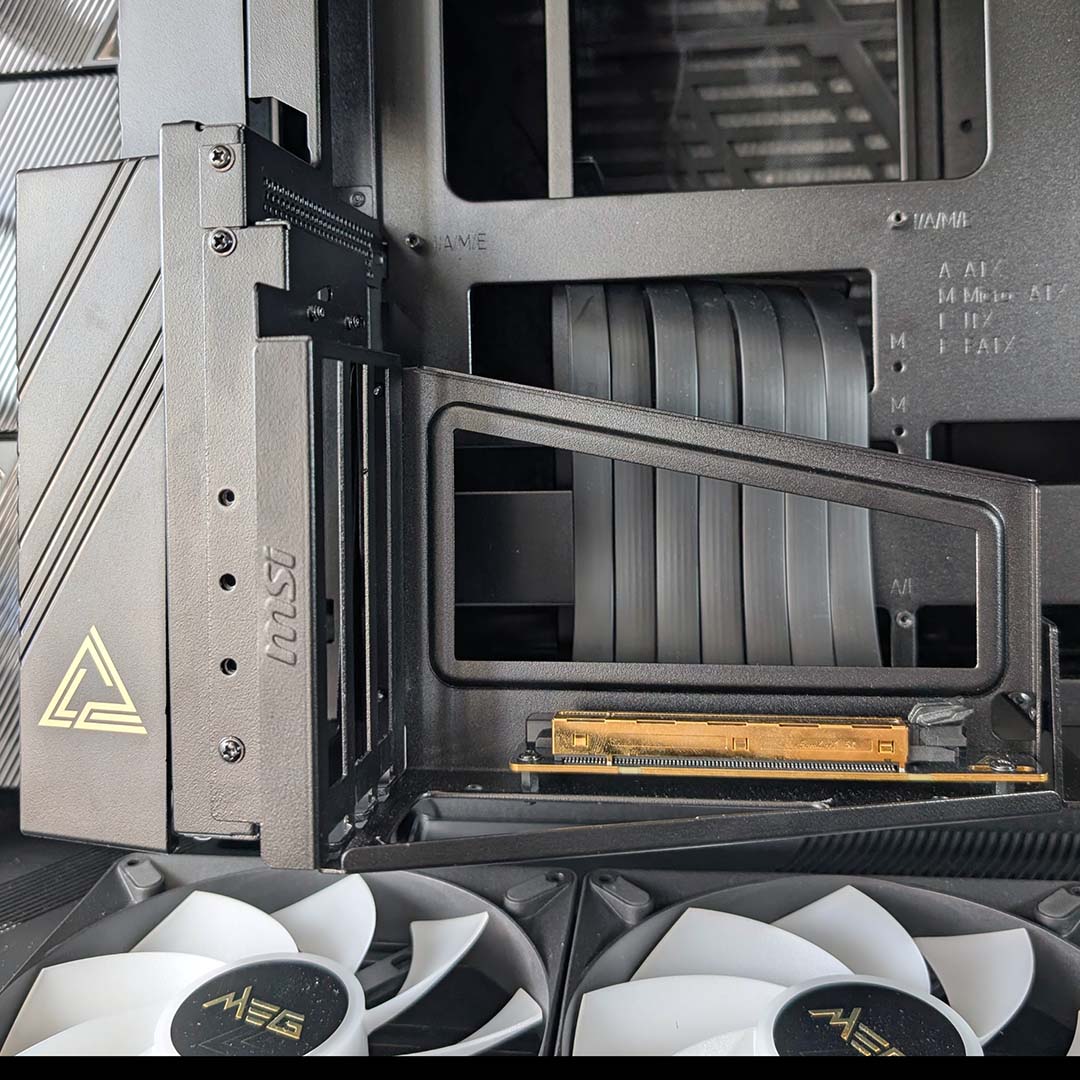
You’ll also find a vertical GPU mount attached to the motherboard frame, which floats above the bottom fans via three screws, two on the left side and one on the right. This is a curiously inelegant looking part of the case, but it’s certainly secure.
This mount has a PCIe 5.0 connection, meaning you’ll be able to take full advantage of the bandwidth that current generation Nvidia GeForce RTX 50 and Radeon RX 9000 series provide. PCIe 4.0 models are far more commonplace, even among relatively expensive cases like the Arctic Xtender VG, so I’m glad to see MSI hit this mark.
The MEG Maestro 900R does support standard horizontal graphics card installation, you’ll just need to remove the vertical mount first. Standard PCIe brackets and screws are available via the included accessories box.
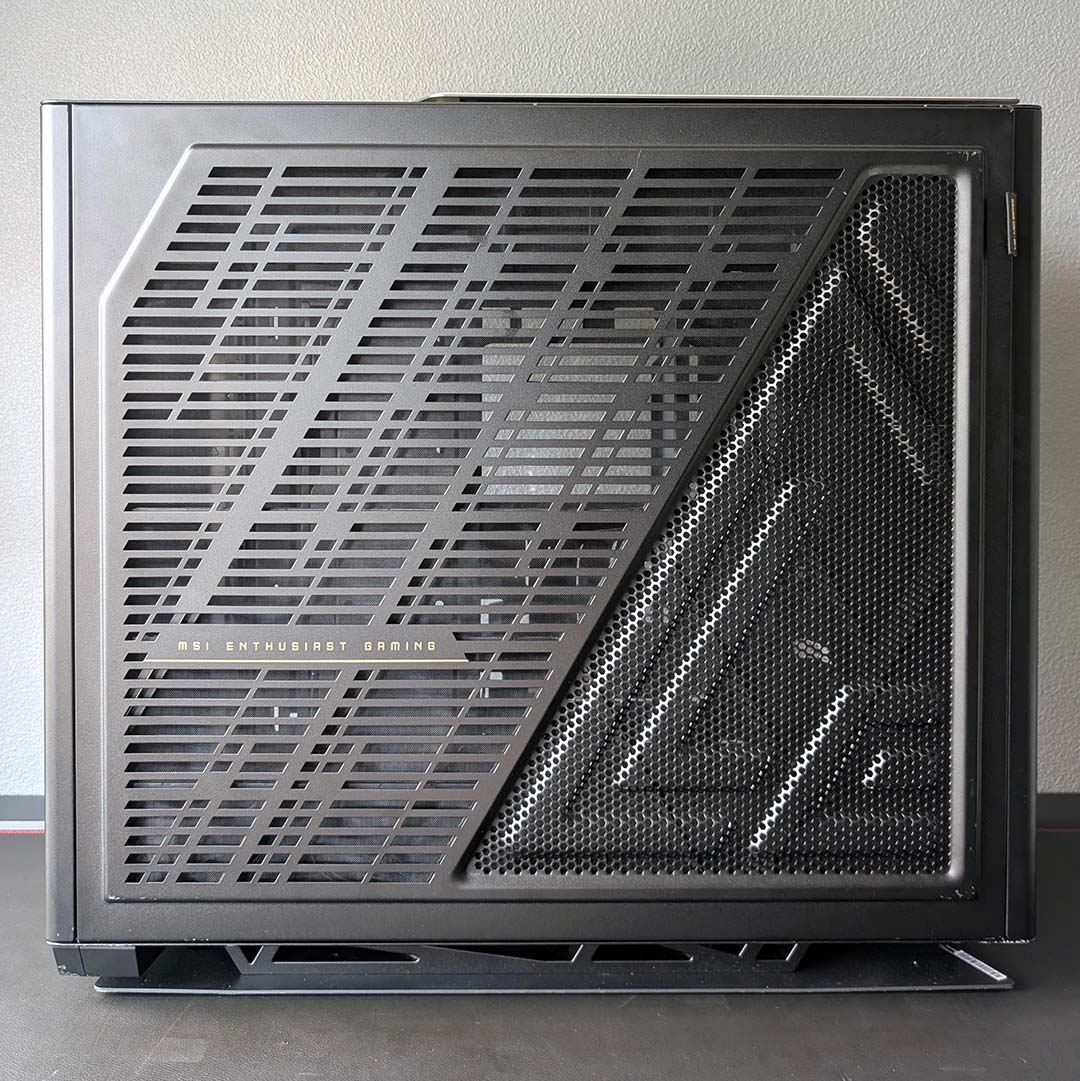
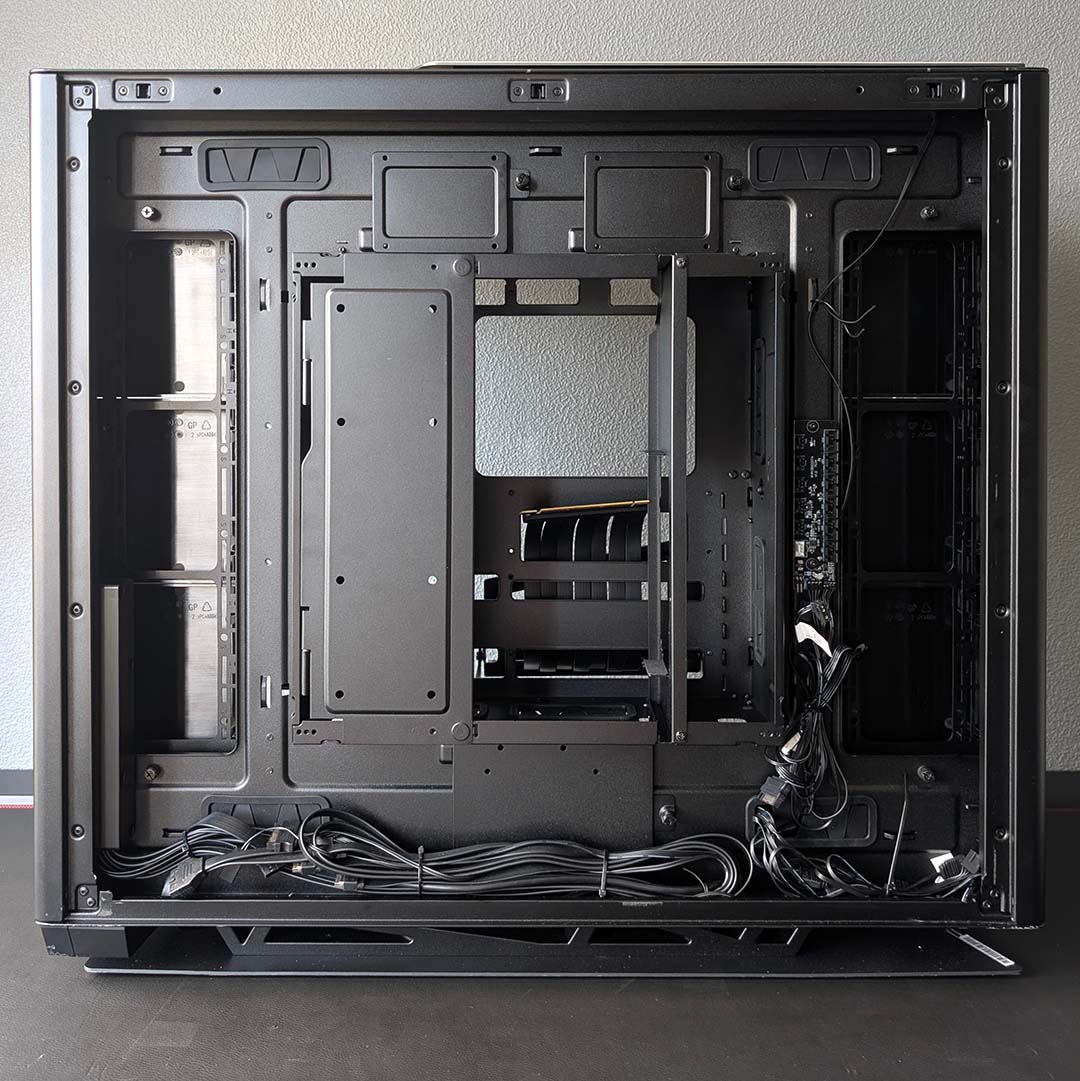
Ventilation slits cover the chassis’ rear panel, in addition to holes of varying heights that create the shape of MSI’s MEG logo, all benefitting from a removable interior dust filter. It makes perfect sense to focus more on enhancing ambient airflow here rather than aesthetics, given this part of the case will largely be out of sight and out of mind.
While the main chamber is welcomingly spacious, though, the rear certainly feels more cramped. This is partly because of the sheer amount of expansion options, with storage installation in particular receiving a lot of love. However, there’s little room to tidy up your case and power supply cables, with a thin tray for the former and compact shroud for the other.
In some respects I wish the case was that little bit deeper, as much as that would make the already large MEG Maestro 900R even bigger. Alternatively, less focus on 2.5/3.5in drive expansion with greater due attention to cable routing via additional rubber grommets, trenches, and so on. would be my preference. This is particularly important for USB devices too, as the motherboard’s rear I/O sits within the case and thus requires you to potentially find room for peripherals too.
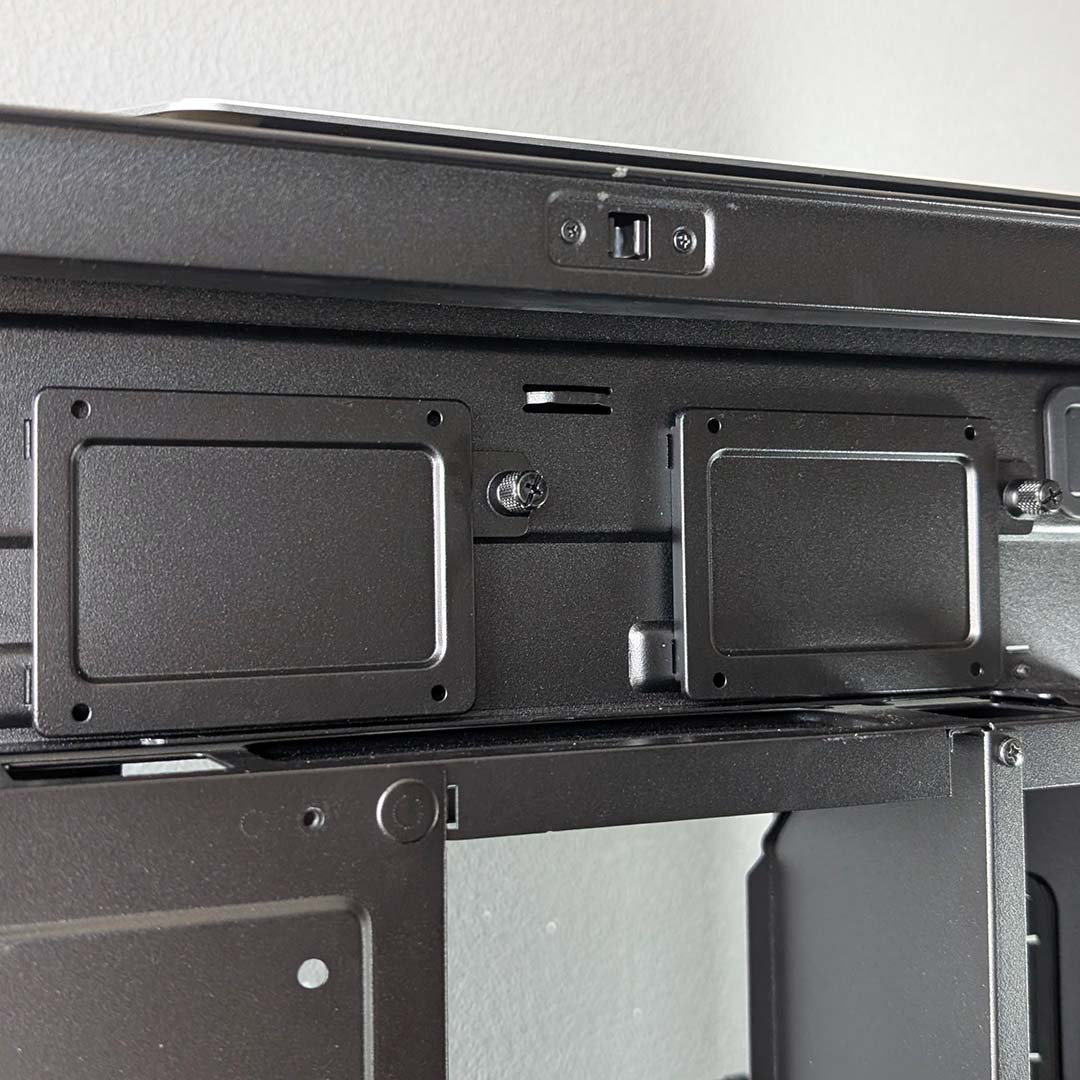
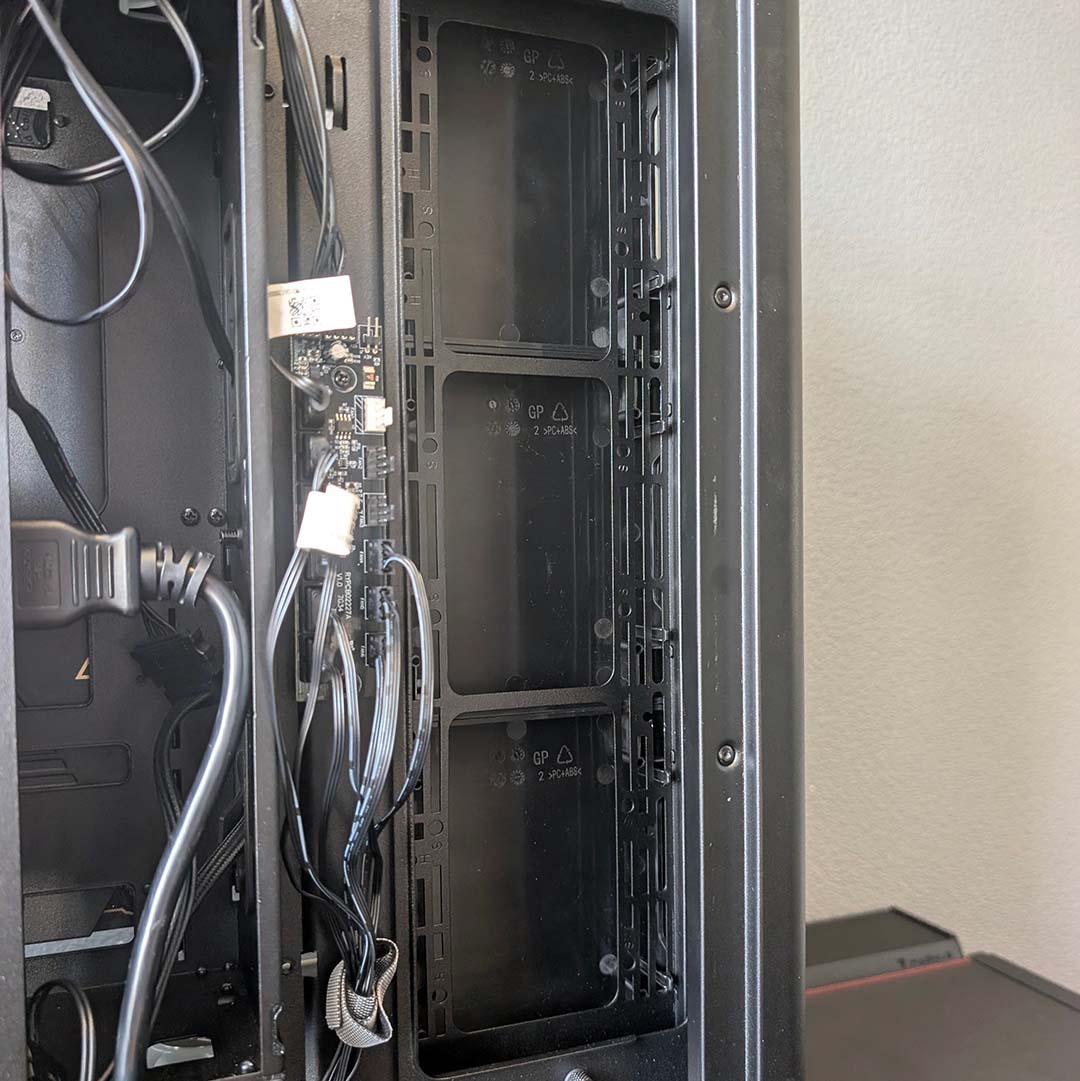
Looking around the rear chamber, it’s difficult not to spot somewhere you can install 2.5/3.5in storage. The most obvious places are the two brackets up top and lone one at the bottom of the chamber. While the higher duo are only capable of supporting 2.5in SSDs, the other serves as a hybrid mount that can hold a 3.5in hard drive instead.
You’ll find space for another six SSDs or four HDDs via the fan brackets that run down the left and right of the case, for a total of up to nine 2.5in and five 3.5in drives. I left SATA storage behind a long time ago, but this is an undeniably impressive selection of mounts for those not exclusively packing M.2.
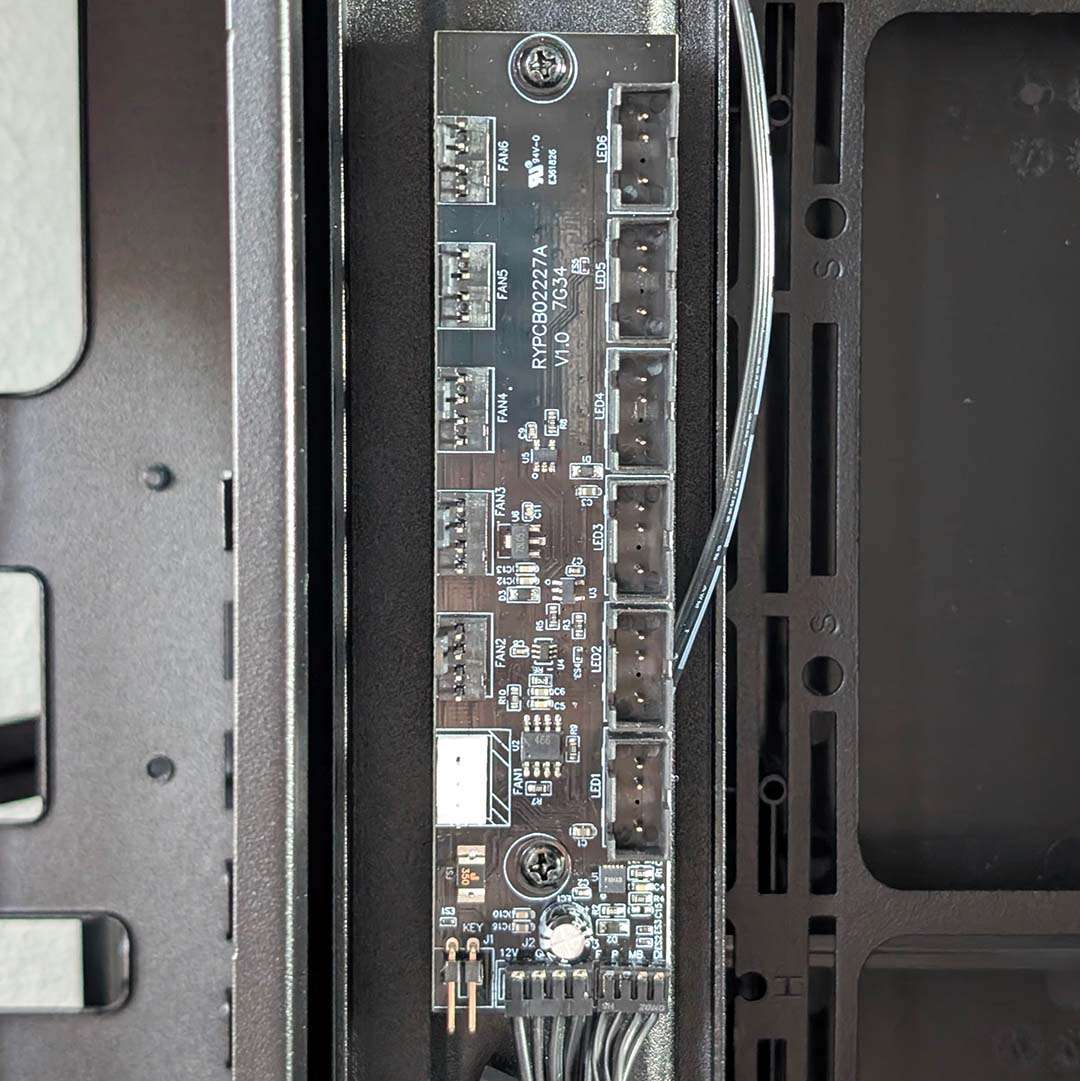
Inside the rear chamber you’ll also find a A-RGB and PWM combo hub, with six headers for each standard present on the petite PCB. This arrangement proved sufficient for my needs, but the bottom three fans and two RGB strips can quickly gobble up space on this accessory, as it’s surprisingly impossible to natively daisy chain them.
MSI installs this hub on the right-hand side of the MEG Maestro 900R, but there are mounts to shift the PCB to the left side if you prefer. Just note that doing so will require you to reroute the bottom fans’ wiring, as the cables aren’t long enough to reach that alternative position. Part of me feels there should be two fans here to better justify the case’s asking price, but I digress.
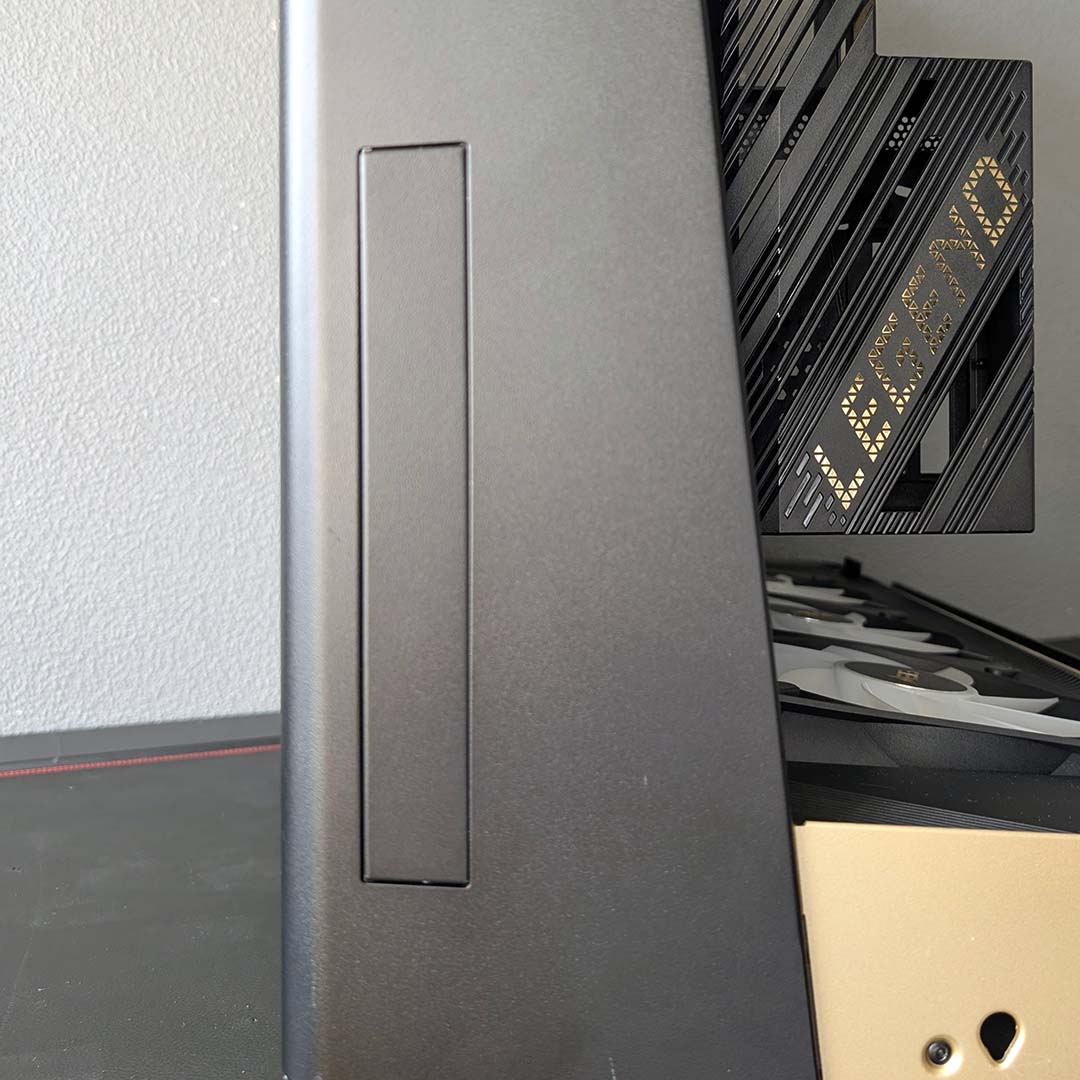
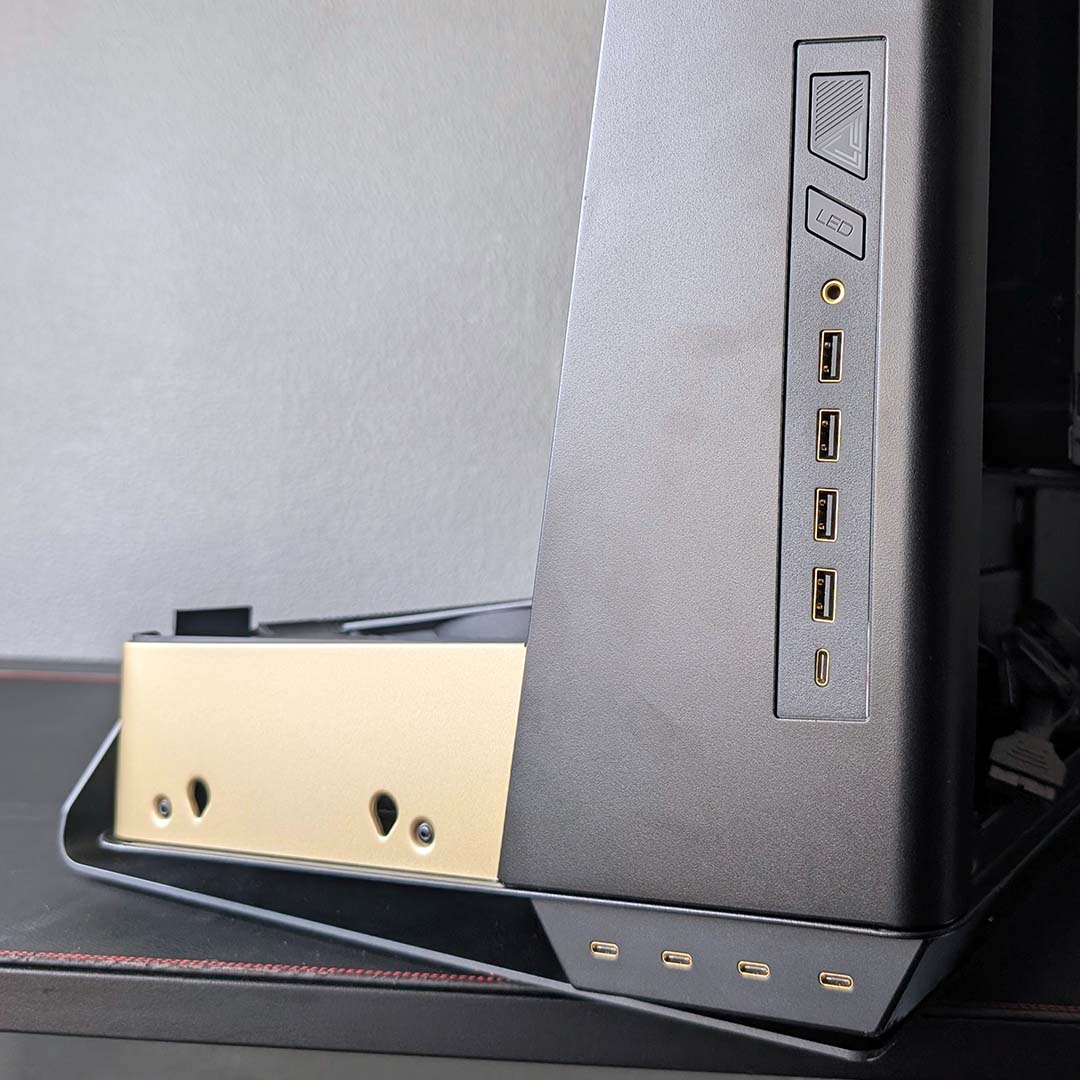
Wrapping up the case’s core design, let’s talk USB ports, as they’re notable here for both their number and customisability. Discussing the former first, the chassis arrives with four 5Gbps Type-A ports, four 10Gbps Type-C connectors, and a single 20Gbps Type-C socket. Note, that you’ll need a motherboard with sufficient headers to support this array to make full use of it. These ports spread across the side, one batch sitting underneath and the other flush to the frame.
Given the enormity of the MEG Maestro 900R, some cables may struggle to reach their intended destination. Thankfully, both the USB-C module and standard front I/O panel are modular, allowing you to shift either part of the entirety of the USB collection to either the left or right side of the case. There’s even a plastic cover to cover up where a hole would otherwise form.
Finally, sitting alongside the USB ports is a 3.5mm audio-out/mic-in port, the power button, and an LED switch. The latter can cycle between preset modes via single presses, or give way to motherboard controls via a three-second long press. I’ve never understood running A-RGB components independently of one another, so I always take the latter route.
Test components
MSI has sent me a MEG CoreLiquid E15 360 alongside the Maestro 900R, further adding to the gold aesthetics of our build. The firm also provided us with its GeForce RTX 5090 Suprim graphics card for this build, which you’ll see pictured in the build log below. However, the graphics card is a display model, so we’ll be assessing thermal performance and acoustics later in this review using a Founders Edition instead.
I’ve also cracked out our MEG X870E Godlike X Edition motherboard for this setup, complete with our one-of-a-kind Club386 M.2 heatsink, under which I’ll be placing a WD_Black SN8100 2TB SSD. With a mind to push performance to the maximum, I’ve also called on an AMD Ryzen 9 9950X3D2 Dual Edition as our CPU pick, flanked by 32GB of DDR5-6000 RAM. Finally, power supply duties fall to an MSI MPG Ai1600TS PCIE5.
Here’s a list of the components I’ll be using:
- CPU: AMD Ryzen 9 9950X3D2 Dual Edition
- Cooler: MSI MEG CoreLiquid E15 360
- RAM: G.Skill Trident Z5 Neo RGB DDR5-6000 CL28 32GB
- Motherboard: MSI MEG X870E Godlike X Edition
- GPU: Nvidia GeForce RTX 5090 Founders Edition
- SSD: WD_Black SN8100 2TB
- PSU: MSI MPG Ai1600TS PCIE5
Build experience
Experienced PC builders will recommend you construct as much of your system outside the case as possible, but the MEG Maestro 900R takes this to another level with its removable frame. Remove four screws and hey presto, you effectively have an open-air test bench at your disposal, complete with power supply shroud and cable routes.
While this may seem gimmicky, I’m very thankful that this option is available as it means you don’t have to contend with the enormous proportions and weight of the main frame. Getting this chassis on its back is difficult enough, and adding the weight of components for the return journey upright is not an experience I’m keen to try.
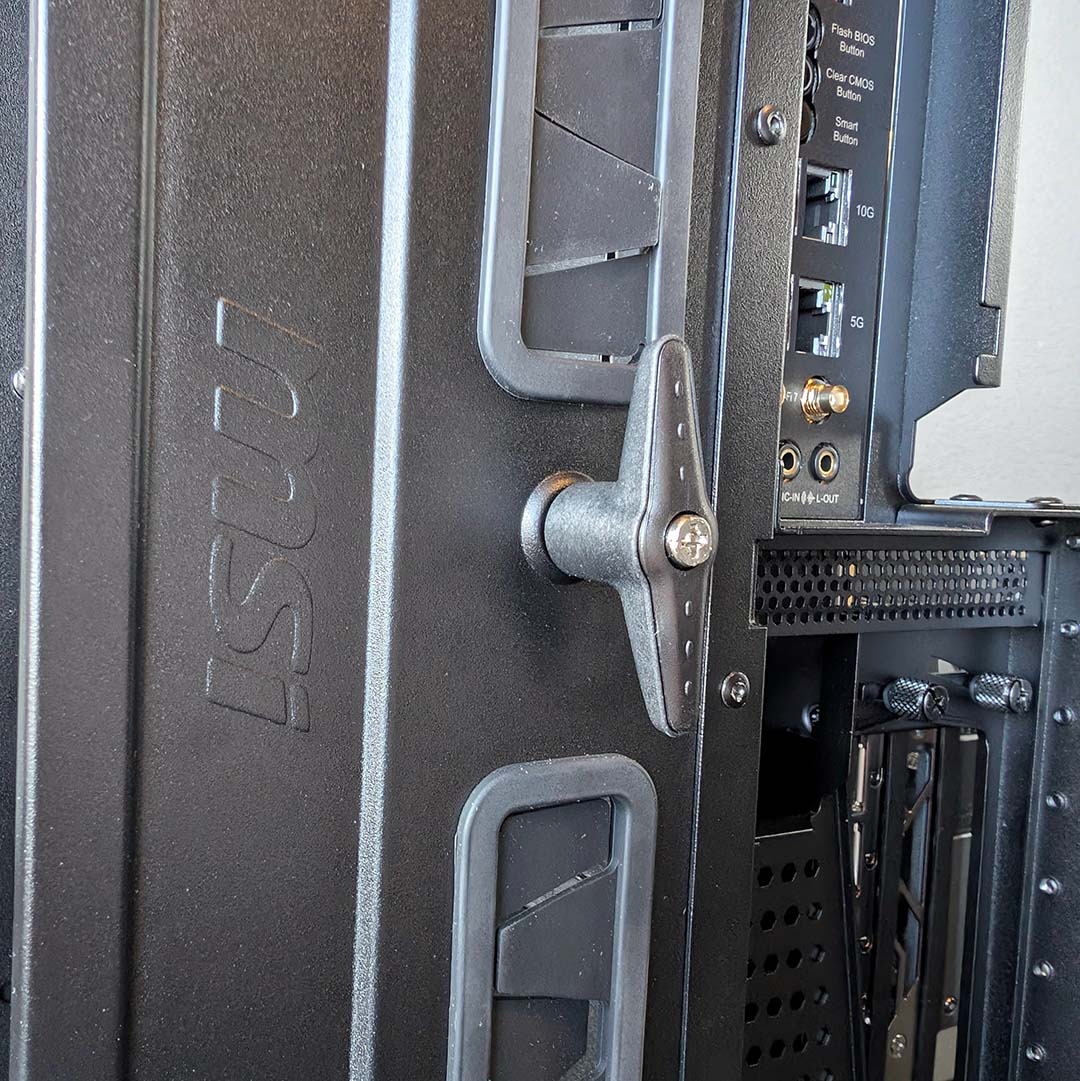
Of course, the frame with all your hardware in tow is by no means lightweight or wieldy either. This is where MSI’s optional handles come into play, which screw into either side of the frame. While this did make moving all my kit back into the main chamber easier, the grip never felt especially comfortable, nor did its plastic cover inspire confidence. However, that could just be the nerves involved with carrying multiple thousands of pounds worth of PC components talking.
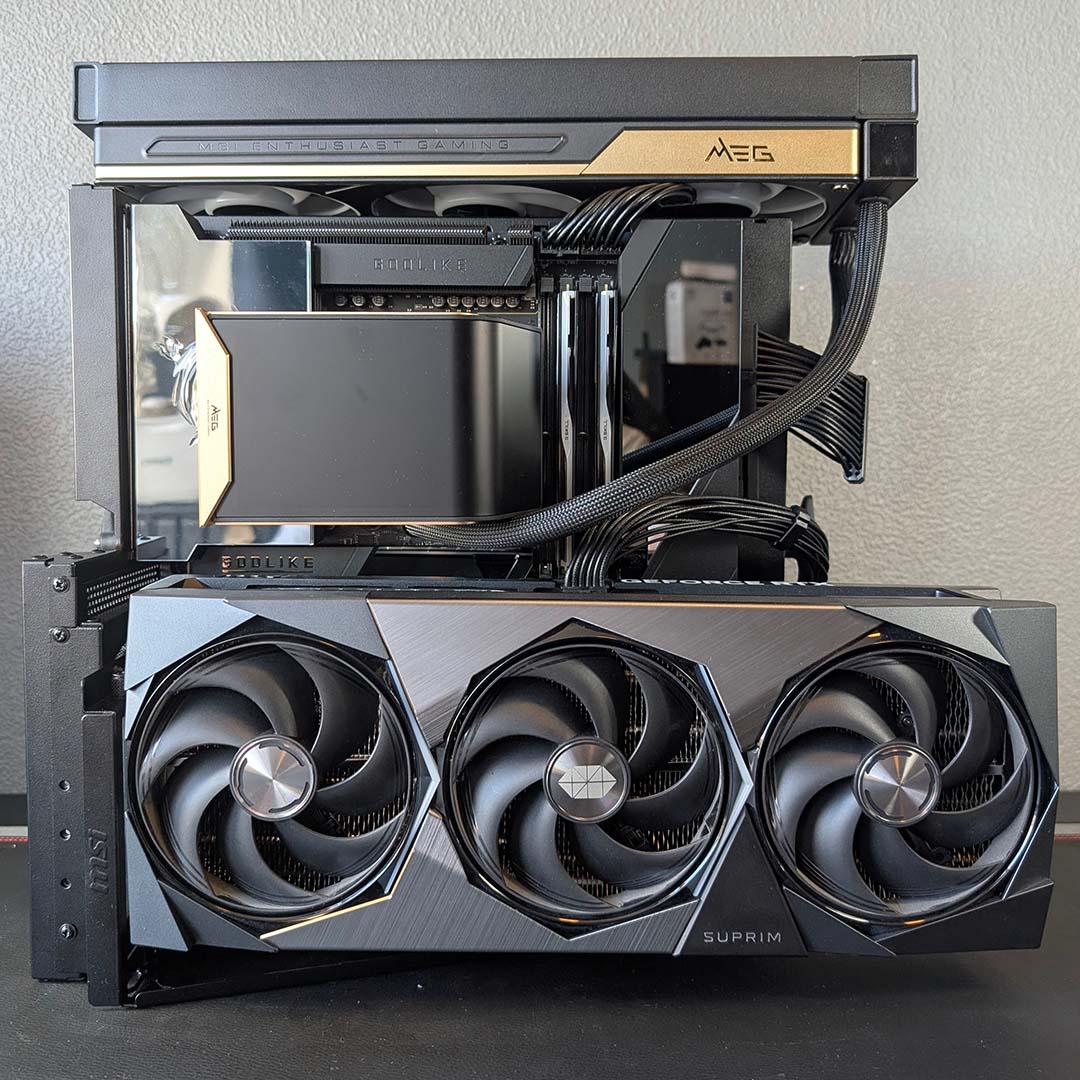
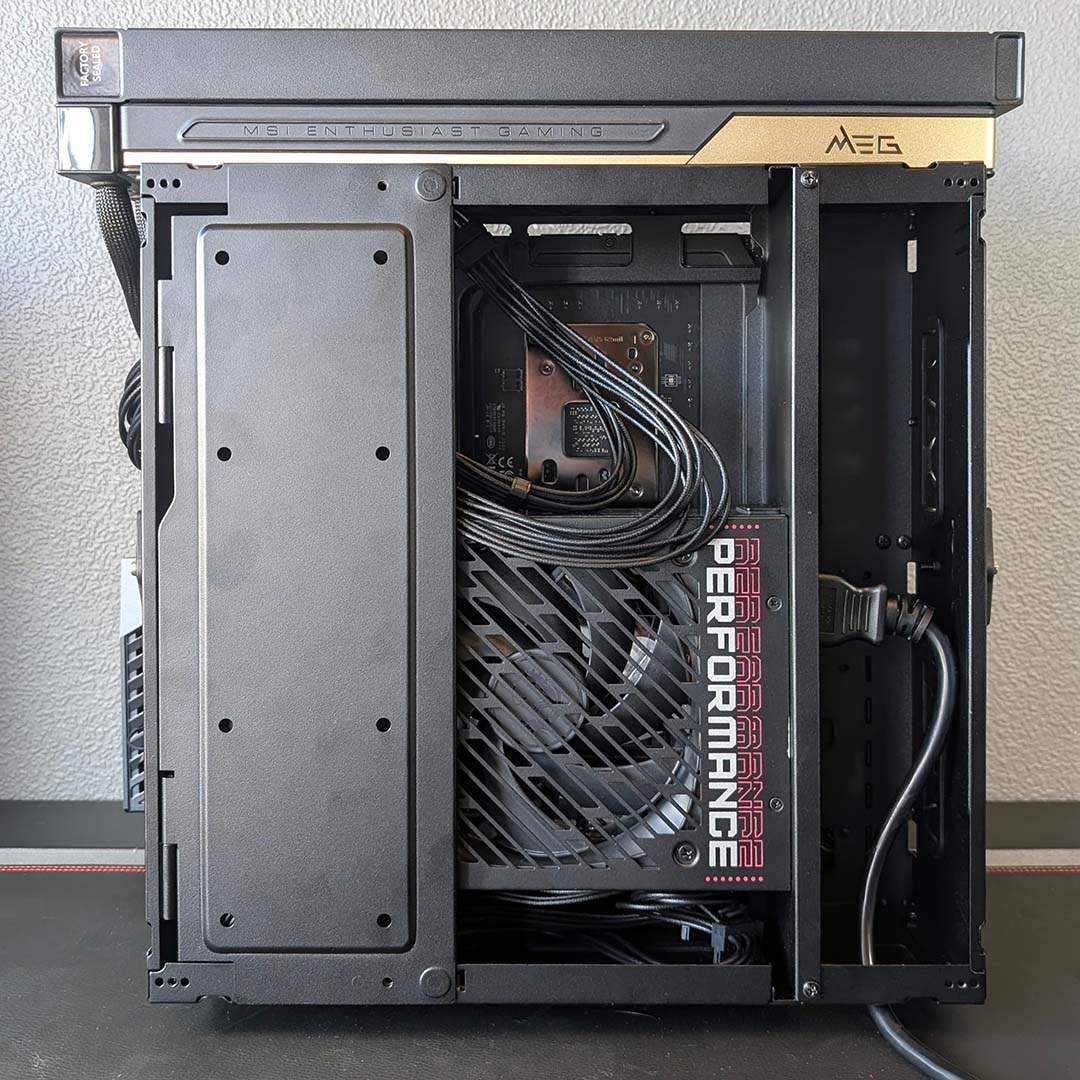
My system came together swiftly outside the case, complete with motherboard cable routing via rubber grommets. This creates a massively efficient start to the build experience, much as I’d perhaps skip installing the cooler here, as handling the frame and radiator is unceasingly clumsy.
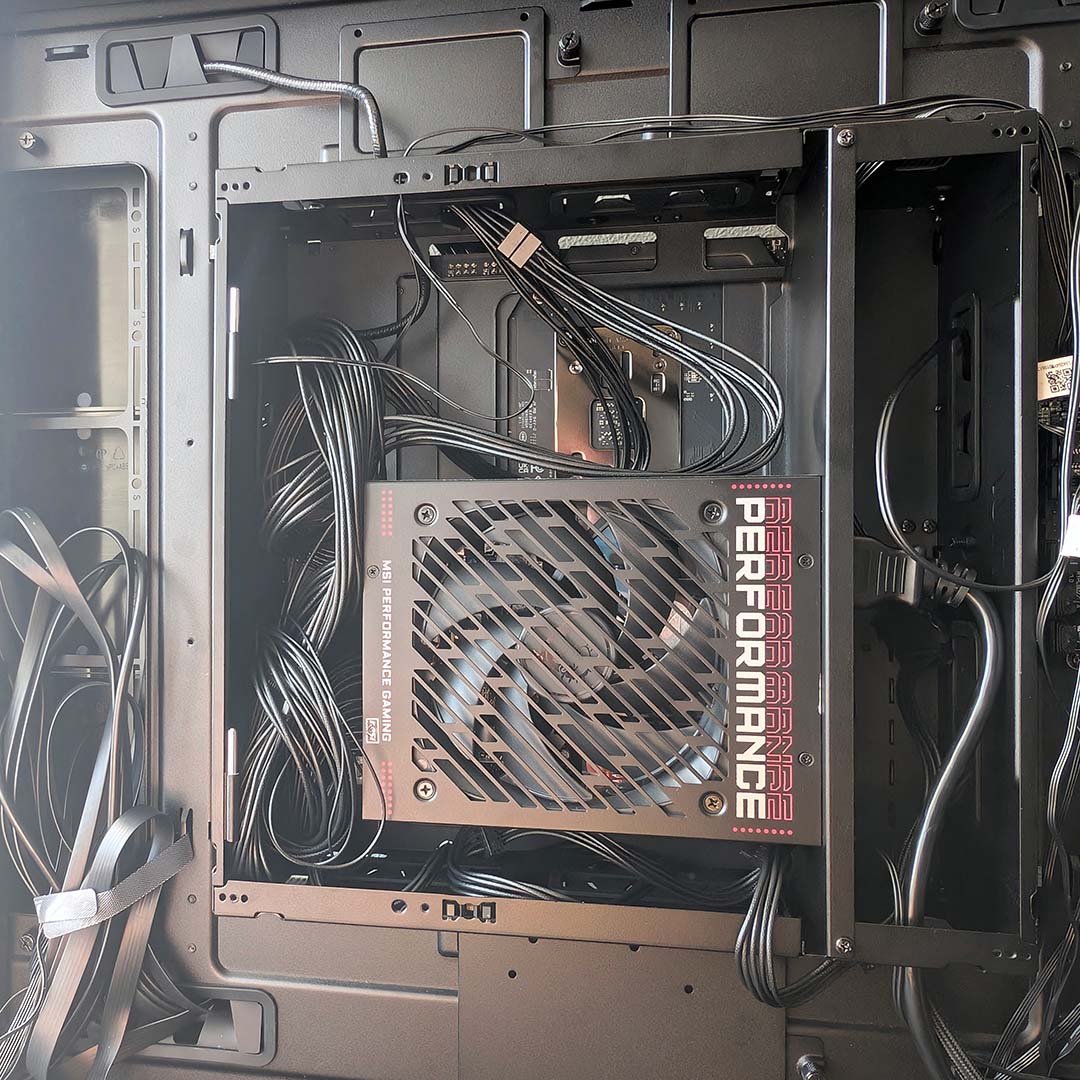
While I have practically no issues with the front of the frame, I’m less keen on how the rear stacks up. Despite only running the bare essentials of power supply cables, namely for 24-pin motherboard, 16-pin GPU, SATA drives, and two CPU power connectors, working in the shroud still feels oppressively small and fiddly. There’s also no means of cable management in here, with MSI instead providing a metal sheet to hide your shameful bundle of wires.
Connecting my power supply to the mains was also very fiddly. As my pictures above show, I connected the C19 connector outside the case, but there’s little point doing this as you’ll need to route the wire through a cut out in the bottom of the main case. This then means pre-routing the plug through the chassis, getting the removable frame in place, and temporarily unscrewing the power supply support, before the setup finally comes together.
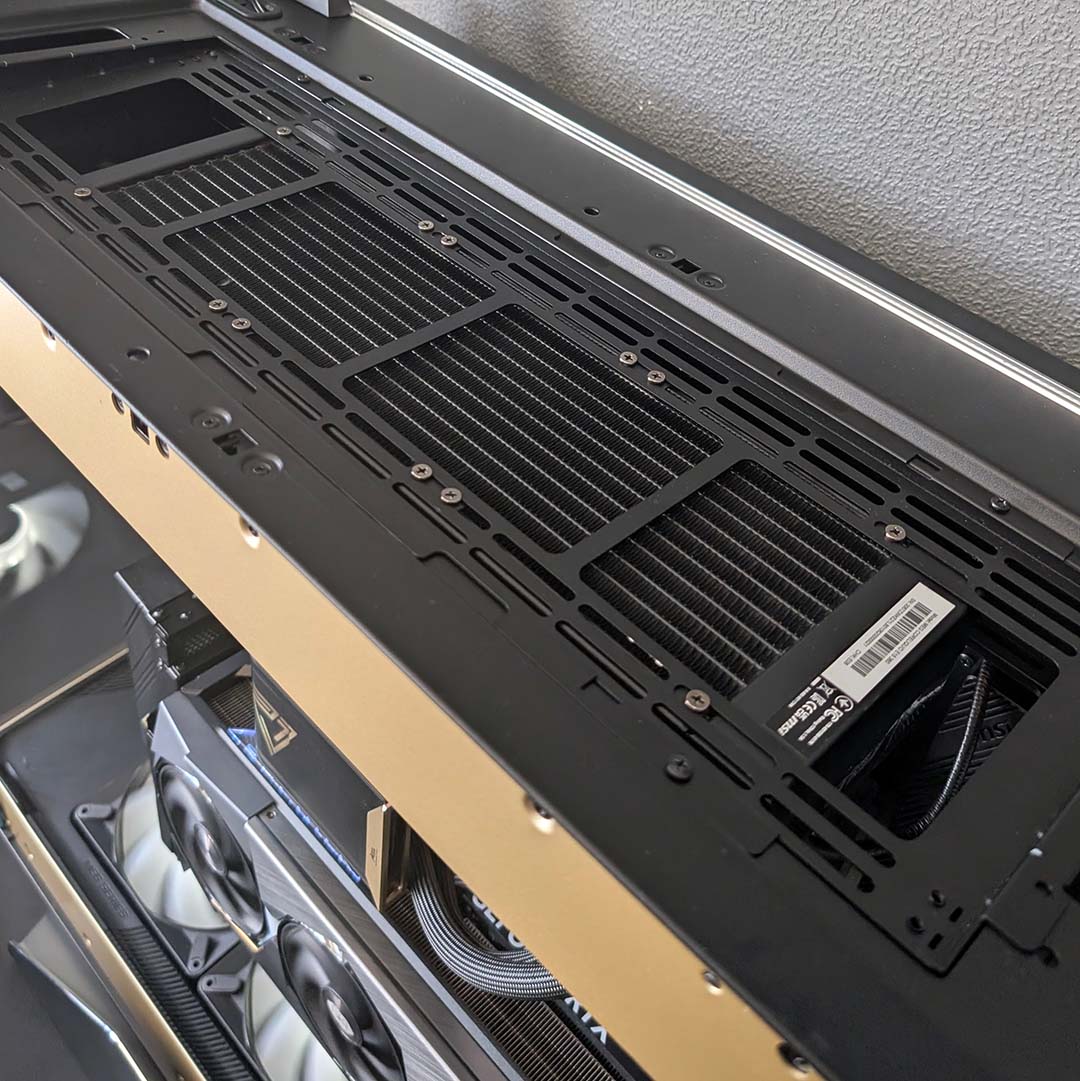
Before putting the system frame back into the main chamber, I detached our MEG CoreLiquid E15 360 from the core build and set about screwing its radiator into the case’s removable top bracket. Within a few minutes, our cooler was ready and waiting to marry with our CPU, resting snugly under a dust filter.
Holding our build by the two handles I mentioned earlier, I carefully slotted the metal teeth into place and returned the four screws to their holes. I’ll admit that this is a more than slightly nerve wracking process to conduct while the case is upright, but it’s certainly doable. The wisest option would be to lay the MEG Maestro 900R on its back for the safest installation, but I simply didn’t want the hassle of lifting a heavy and unwieldy setup on my lonesome.
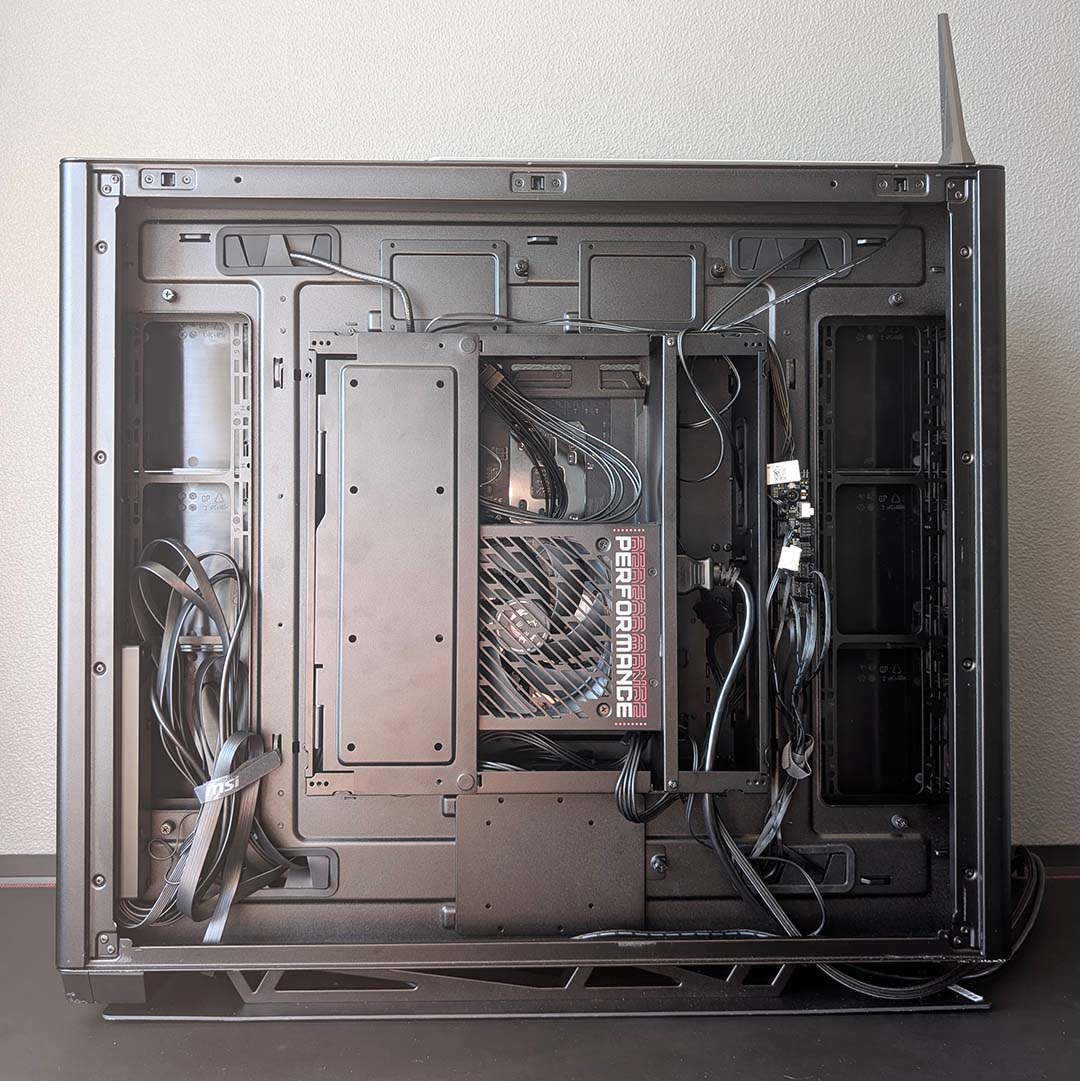
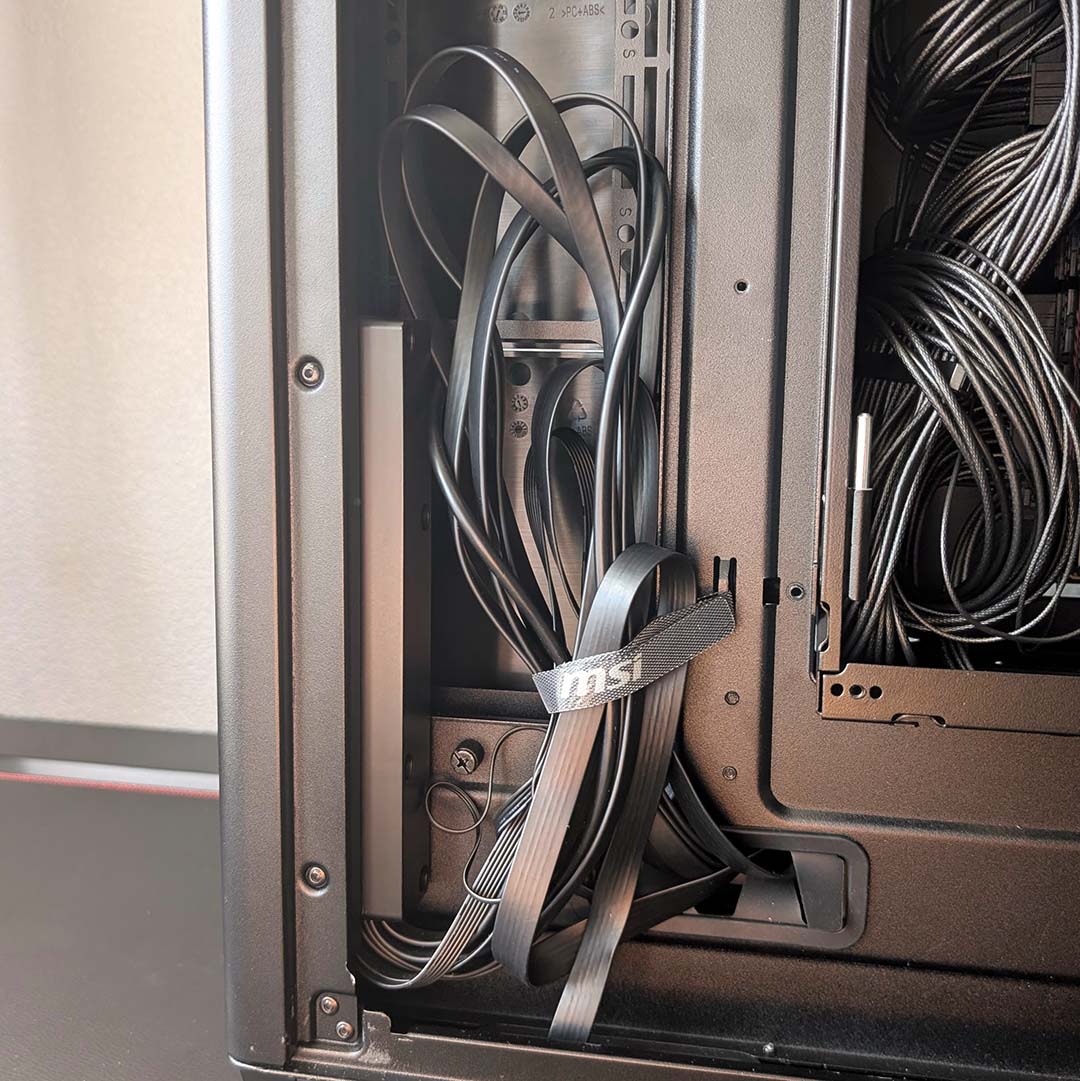
Next comes case cables, and it’s here that the case’s sleek sheen stumbled a bit. With six wires feeding out from the front I/O alone, each are fighting for space in a surprisingly tight chamber. They face a similar bout through the bottom-most rubber grommet too, as routing them through the side via the power supply shroud is decidedly difficult.
There’s a lot of slack to handle in the rear chamber once you’ve wired everything up. The bottom trench simply isn’t wide enough to deal with this bundle in a neat fashion, leading me to haphazardly make use of the dead space where storage and fans could live. This approach works but wouldn’t be available to those with 2.5/3.5in storage or fans on this side, necessitating the spread of this silicon spaghetti into a few batches.
While twist and zip ties fit well into the grip points across the rear chamber, MSI’s collection of Velcro straps don’t marry nearly as conveniently, as the slots are small and sparse. I much prefer using the latter where I can, for the sake of sustainability and ease of later adjustments, but doing so in this case feels more difficult than it should.
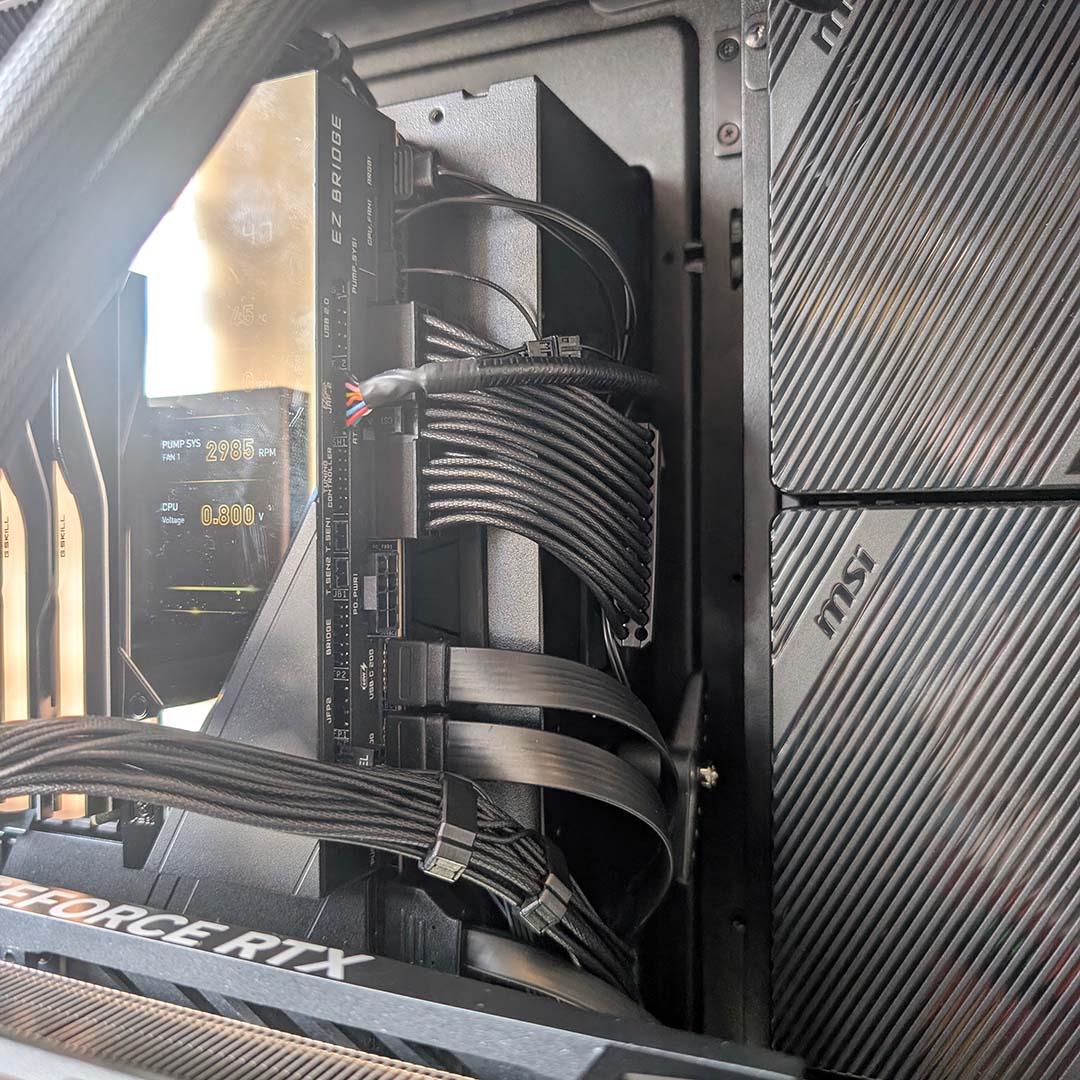
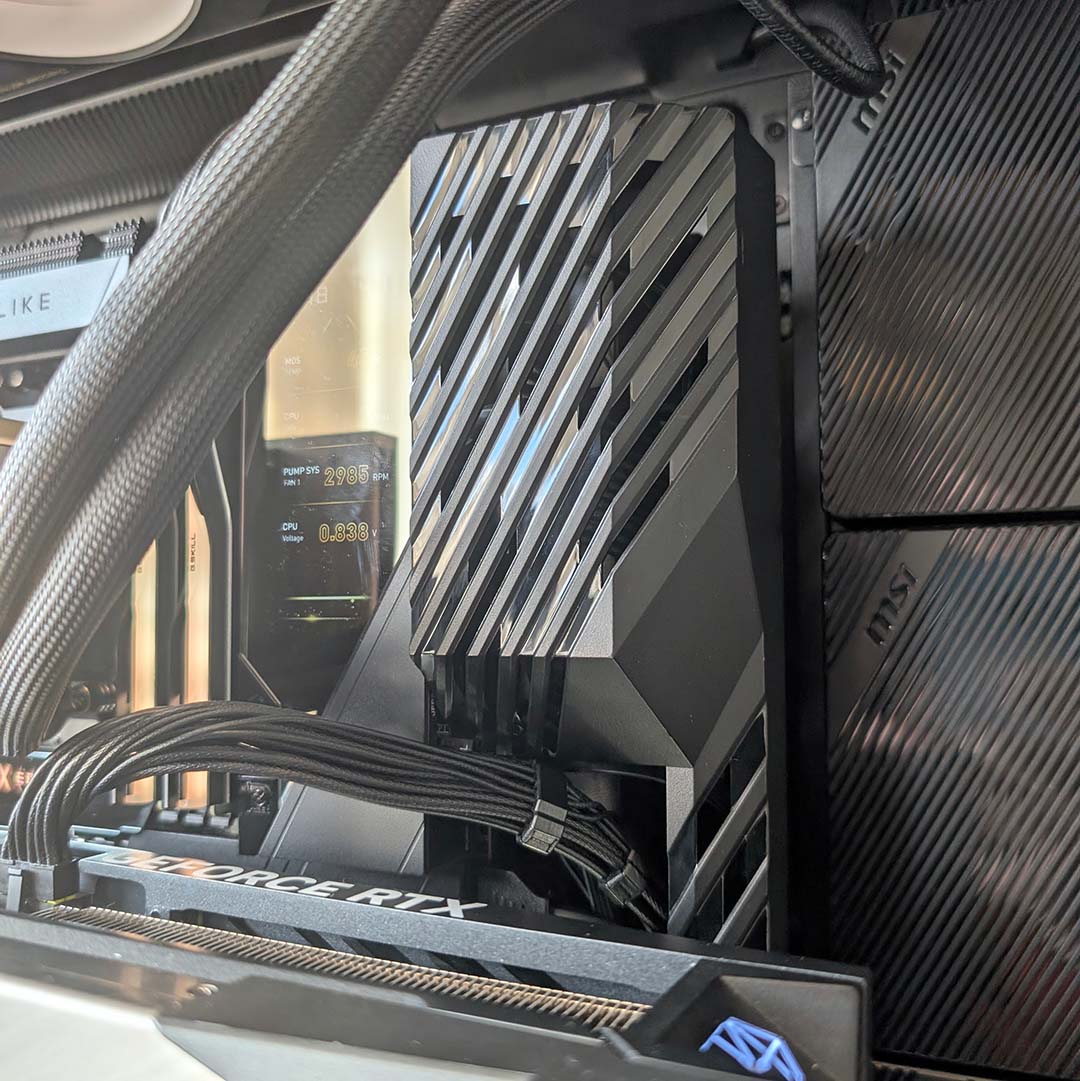
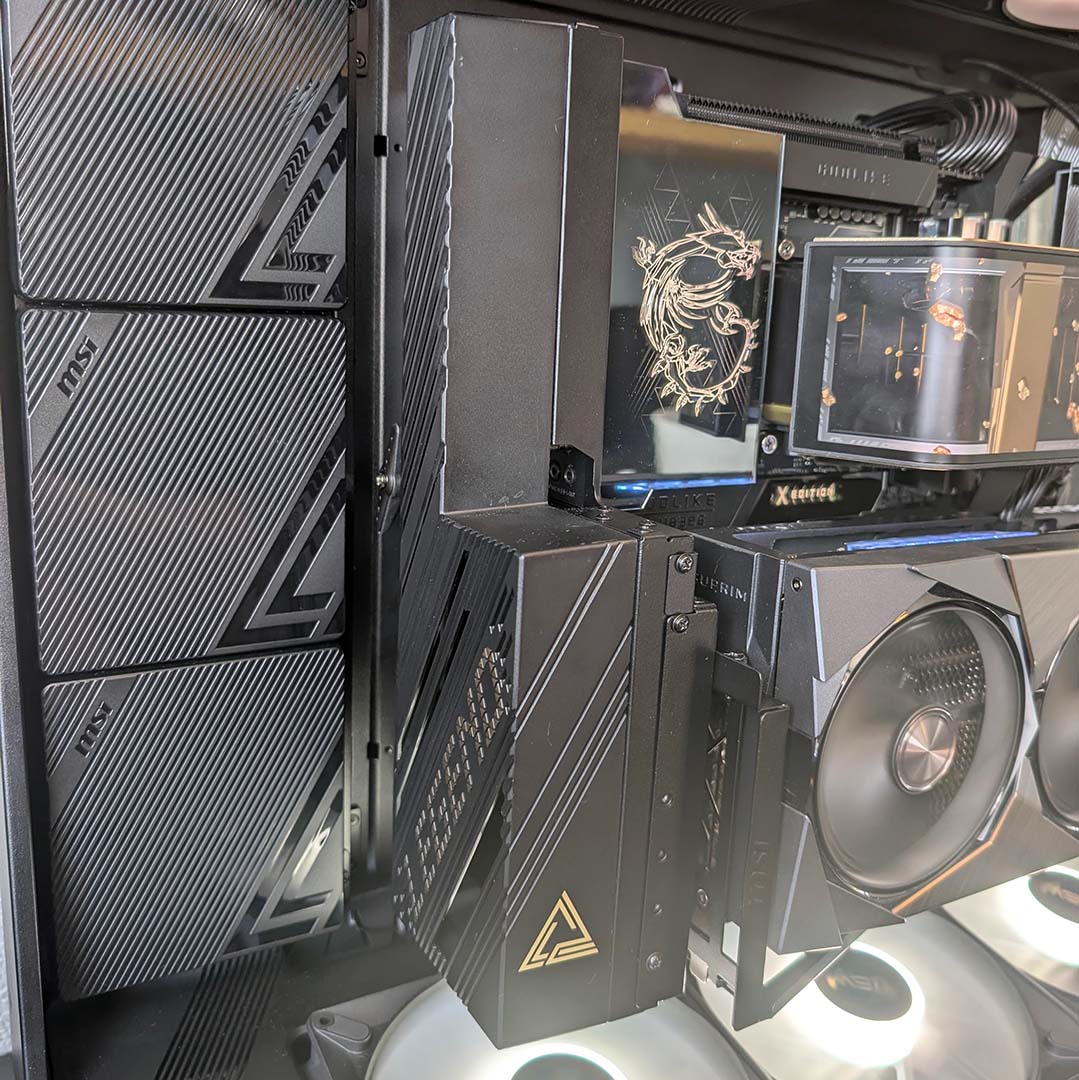
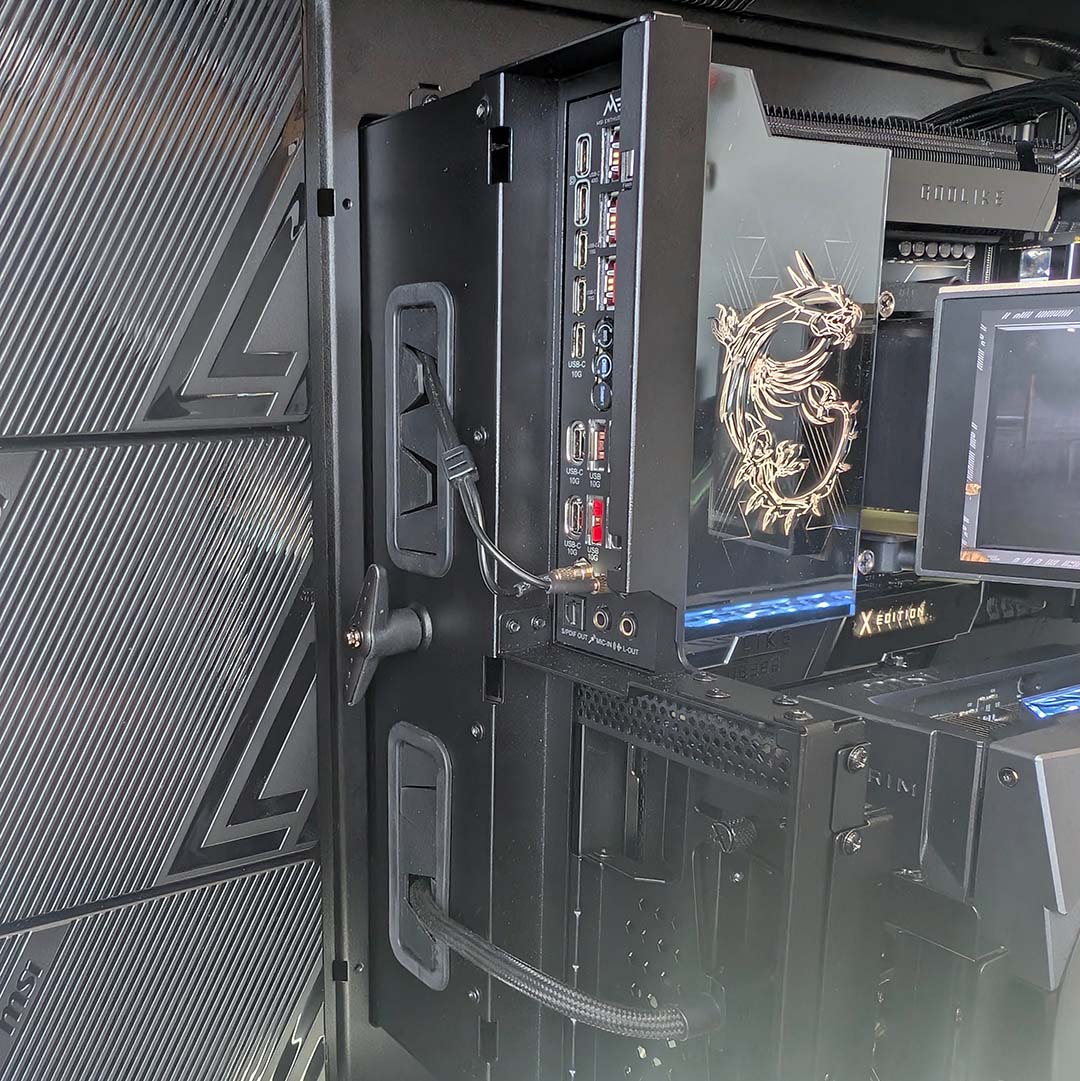
As I mentioned earlier, your motherboard rear I/O panel and graphics card display outputs both sit inside the MEG Maestro 900R. This means you’ll need to route cables that would typically sit outside the case through the main chamber, into the rear, and out of the two rubber grommets on the bottom of the case.
This is as inconvenient as it sounds, meaning you’ll need to open one of the side panels in order to access any of these ports. Moreover, the introduction of more cables compounds the difficulty you’ll already face with getting the rear chamber tidy. As such, I’d strongly advise building in this case with a ‘set and forget’ mindset, because making any kind of semi-frequent adjustment is simply too inconvenient.
Of course, the large collection of front USB ports does offset this problem to a degree, but there’s no way around connecting your PC to your monitor or Ethernet by these means. On the plus side, MSI does provide a grommet up top for your Wi-Fi antenna, which I much prefer as a means of networking in this case.
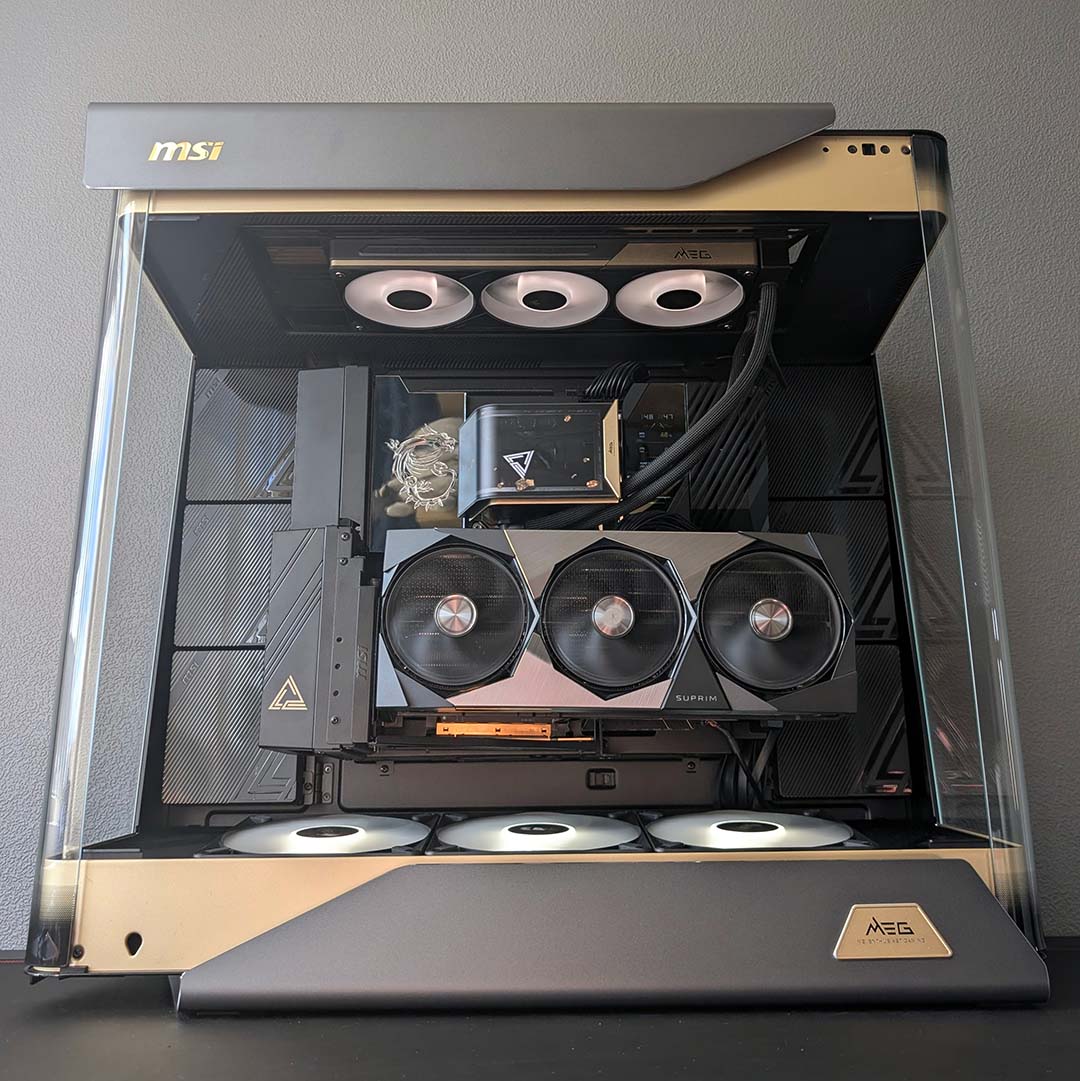
What began as a promising build outside the case, became one of persistent frustration once the frame returned to the proverbial mothership. Piecing together our test system inside the MEG Maestro 900R took around two hours in total, far beyond my average one-hour target for smaller cases.
This was in large part due to fiddly cable management, but the size of the chassis also plays into this time sink. Rather than being able to quickly spin the case around or shift myself over slightly to swap between chambers, I physically have to walk around my desk to work on this build, in what feels like a bad vaudeville sketch.
While I did feel some satisfaction at seeing the complete build boot without issue on my first attempt, this came with a mix of relief as well. I was both so physically and mentally exhausted from working on this case, that I was all the more thankful to not face any troubleshooting. My fatigue did at least make me sit and absorb the final finish for a while, which is undeniably uniquely striking.
Performance

My office is the chilliest it’s been for many months now at 20°C, which stands to benefit the thermal performance of the MEG Maestro 900R. I’ll report the absolute temperatures we capture in our testing below, and note how they broadly compare relative to other large cases we’ve tested with this ambient delta in mind.
Despite running a largely bespoke setup, I’m still using the same fan settings I’ve used in prior PC case reviews, mirroring our 9950X3D test bench. More specifically, the system’s pump is running at 100% while all fans spin at just 30%.
It’s impossible for me to measure noise directly from 30cm away from the intake as it’s on the bottom of the case. Instead, I’ve taken a reading at the same distance from the front panel and top exhaust. In doing so, noise levels measure at a reasonable, nearly inaudible 34dBA.
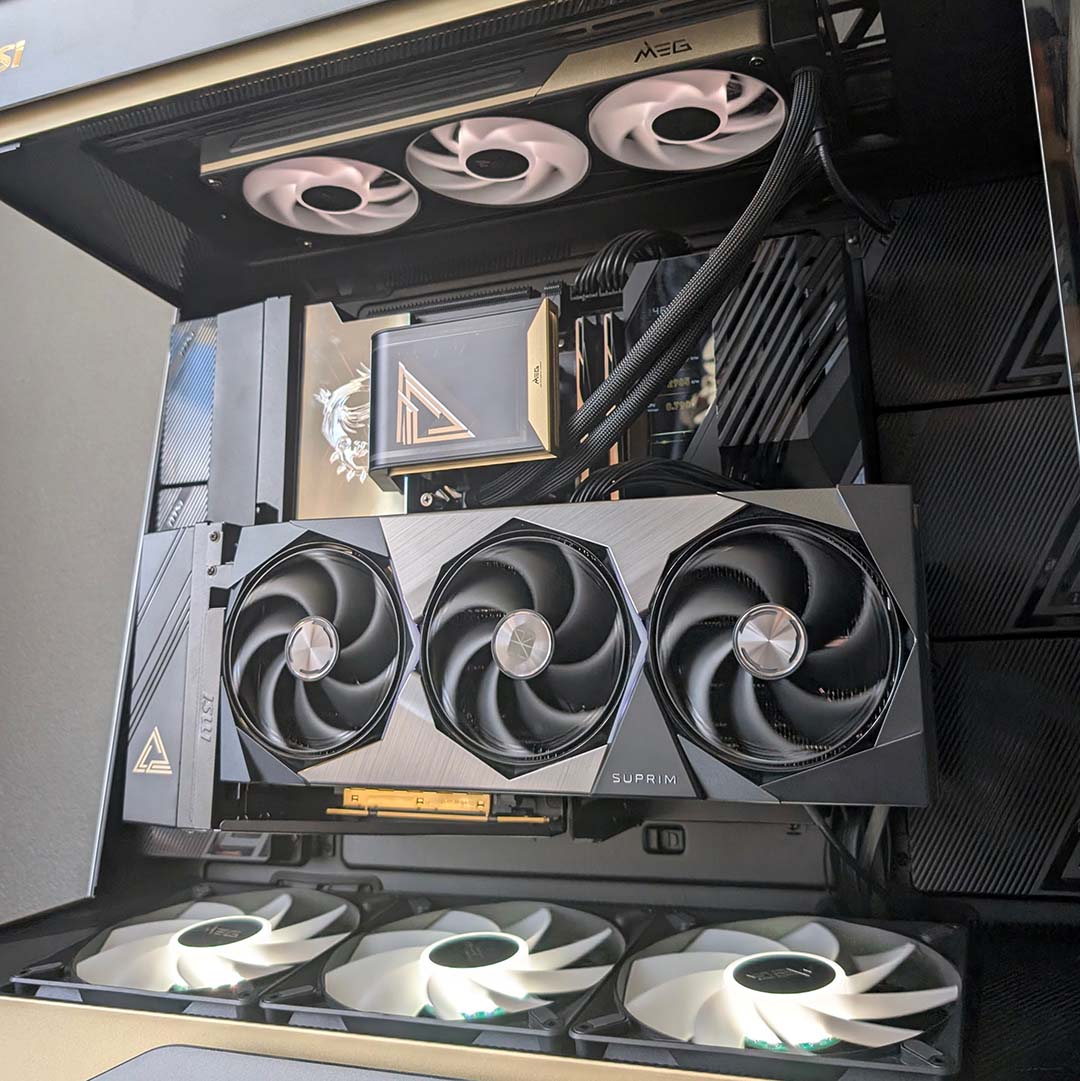
From a cold boot, our 9950X3D2 is nice and chill at 27°C. Temperatures soon rise in the wake of a 10-minute Cinebench 2026 benchmark, with core temperatures peaking at 81°C. This is about what we’d expect from this processor, with the chip hitting a maximum 84°C in our test bench while my office was 22°C. A good result, but one that indicates all that extra space isn’t greatly benefitting baseline cooling.
Moving on to gaming, the stock Cyberpunk 2077 benchmark naturally proves less punishing on our CPU with core temperatures rising up to just 69°C. Our GeForce RTX 5090 Founders Edition similarly cruises at a cool 69°C. I’d guess the card could run slightly cooler in a horizontal orientation, with more direct airflow from the intake fans, but this may have knock-on effects for the processor.
Our test setup shows the MEG Maestro 900R’s airflow is solid, using just the stock fans combined with a great water-cooling system, with plenty of thermal headroom to push RPMs down in favour of lower noise. Of course, there’s room to bolster cooling potential further via more fans or radiators, which would also further the showpiece aesthetics of the case.
Conclusion
Despite my gripes with the MSI MEG Maestro 900R, I can’t deny that I love how hardware looks inside it. The trio of tempered glass panels combined with a centre alignment really does make a system feel like a showpiece. The black-gold accenting may not suit all tastes, but they certain tickle mine.
I’m glad those looks don’t come at the expense of performance either, with rock-solid temperatures and noise levels. The addition of accessories such as the fan hub, vertical GPU mount, and even frame carry handles all help increase value in the face of that extraordinarily high asking price. That’s not forgetting the wealth of USB ports too.
However, for £799, I’d expect nothing less than a dream PC case and the chassis simply doesn’t measure up to that level – it’s also worth stepping back here, as that really is an absolutely extraordinary price for a case. Meanwhile, the sheer size and weight here exclude it from those without the most spacious setups, and even those that can accommodate its proportions should prepare for a difficult build process.
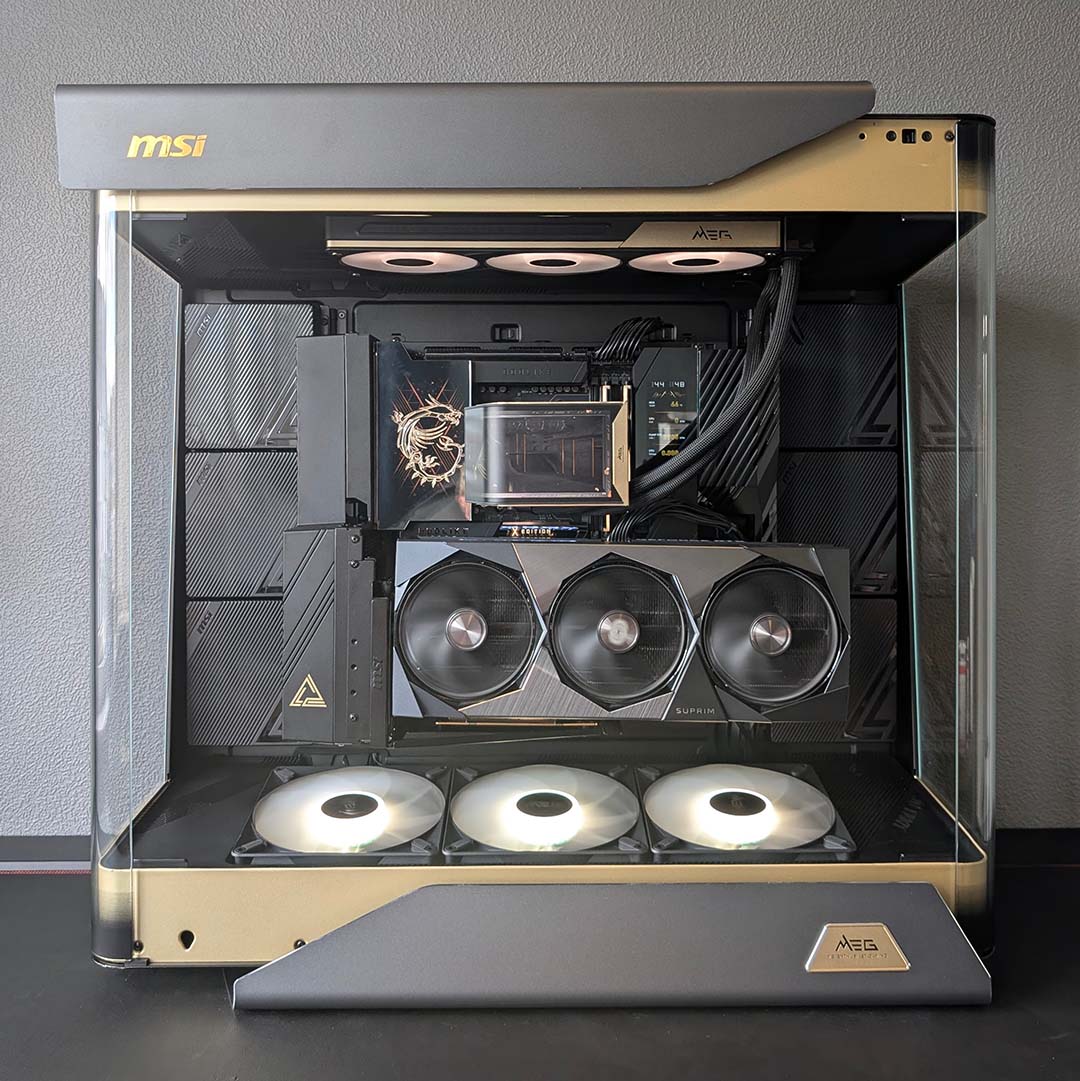
Cable management is a chore in this case as well, with the surprisingly claustrophobic rear chamber growing all the more crowded once you introduce display cables and peripherals into the mix. Putting together a system inside this chassis isn’t for the faint of heart, to the point that I wonder why MSI don’t sell it as a part of a prebuild bundle for the sake of consumer convenience.
There isn’t anything else on the market like the MEG Maestro 900R, and that uniqueness is commendable, and I’d love to see a revised version that addresses some of the flaws I’ve discussed. Even then, though, it would be hard to justify the sky-high asking price.
Most folks would be better off with a far less expensive and smaller case. If you want to build an outstanding showcase system, though, I can certainly see an appetite for this chassis among enthusiasts with deep pockets and oodles of room in their setup.