
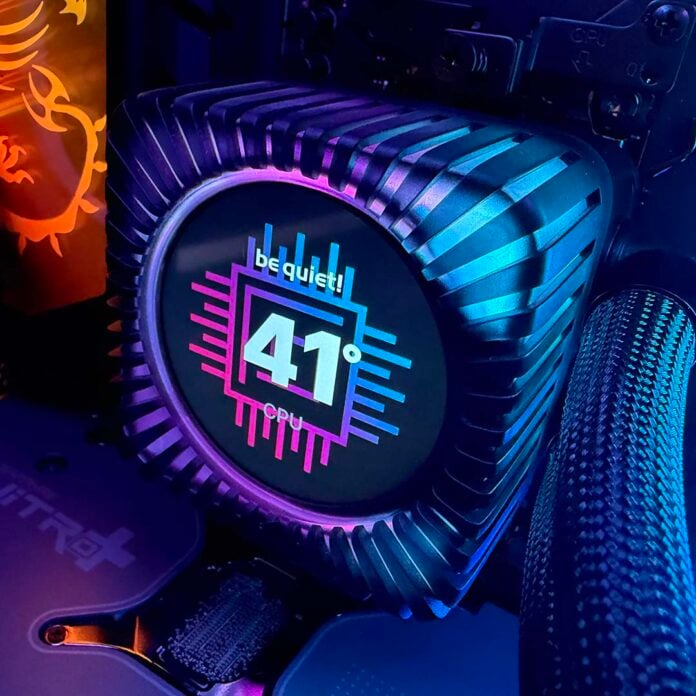
After years of only offering screen-free cooling, be quiet! has finally relented and fitted an LCD to its latest AIO cooler. The result is the Light Loop IO LCD 360, a very flashy-looking contraption that not only has a screen on top of its pump block, but also a circuit of RGB LEDs surrounding it.
Add in a trio of RGB-equipped fans, and you have a veritable light show here. It’s a far cry from the minimal all-black designs for which be quiet! is usually known. Speaking of which, this cooler is available in a white version as well.
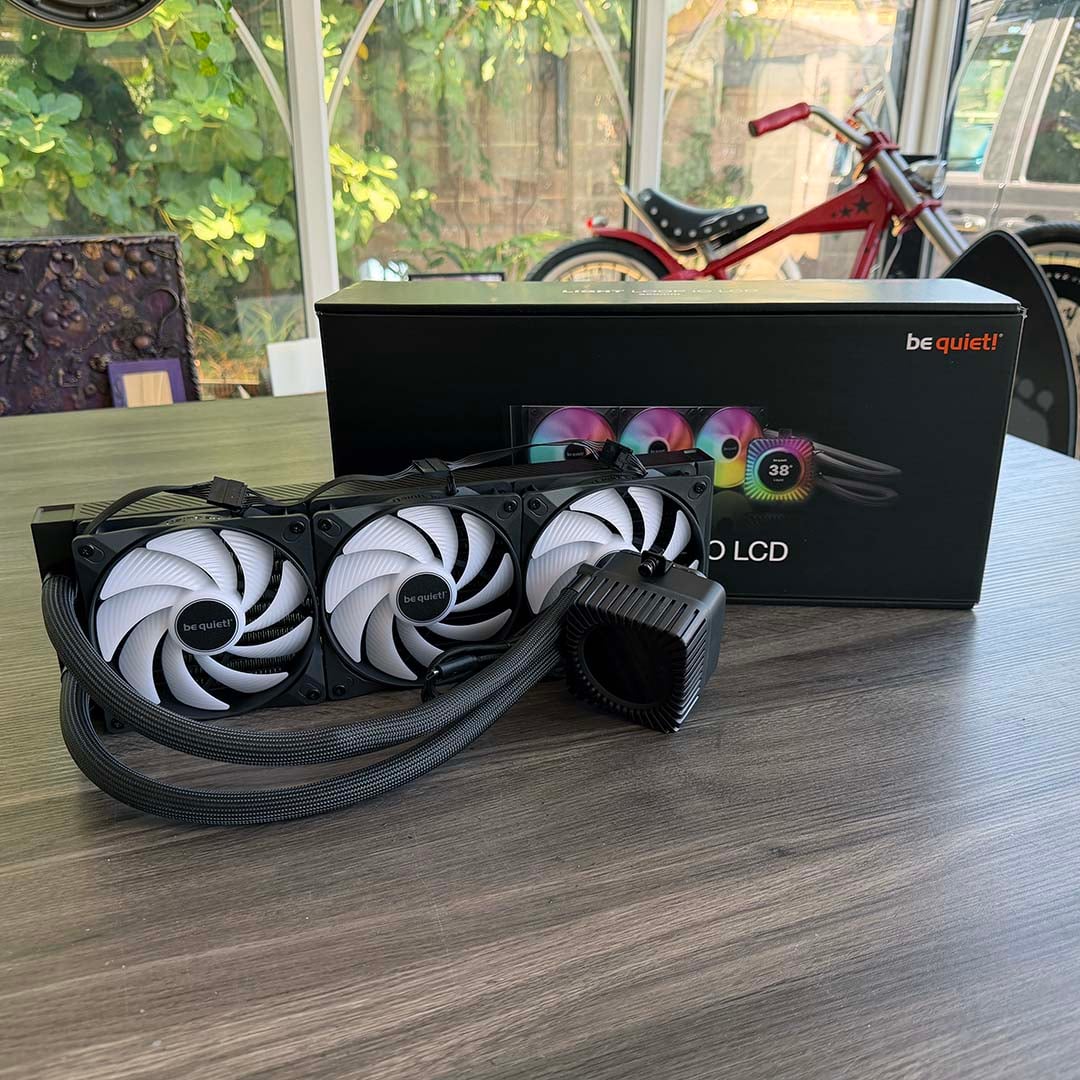

be quiet! Light Loop IO LCD 360
£179.99 / $249.90
Pros
- Very quiet operation
- Gorgeous lights surrounding pump
- Bright, good-looking LCD
- Fill port and extra coolant included
Cons
- Cooling could be better
- Some software quirks
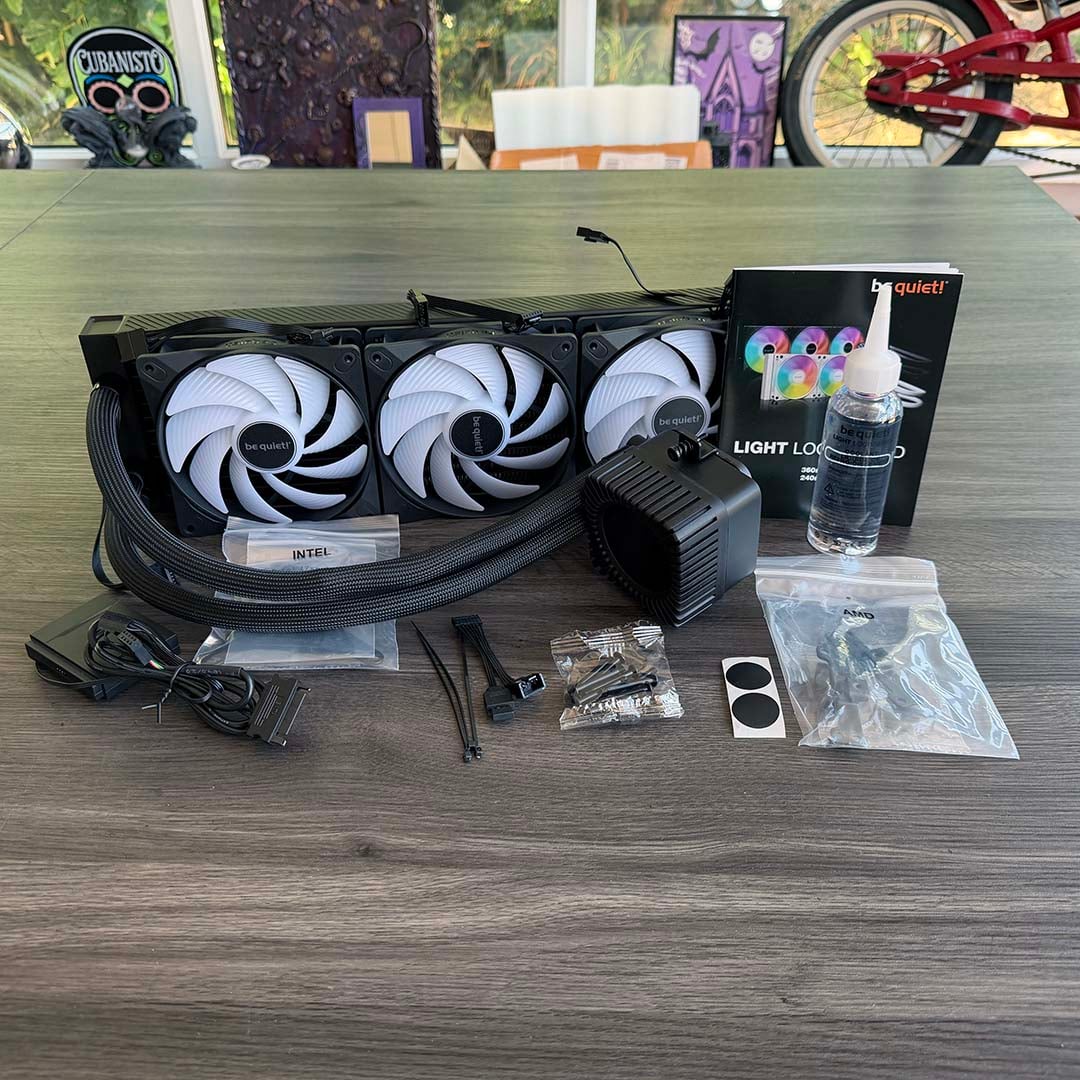
- Fans aren’t pre-installed
Club386 may earn an affiliate commission when you purchase products through links on our site.
How we test and review products.
It’s about time, isn’t it? The likes of MSI, NZXT, and other companies have all offered screens on their coolers for a long time now, and it’s taken a while for be quiet! to catch up. Is the result any good, though, and can this new design live up to the veteran cooling firm’s usual standards, with low noise and decent thermals? I’ve put the 360mm model through its paces on our Ryzen 9 9950X3D test rig to find out.
Specs
| Specifications | |
|---|---|
| Socket support | AMD: AM4, AM5 Intel: LGA1700, LGA1851, LGA115x |
| Radiator dimensions | 397 x 120 x 27mm |
| Tube length | 400mm |
| Pump speed | 1,500-2,900rpm ± 10% |
| Display | 2.1in IPS (480×480) |
| Fan size | 120mm be quiet! Light Wings LX PWM (x3) |
| Fan speed | 0-2,100rpm ± 10% |
| Fan airflow | 61.8CFM (per fan) |
| Fan pressure | 2.51mm H2O (per fan) |
| Extras | Magnetic I/O hub Coolant bottle Fill port |
| Price | €229.90 / $249.90 / £179.99 |
Design
The first thing I noticed while unboxing the Light Loop IO LCD 360 is that, despite all its mod cons, it still requires you to install all the fans and wire them up yourself. This isn’t a huge issue, seeing as we used to do that all the time in the past anyway, but it adds another level of faffing to the installation process.
Comparably, several of the other latest coolers I’ve tested have their fans pre-screwed into the radiator, with their wires daisy-chained together, all ready for you to just fit the unit into your case and plug it in. The MSI Core Liquid P22 360 is one example, as is the Arctic Freezer Liquid III Pro ARGB, and they’re both cheaper than the be quiet! cooler here.
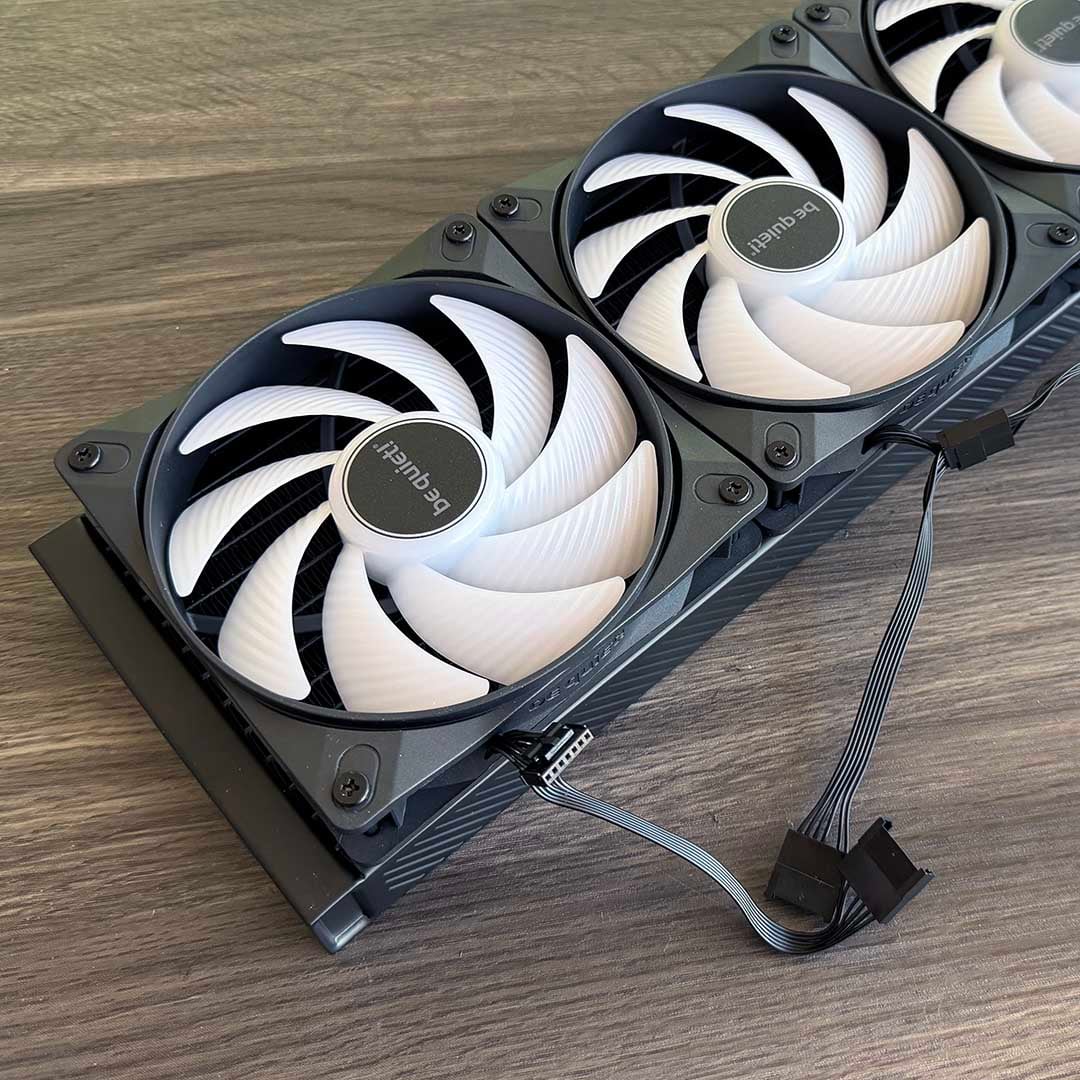
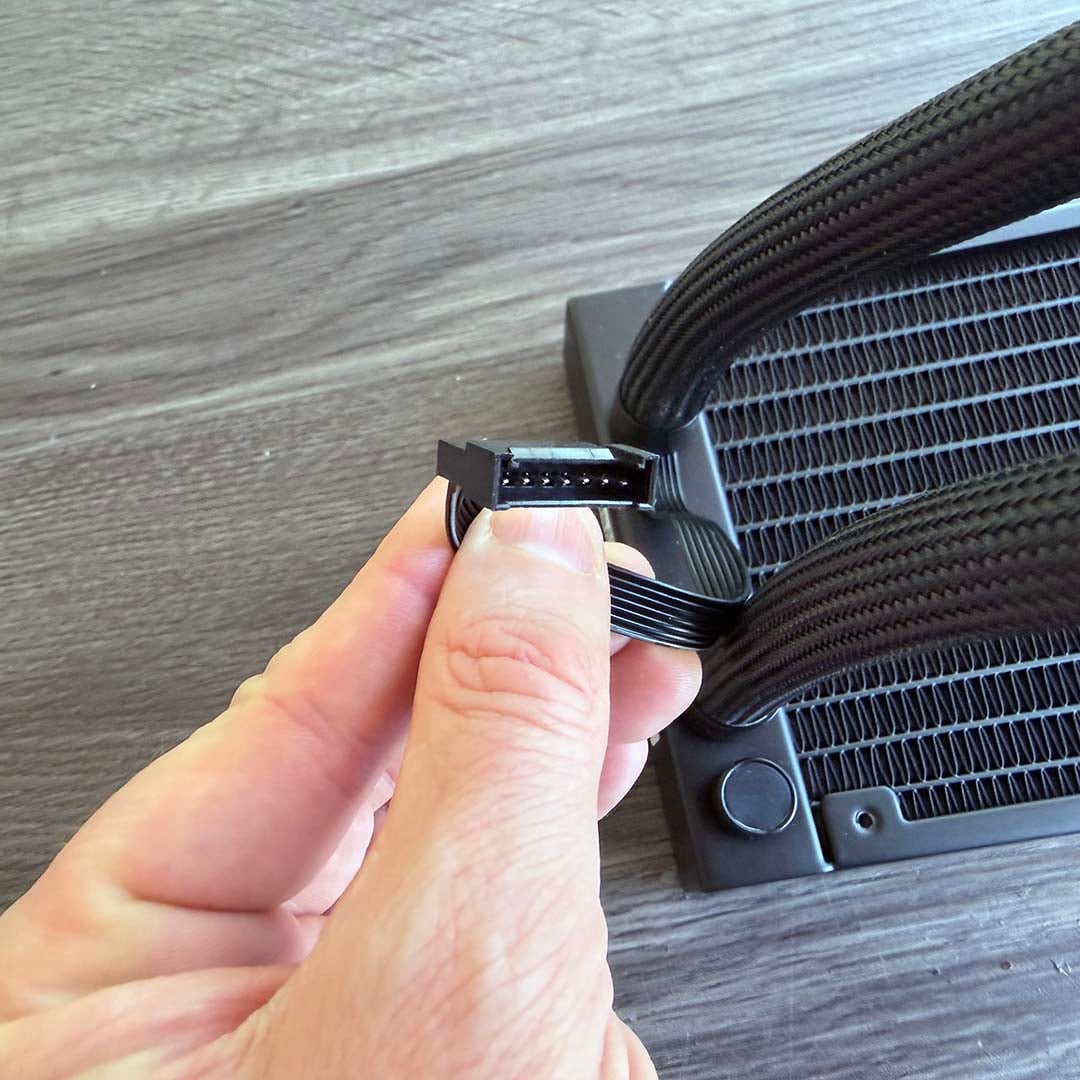
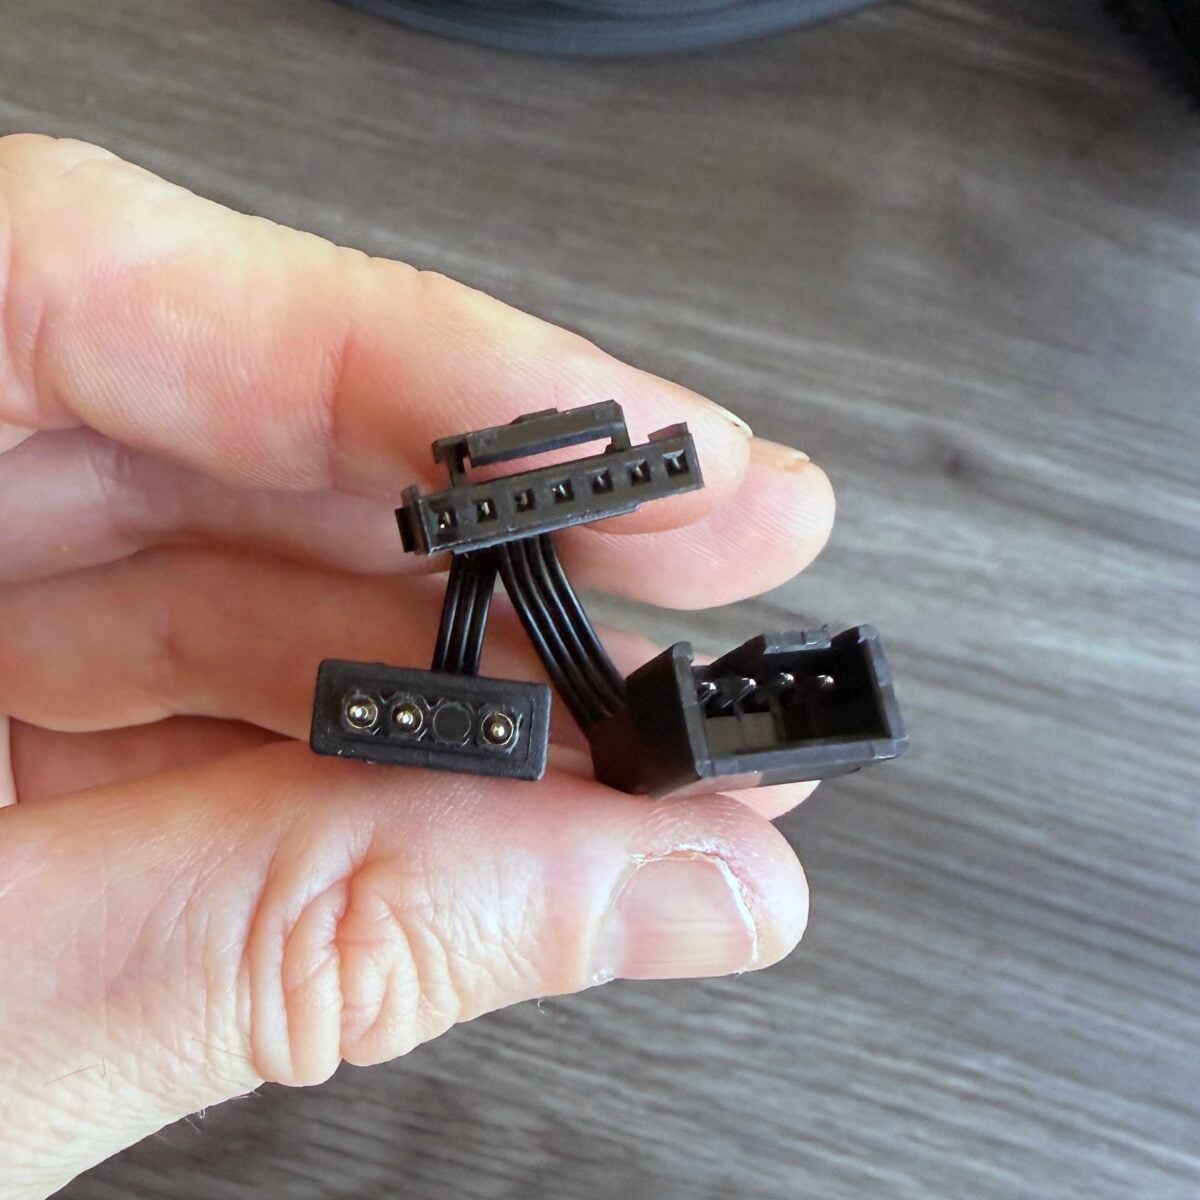
To make matters worse, the fans use proprietary be quiet! connectors, rather than standard 4-pin PWM plugs, as does the socket on the radiator to which they connect. This means you can’t easily replace them with your own choice of fans later, at least not if you want to use be quiet!’s USB software-control system.
Speaking of which, that’s one area where be quiet! has come up with a decent idea for cabling. The pump just has a single USB-C connection that plugs straight into the IO Controller (more on this later) – it makes for minimal cable clutter around the pump area, and it means you have software control for the whole setup.
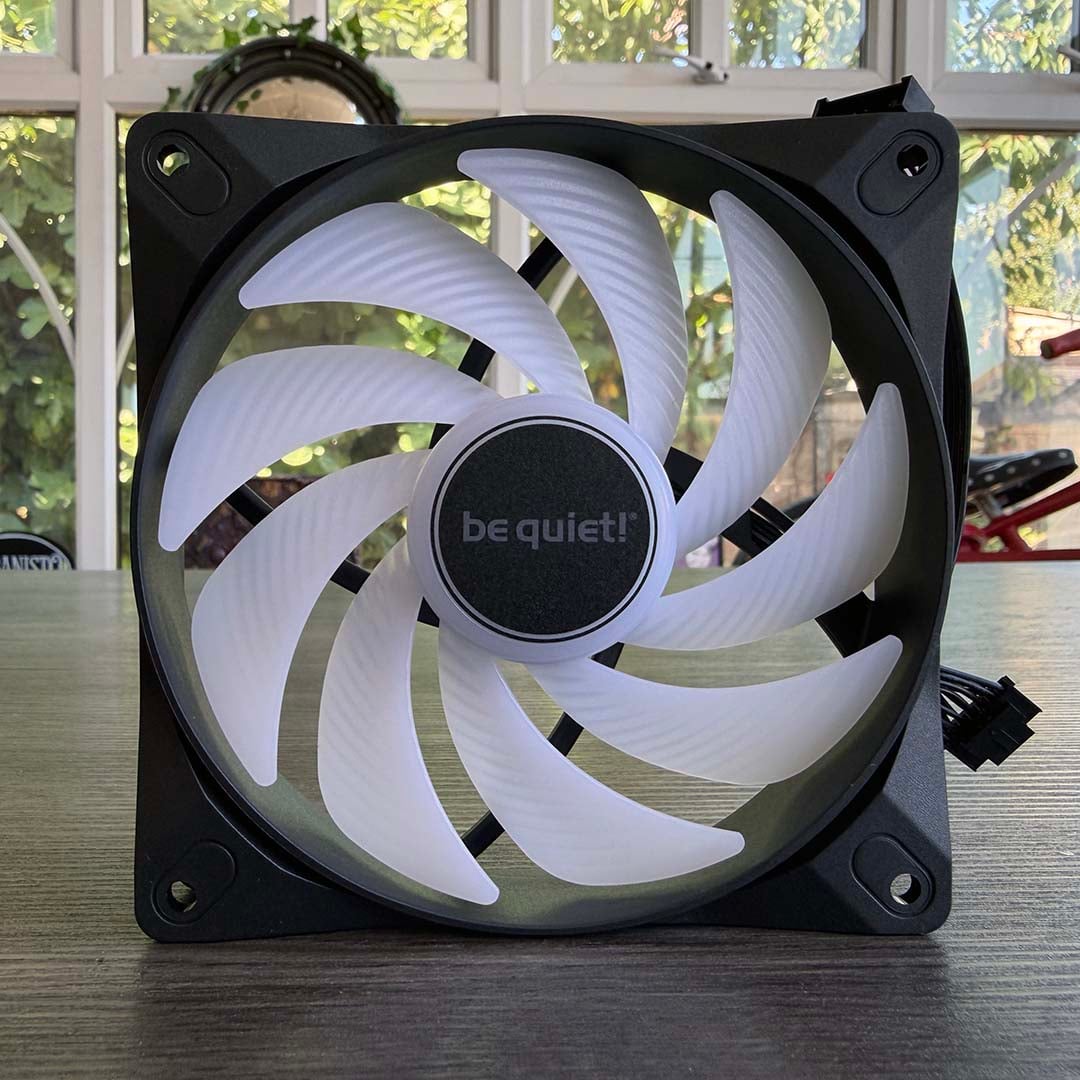
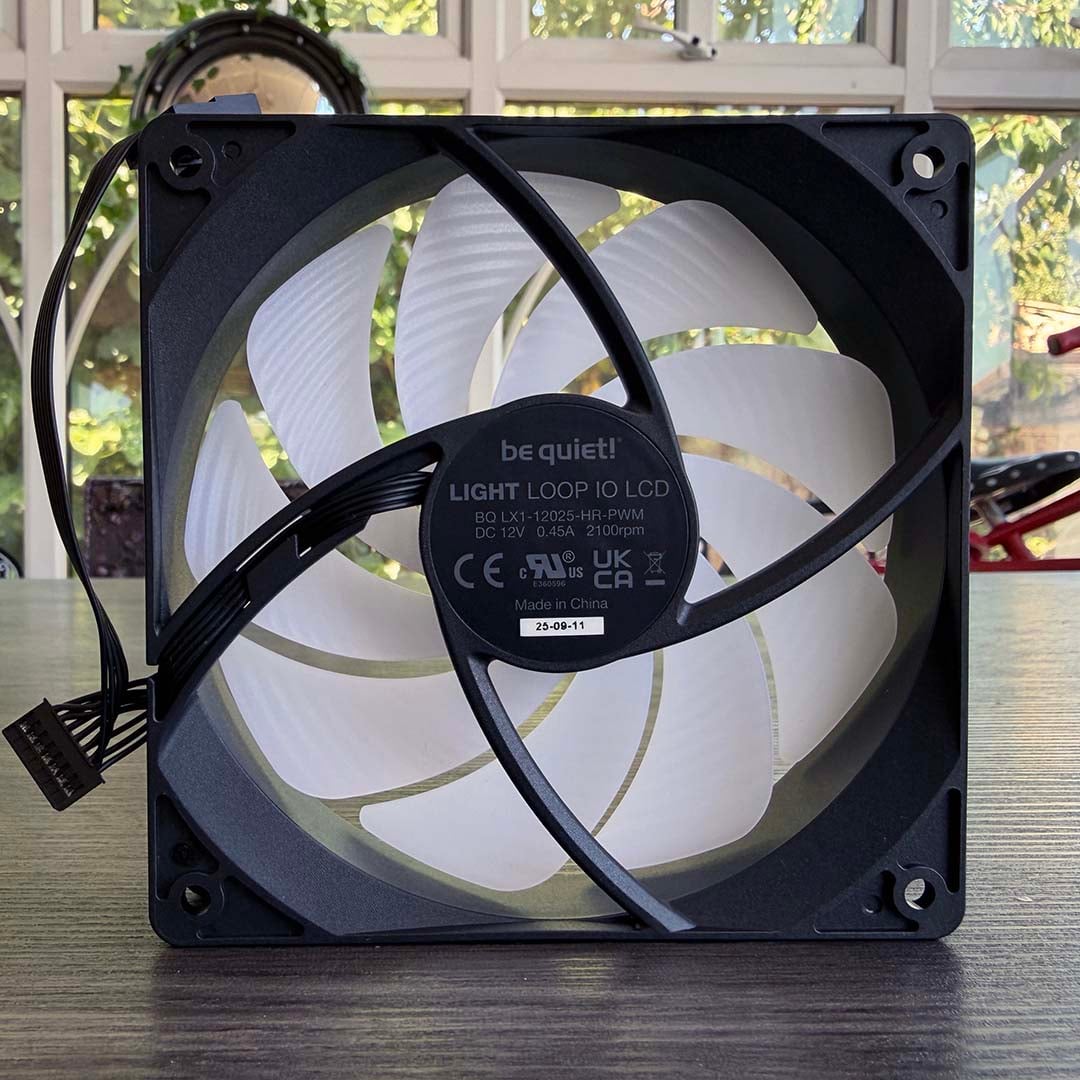
Another neat touch is the bundling of a Y-cable, which converts the be quiet! proprietary plug into standard 4-pin PWM power and ARGB connectors, so you can extend the setup and control other fans via USB, using the be quiet! software-control system.
Three be quiet! Light Wings LX PWM fans are included in the bundle. They can spin at up to 2,100rpm, and each one contains 16 LEDs to light up your PC’s interior. Maximum airflow is rated at 61.8CFM (cubic feet per metre), which is in the right ballpark for a 120mm fan spinning at 2,100rpm, although it’s a little lower than some of the competition.
Comparably, the 120mm MSI CycloBlade 7 ARGB fans on the MSI CoreLiquid P22 360 can generate 62.6CFM at a lower speed of 2,000rpm, for example. Meanwhile, the peak static pressure of 2.51mm H2O is about right for fans designed to be attached to radiators on quiet coolers.
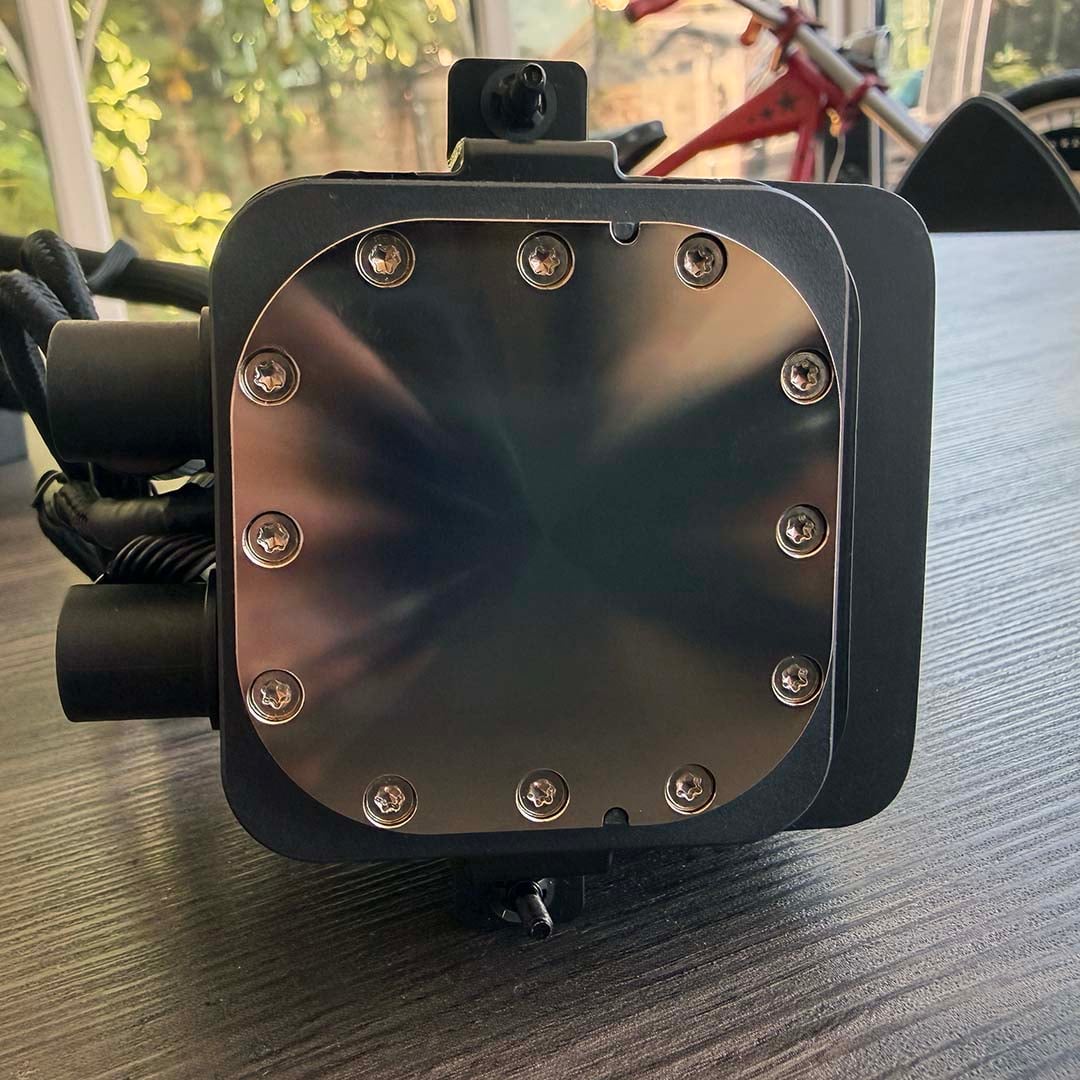
Meanwhile, be quiet! says the pump unit features a precision-engineered metal jet plate between the contact plate and pump unit, with its densely stacked fins designed to shift heat from high-end CPUs. There’s also a chip inside the pump motor, which the company says keeps switching noise minimal.
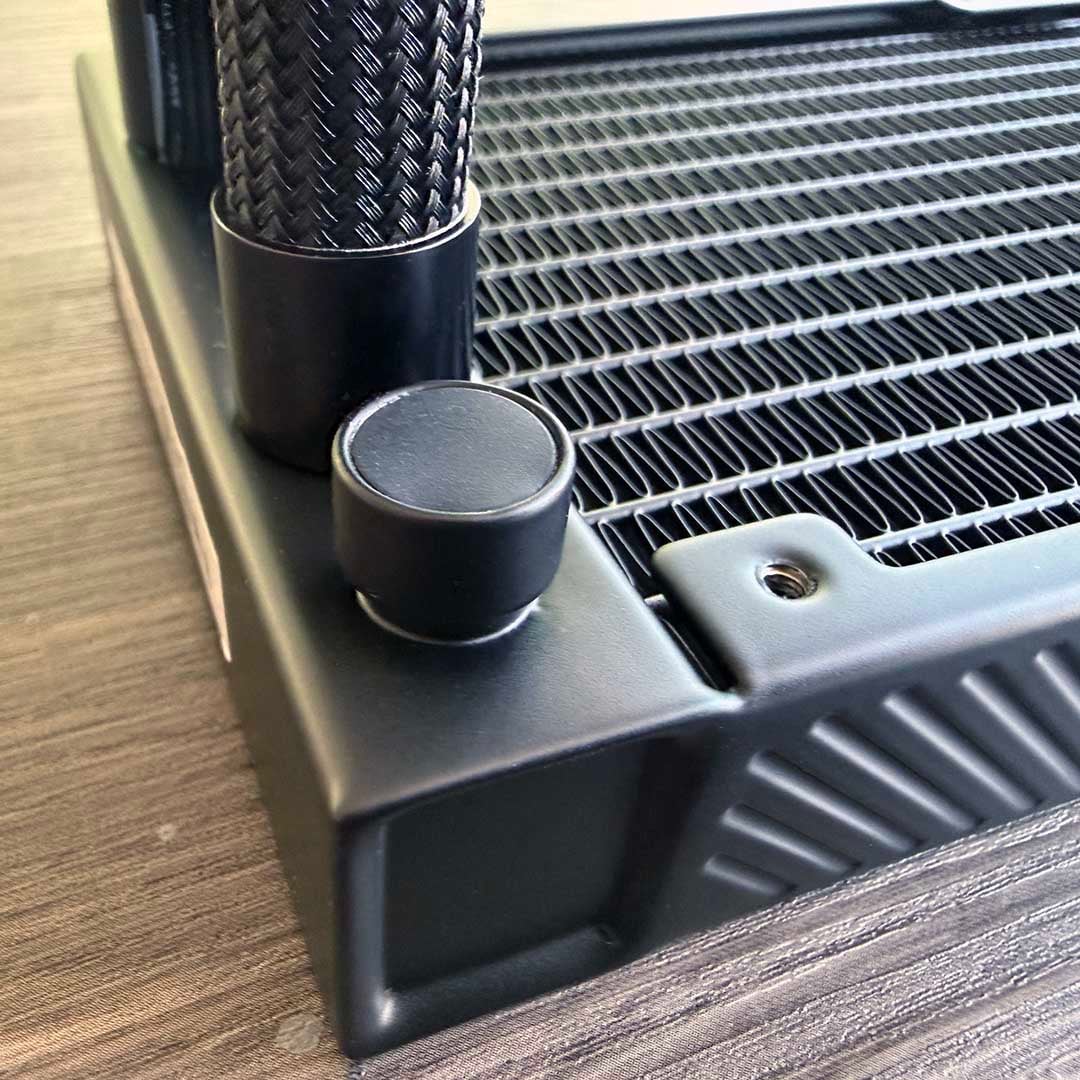
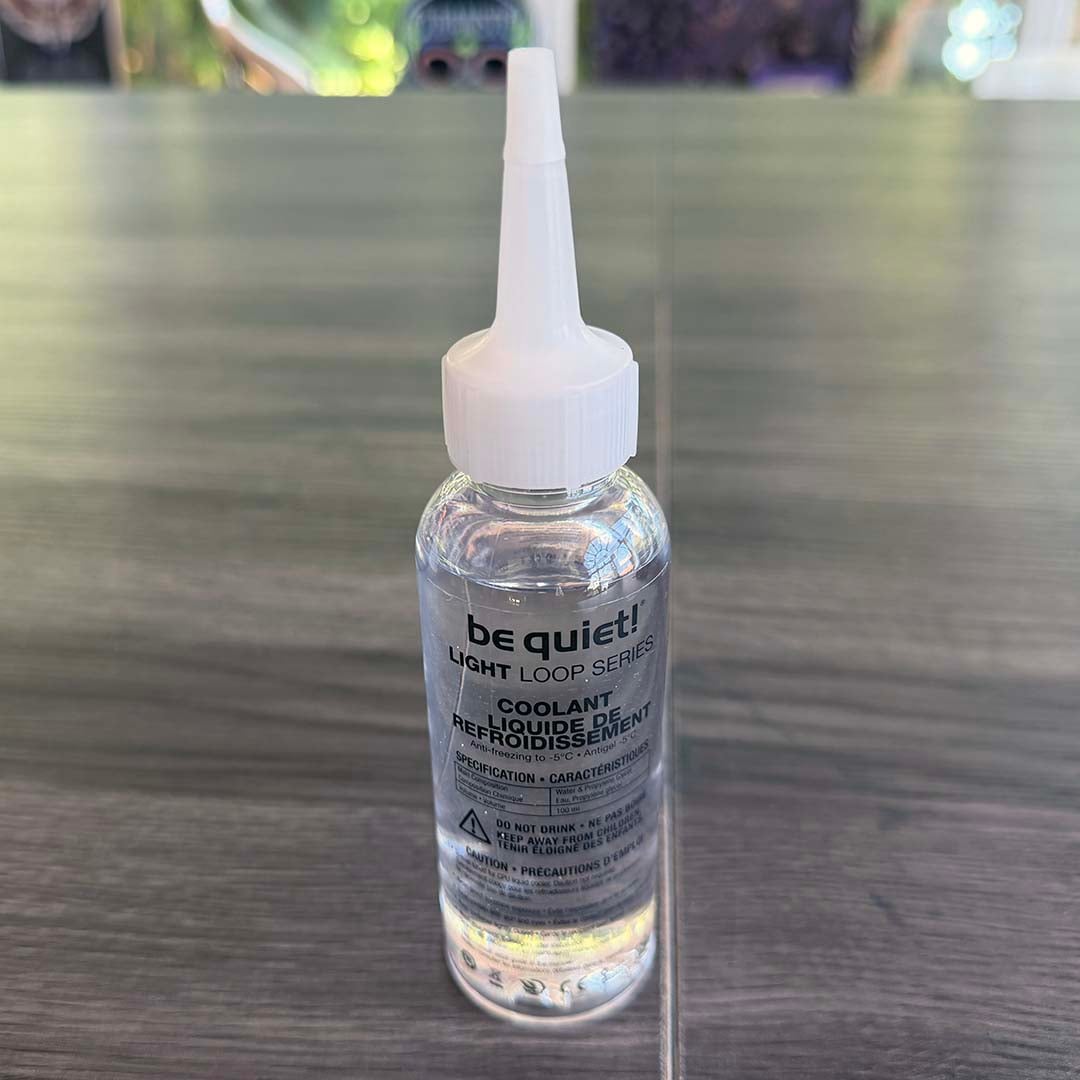
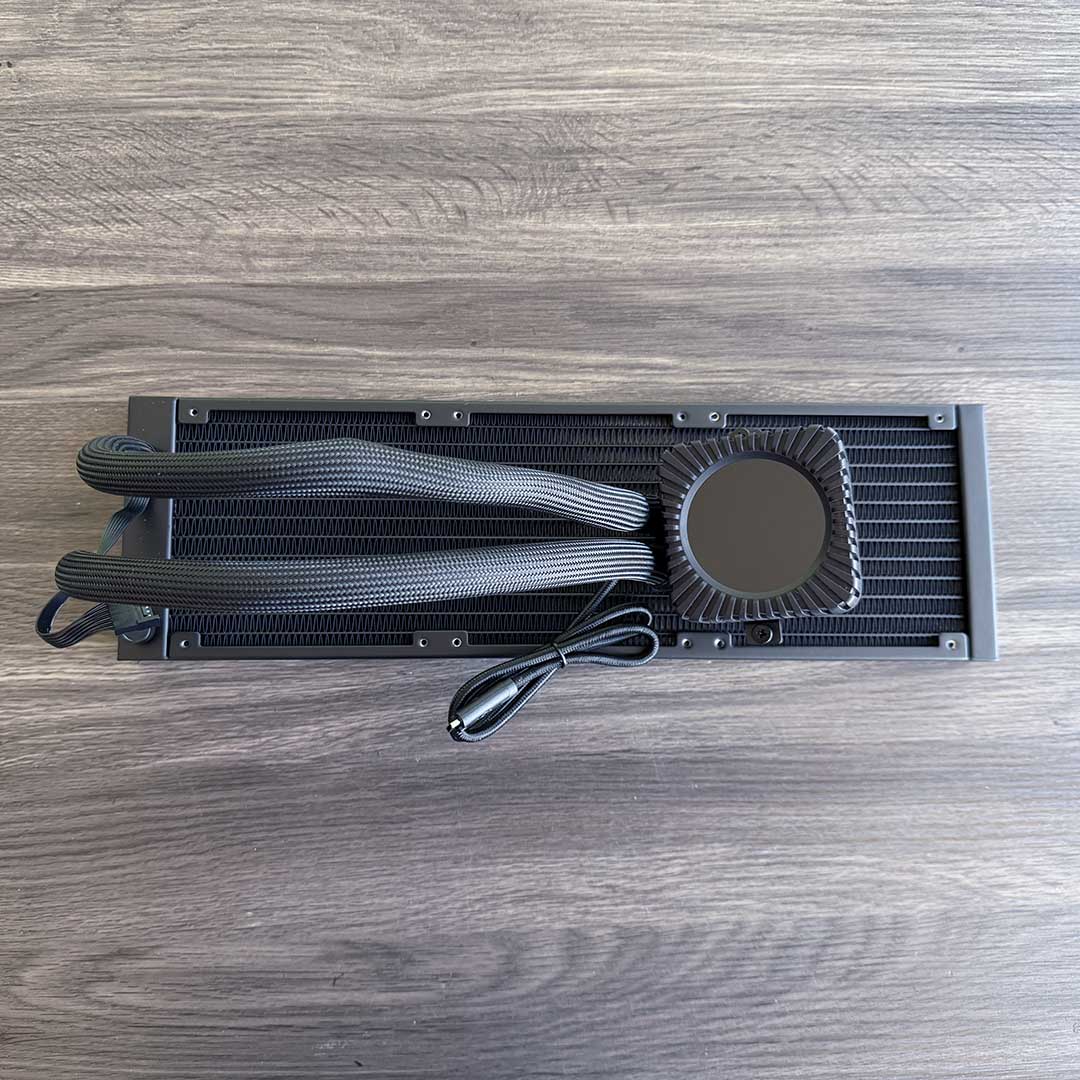
Finally, you’ll notice another cool little feature on the radiator, next to the tubing and pictured below. That’s a fill port, which lets you top up the coolant in the loop if it ever gets low. That’s a solid boost to longevity, bringing one of the benefits of custom loops to this otherwise closed-loop design.
Features
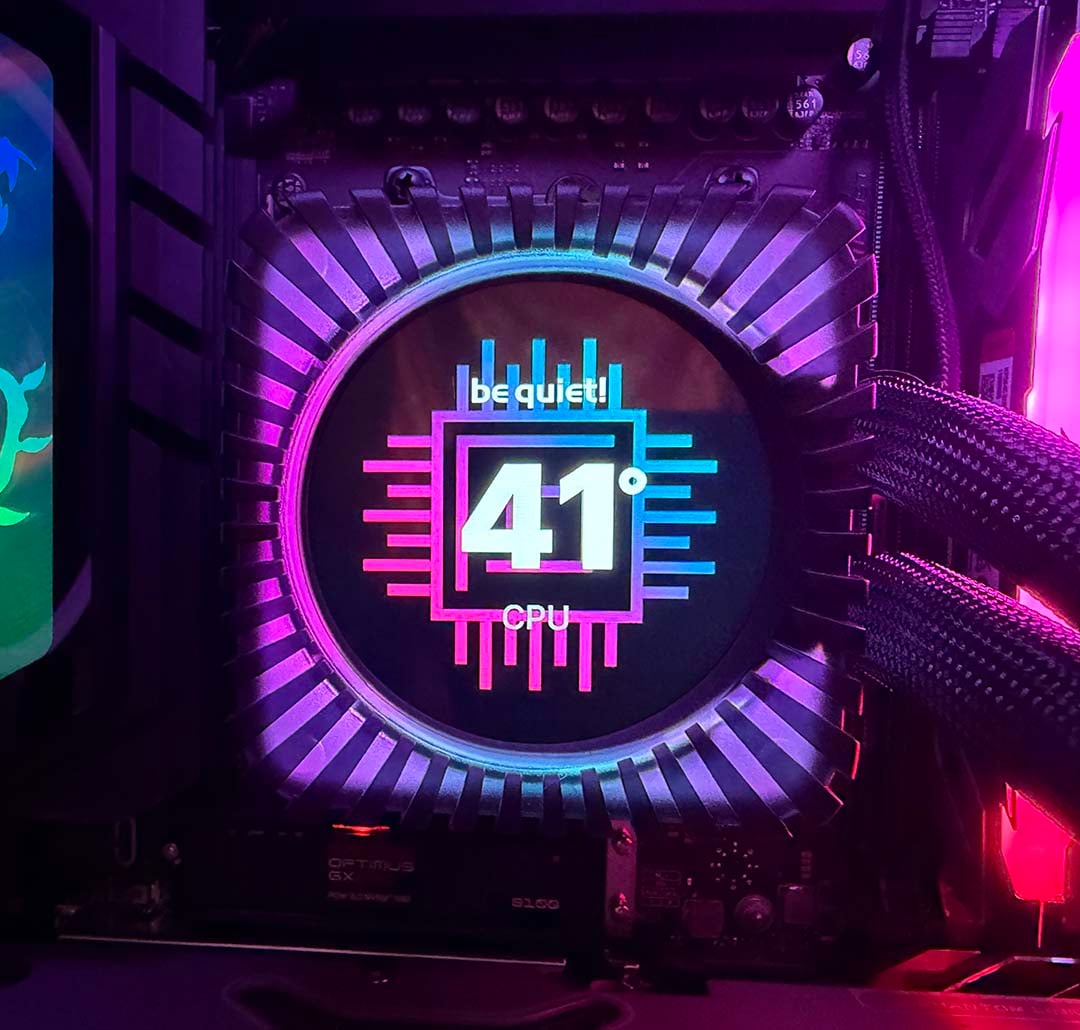
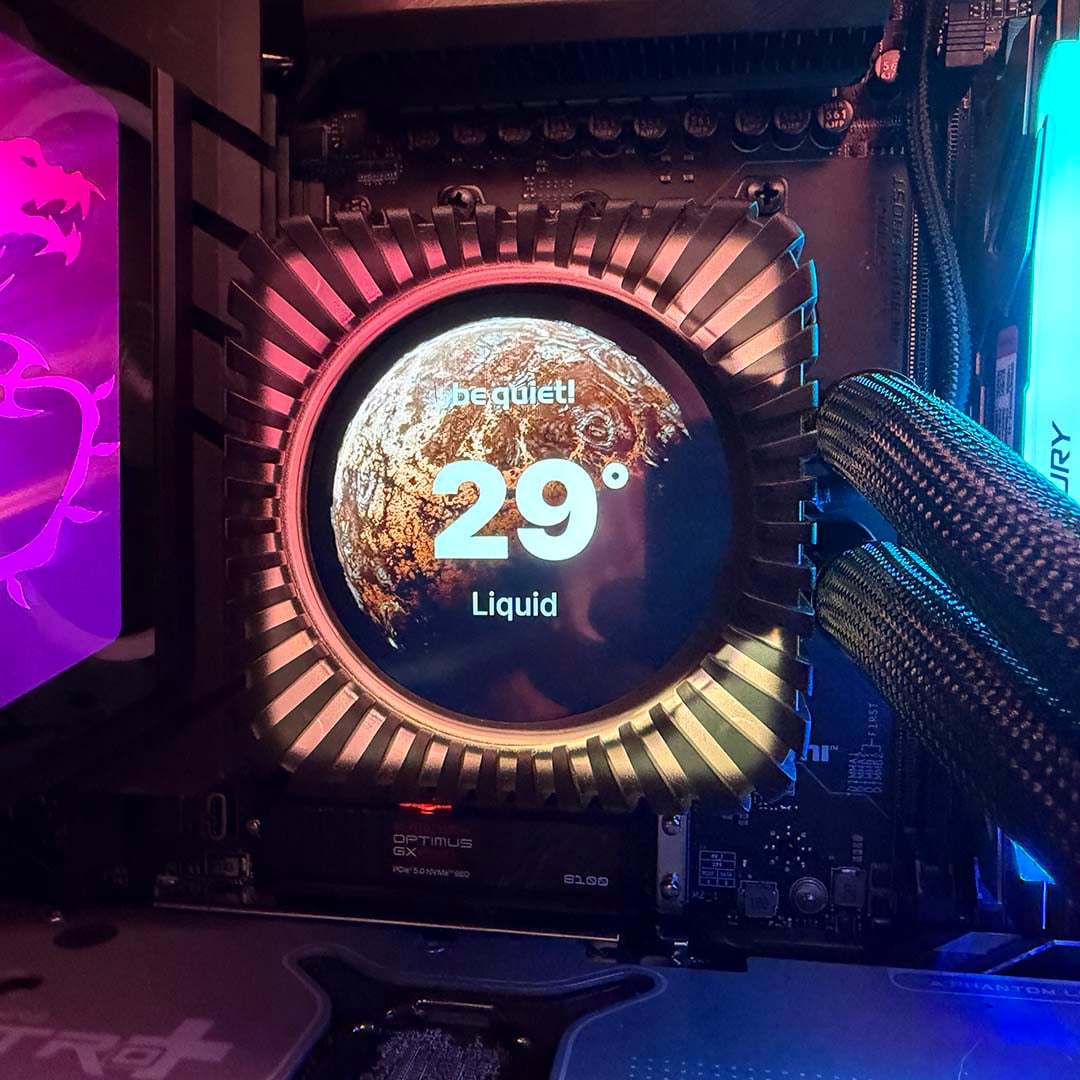
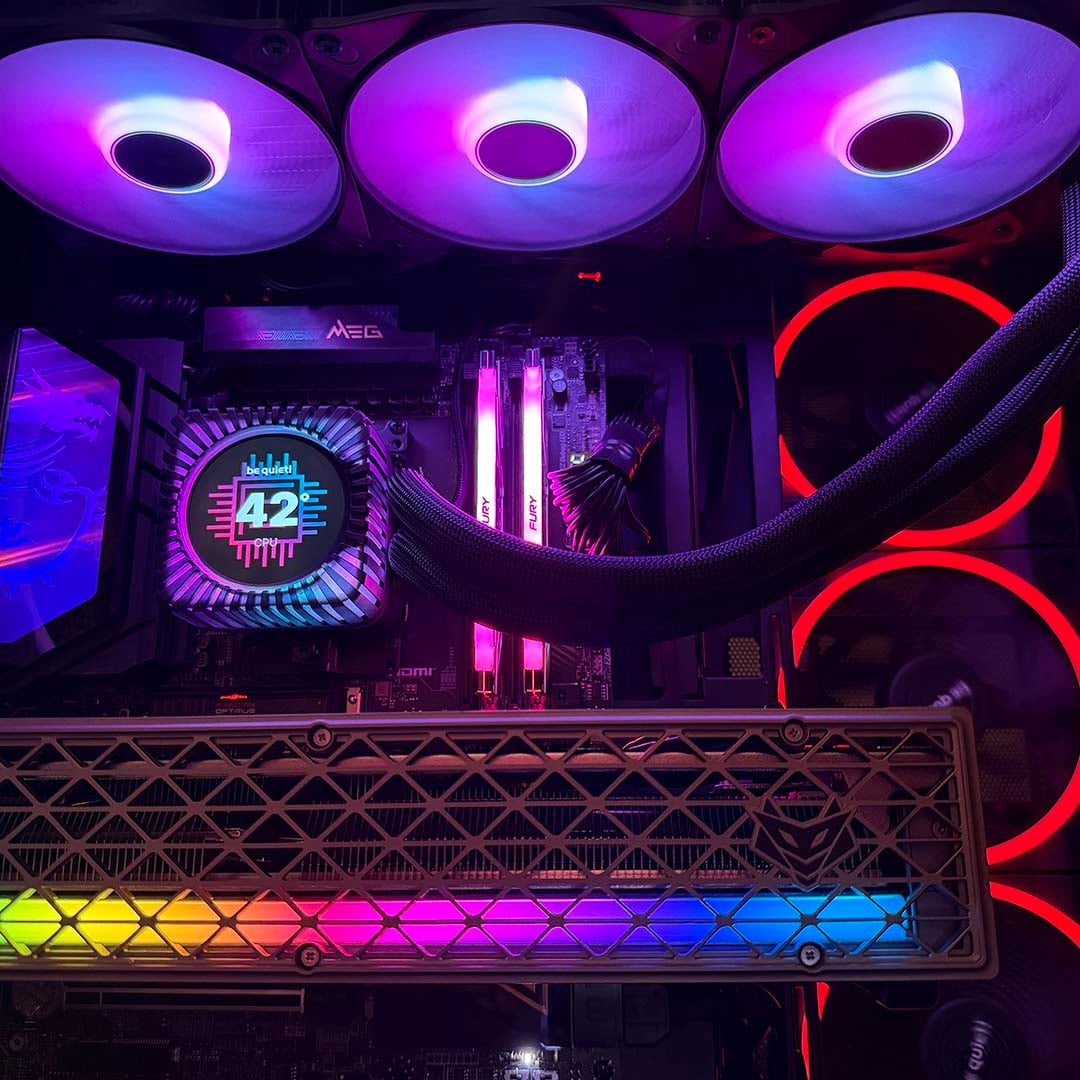
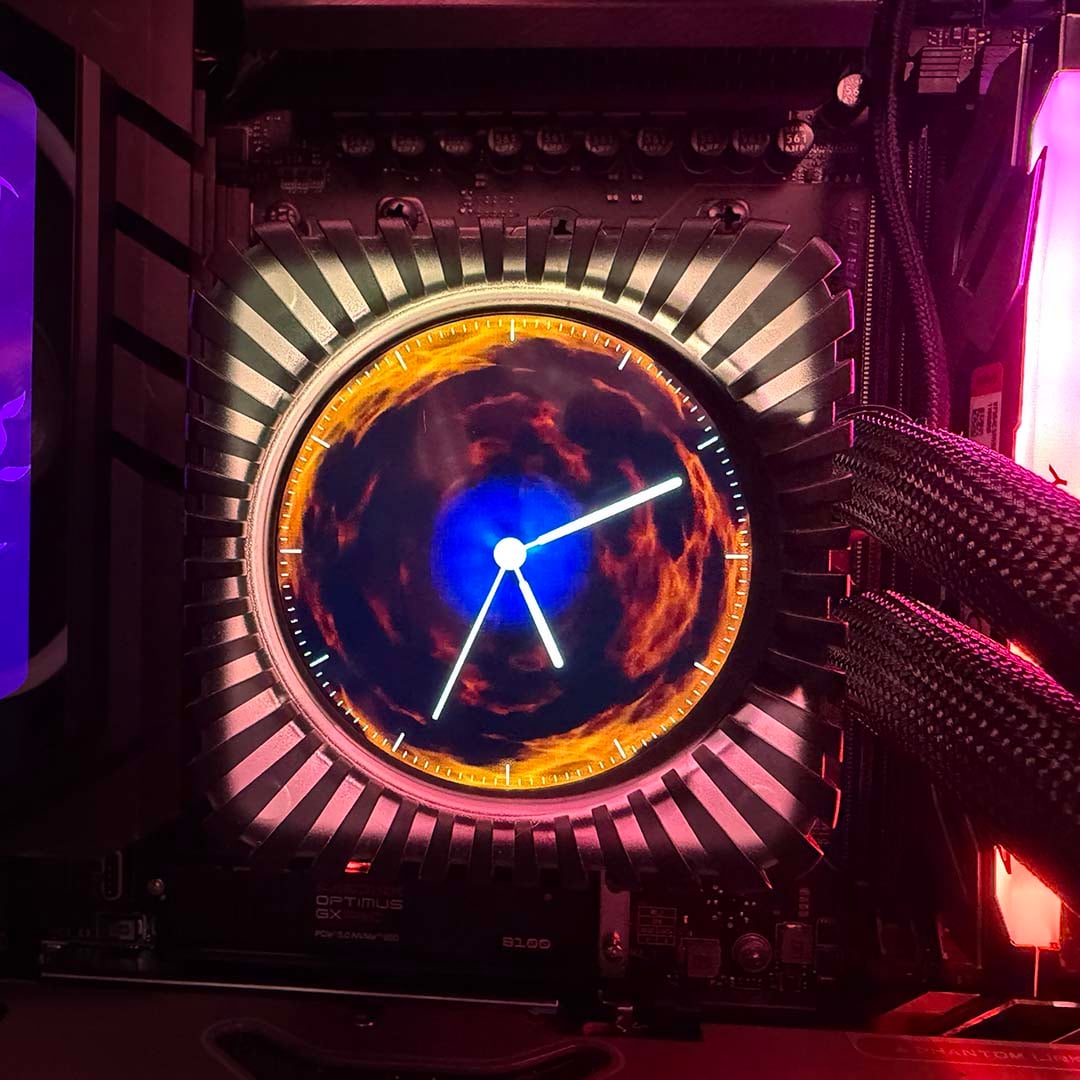
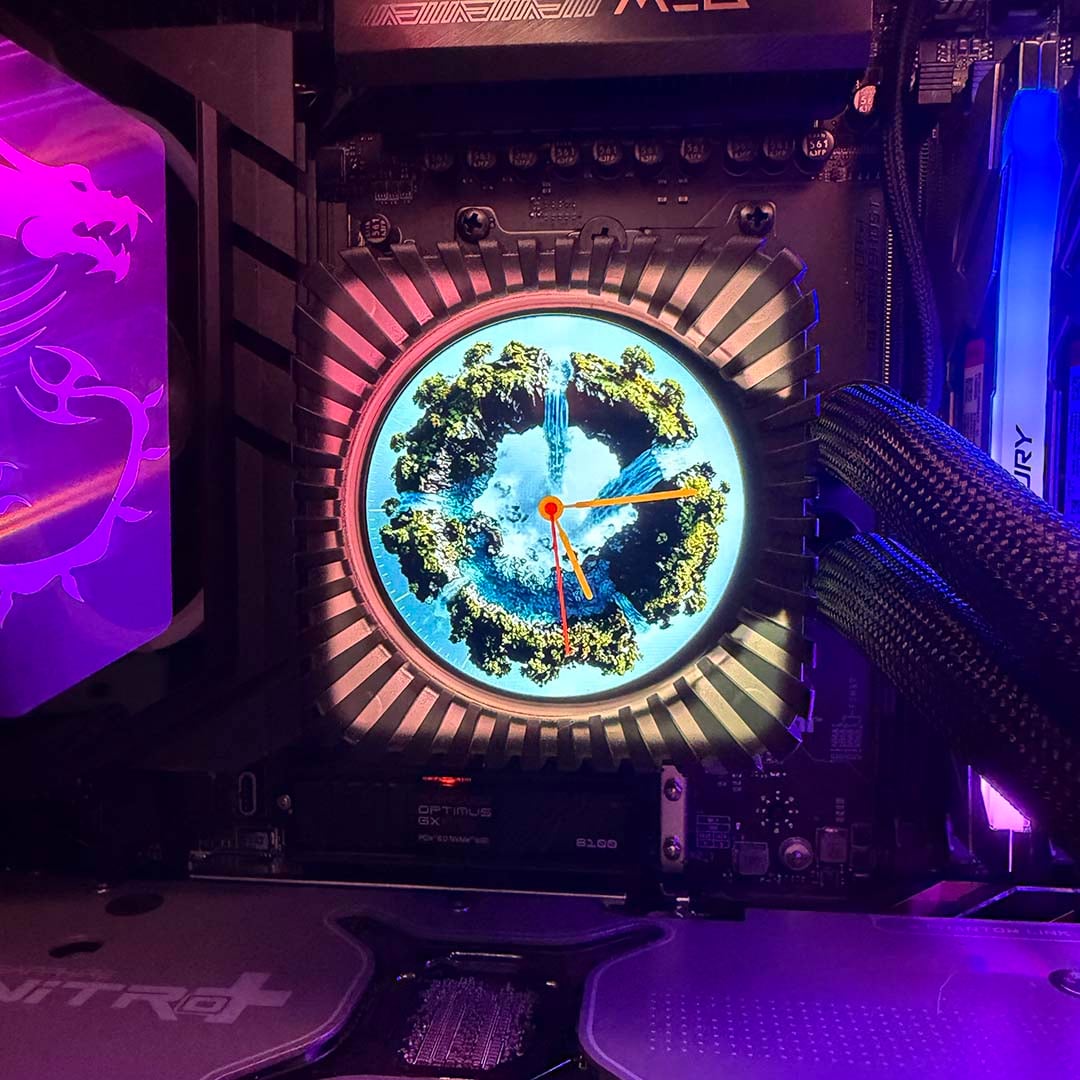
The big feature here, of course, is that 2.1in IPS screen. With a 480×480 resolution, it’s sharper than some of the little displays you see on older or cheaper coolers. The NZXT Kraken Plus 360 RGB has a smaller 1.54in display with a 240×240 resolution, for example. It looks great too – with a bright picture and punchy colours, with up to 500nits of brightness on offer.
A translucent plastic block surrounds the display, with a ring of RGB LEDs underneath it. This makes for a really cool spectacle, with your choice of dynamic lighting complementing what’s on the screen. As with all these sorts of frills, it’s completely unnecessary, but it does look good.
At first, I thought I’d rather have a plain surround with just a translucent diffuser, like Corsair’s iCUE Link Titan RX design, rather than having the black plastic vents round the edge. However, I’ve really come round to them after a few days of use – they give the pump block a bit of an art deco vibe.
It’s all controlled by the be quiet! IO Center software package, which takes the form of either a web app, or a dedicated local version you install on your machine. I recommend taking the latter route, as it’s much more flexible. You can get a basic setup running with the web app, but you lose the hardware monitor, temperature-based lighting, and dynamic background support you get with the local app.
Several preset videos are provided, including a spinning planet, rolling oceans, and a countryside scene, but you can upload your own videos or GIFs too. On top of your background video, you can also add animations on top, showing a clock, for example, a music visualiser, or temperature stats.
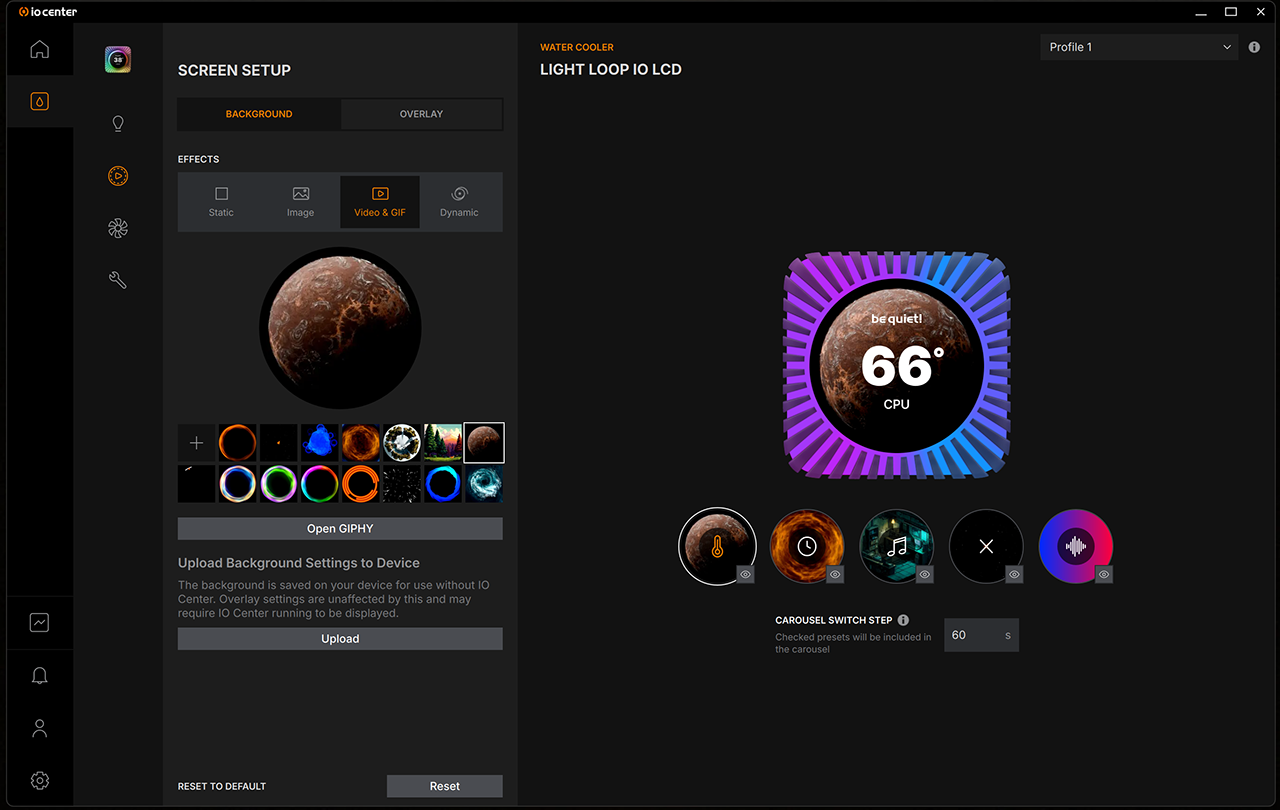
You also have the option to upload your video or image to the cooler’s memory, as you would on some of Corsair’s iCUE models. This means you still get your own custom image when you first turn on the machine, rather than having to wait for Windows to finish booting.
Loads of customisation options are available. There’s a big list of sensors from which to choose for your stats, for example, and you also have a lot of control over the lighting. The latter is in its own section, where you can set the lighting to sync up with what’s on your screen, react to temperature, or create a breathing effect, for example.
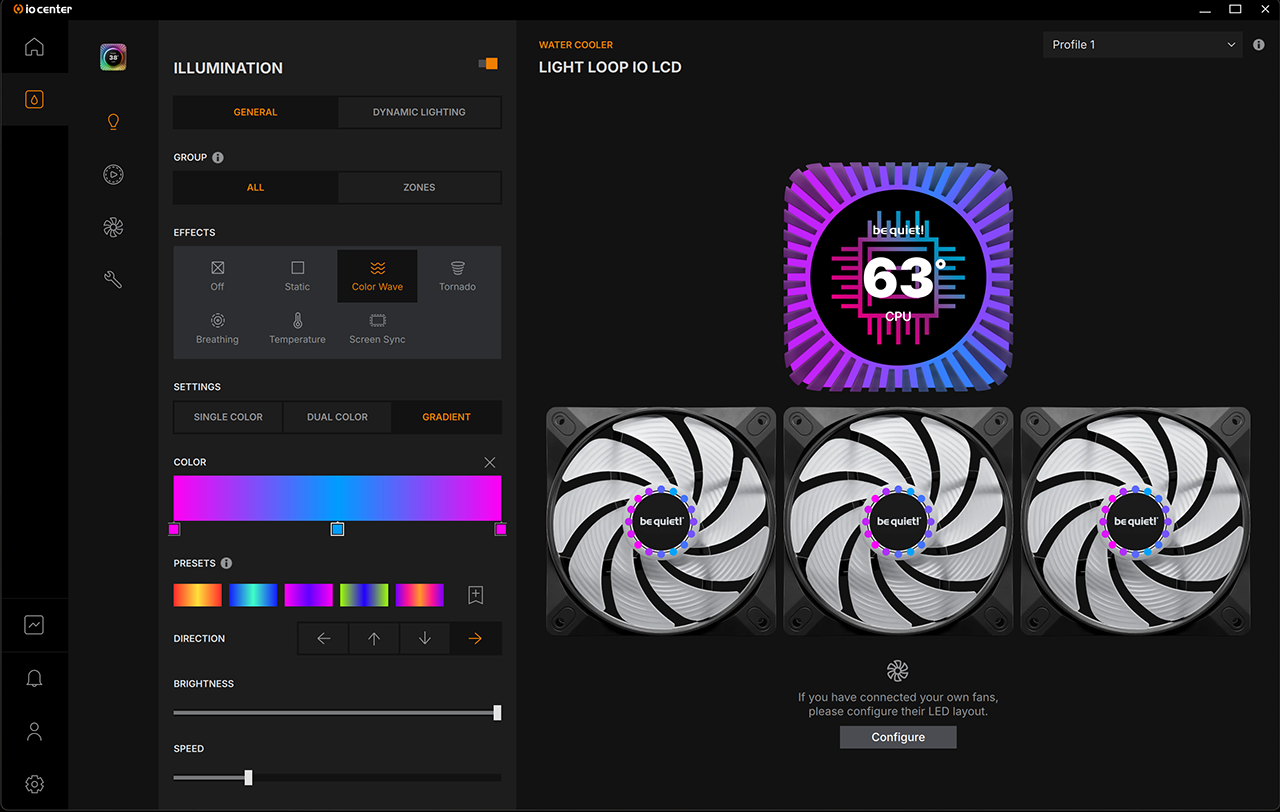
I settled on a gradient effect, going between pink and blue shades to match our Club386 logo. Again, several presets are already provided, but you can select your own choice of colours as well, and adjust the speed, direction, brightness, and so on.
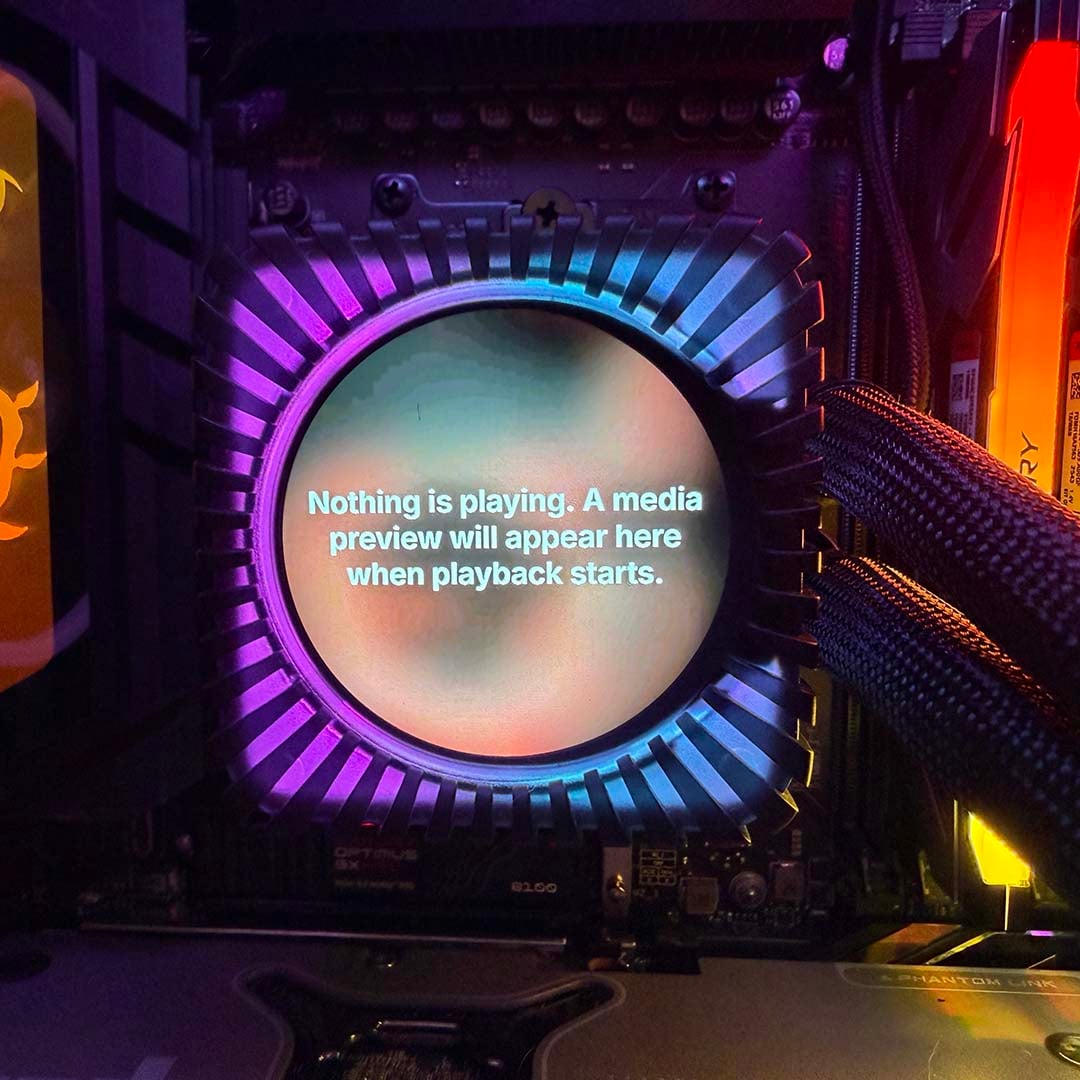
There are a few quirks at the moment, however. One particularly annoying one was an error message that would suddenly appear on the LCD as I was flicking through the preset video options, telling you that nothing was playing, despite you selecting the media in the software. You can get around it by restarting the software, but it’s a pain.
I also found that, sometimes, the cooler seemed to forget my screen settings and suddenly revert to the stats overlay displaying the coolant liquid temperature, rather than the CPU temperature I’d selected, or showing a game of Asteroids on the screen, when I’d told it to only display the Club386 logo. You might be able to upload your pictures to the cooler, but that doesn’t stop the software from overriding your choices sometimes.
All that said, I was testing an early preview version of the software, and be quiet! can fix these sorts of quirks over time. In general, I found IO Center easy to use, and it offers a boatload of flexibility when it comes to customising your lighting and LCD.
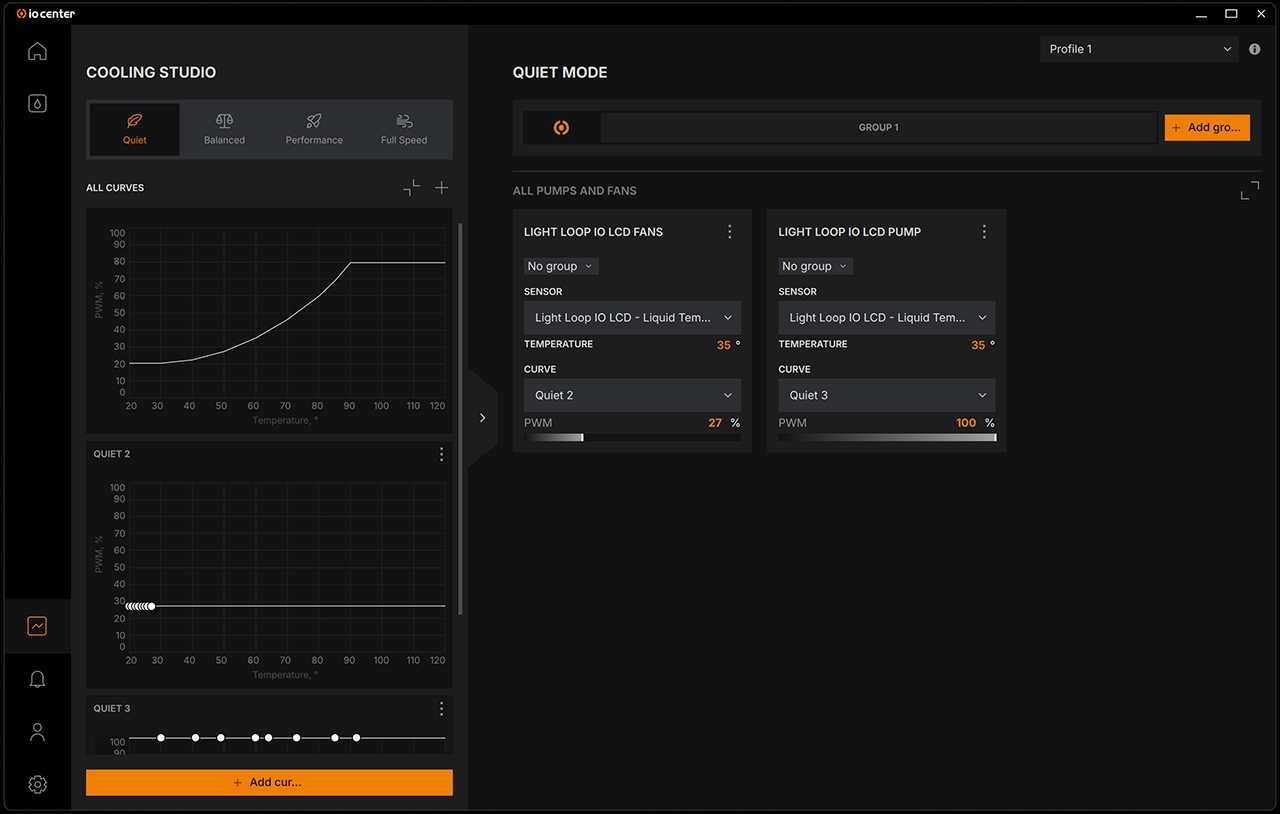
Thanks to that USB connection, you also get full control over your fans with IO Center. This is all conducted via the Cooling Studio section, where you can select from Quiet, Balanced, Performance, or Full Speed presets, or customise the fan curve how you like. As you can see in the screenshot below, I’ve created a second Quiet preset to fix the fans at 600rpm for some of my testing. You can also adjust the pump speed here.
Installation
Installing the be quiet! Light Loop IO LCD 360 is a bit of a complicated process, as you have to contend with several cables, as well as a separate IO hub (more on that later), but I want to start by thanking be quiet! for including a proper paper manual with this cooler. It shows you exactly what you need to do, with clear diagrams, using a mix of black and orange colours.
It may cost a cooler manufacturer more money to print a manual, rather than offering a QR code that takes you to an online one, but it’s absolutely worthwhile. It’s certainly much better than zooming in and out of a PDF on your phone to read the text, and it means you can build your PC in an area without an Internet connection. More of this please.
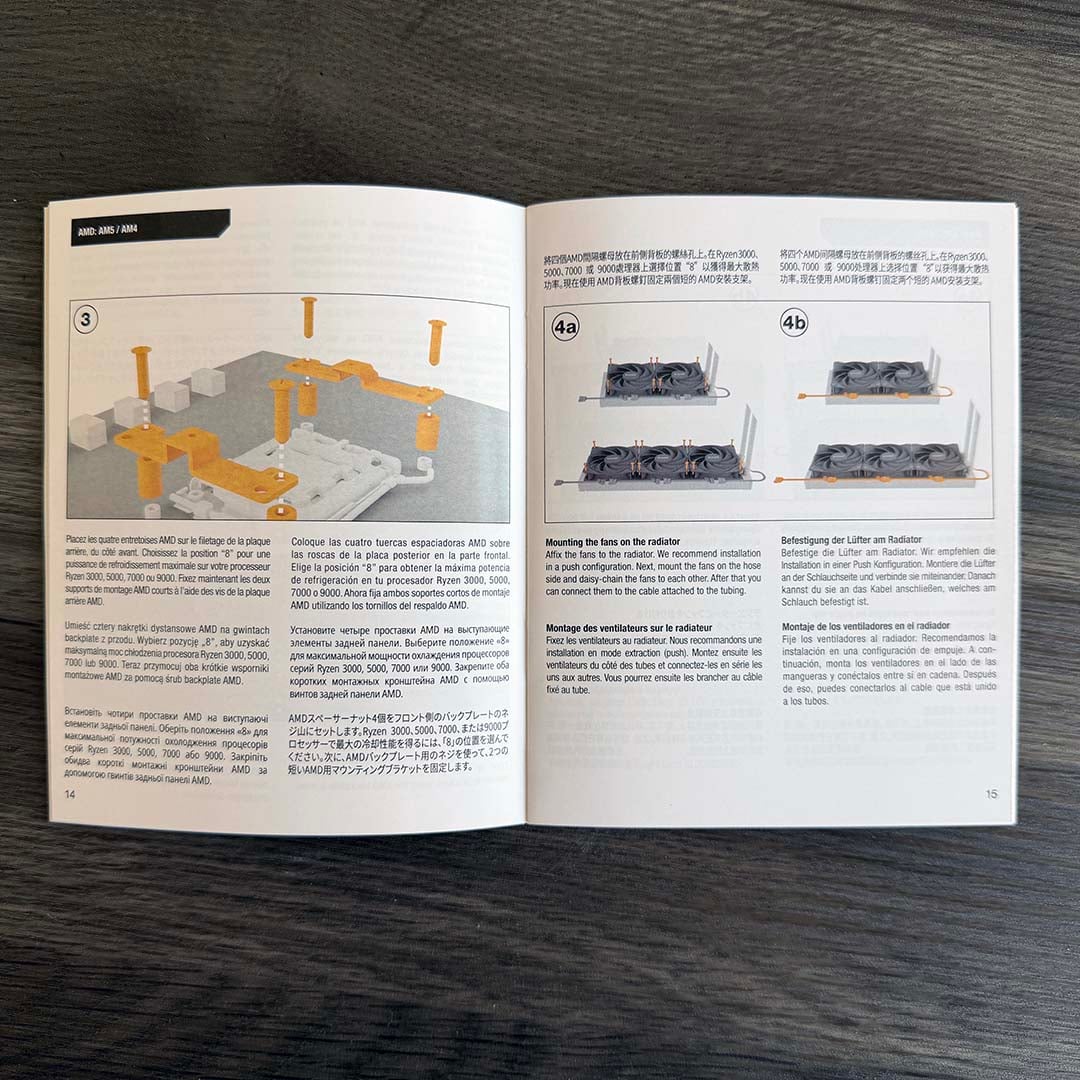
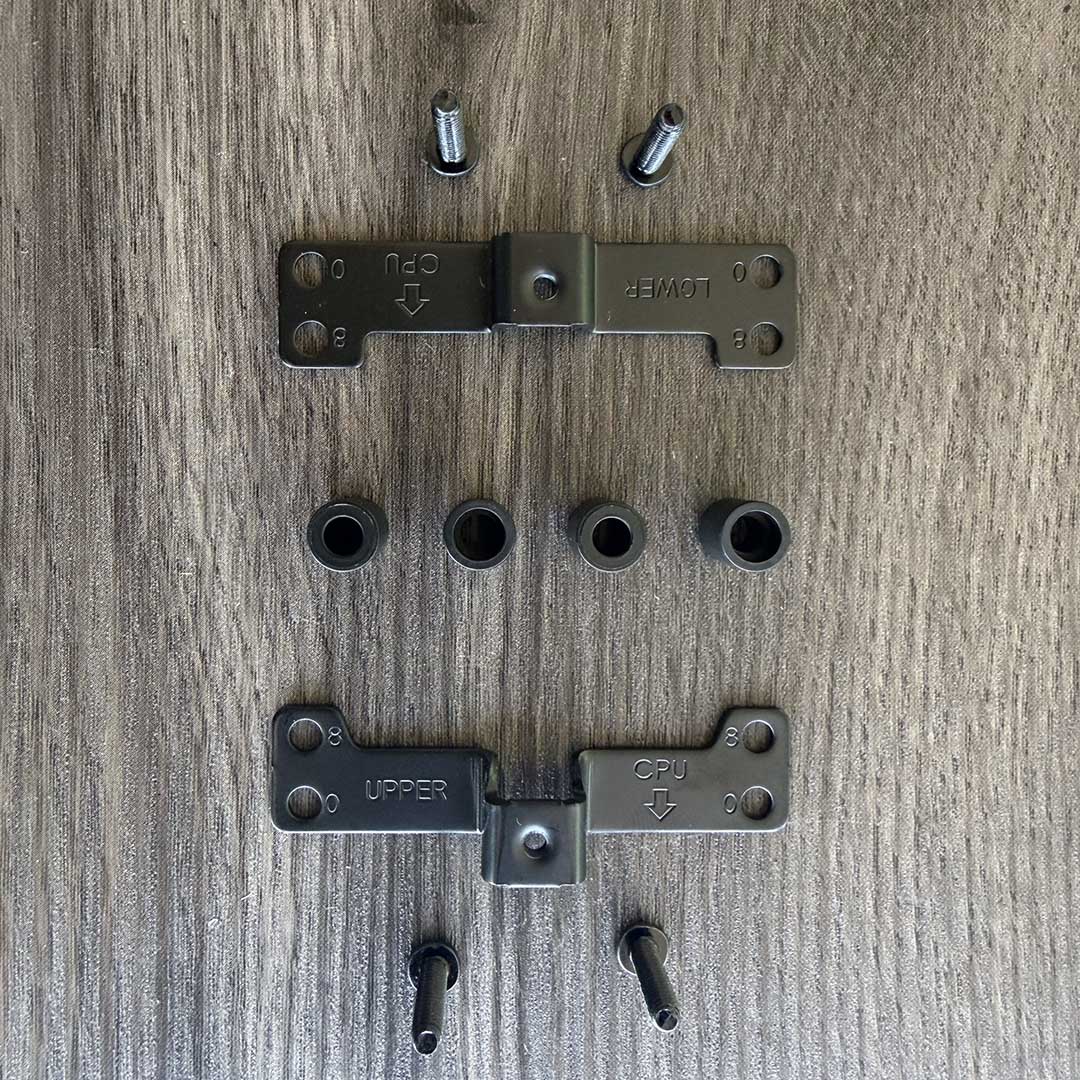
Fitting the Light Loop IO LCD 360 to an AMD motherboard is really simple (left pic below), as it uses the standard backplate that’s already on your board – you just need to remove the plastic clips. After that, it’s just a case of screwing two plates into the backplate, along with four plastic washers, using the holes marked ‘8’ for chiplet-based CPUs, such as our Ryzen 9 9950X3D, and the ‘0’ holes for older chips, such as the Ryzen 7 2700X. There are also arrows on each plate to show how they should point to your CPU, and they’re clearly labelled ‘upper’ and lower.
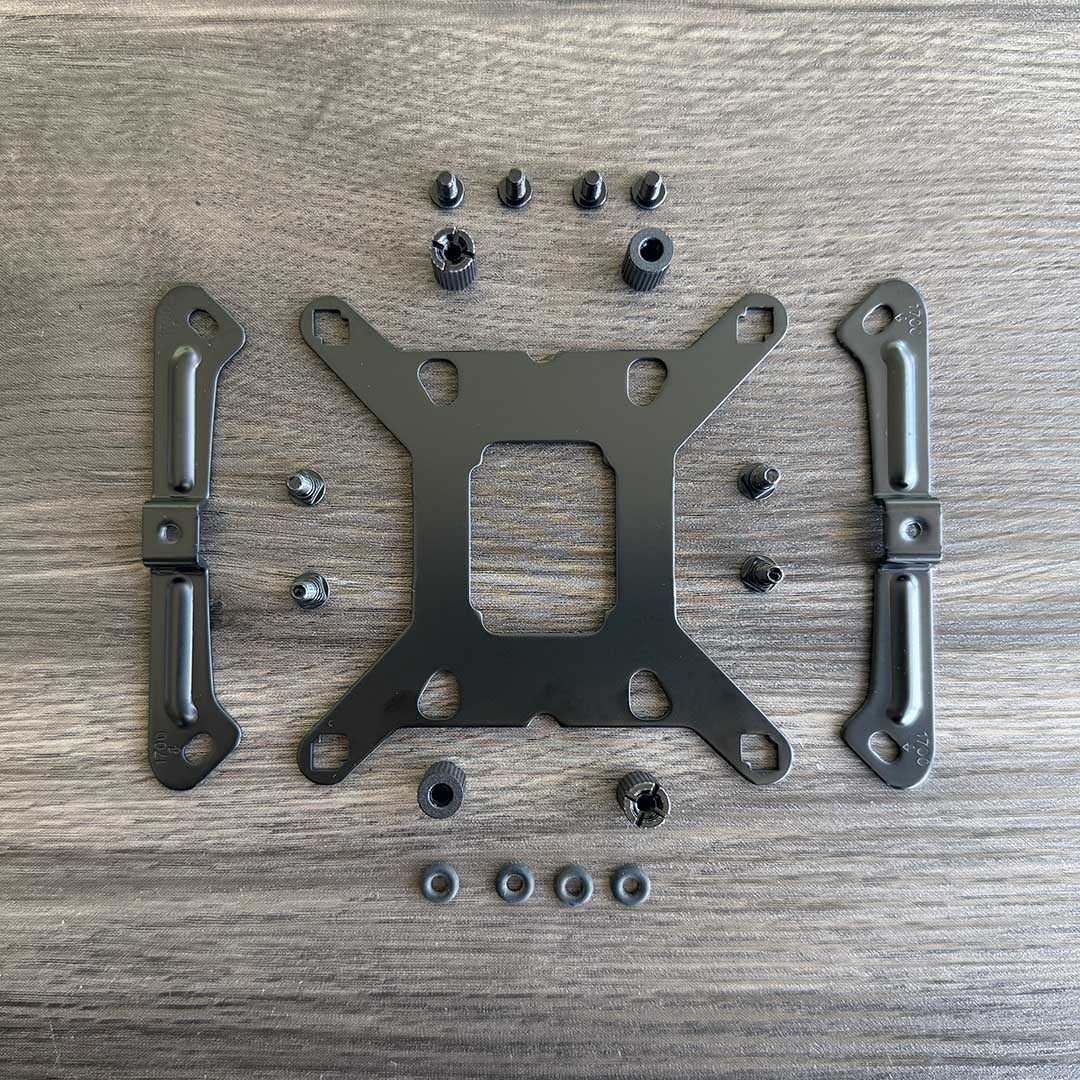
Installation on Intel motherboards is more involved (right pic below), as you have to install a custom backplate, as well as four thumbscrews with threaded holes. On the plus side, unlike a lot of new coolers, you can strap this one to motherboards with older LGA1200 and LGA115x sockets, rather than just LGA1852 and LGA1700 platforms.
Once you’ve installed your mount, you simply need to apply a layer of thermal paste to your CPU. This comes in a tube, and there’s enough for one application, with a bit leftover – I wouldn’t count on getting two out of it. After that, fitting the pump unit is a simple case of screwing the sprung screws on either side of it into the plates.
As I mentioned earlier, you do have to screw the fans to the radiator yourself, and also connect their cables, but this is all done in a few minutes. The next stage is working out how you’re going to route all the cables. The actual unit itself is really tidy in terms of wiring. All the fan wires are cleanly hidden at the back, and there’s just a single cable going from the pump unit to the radiator.
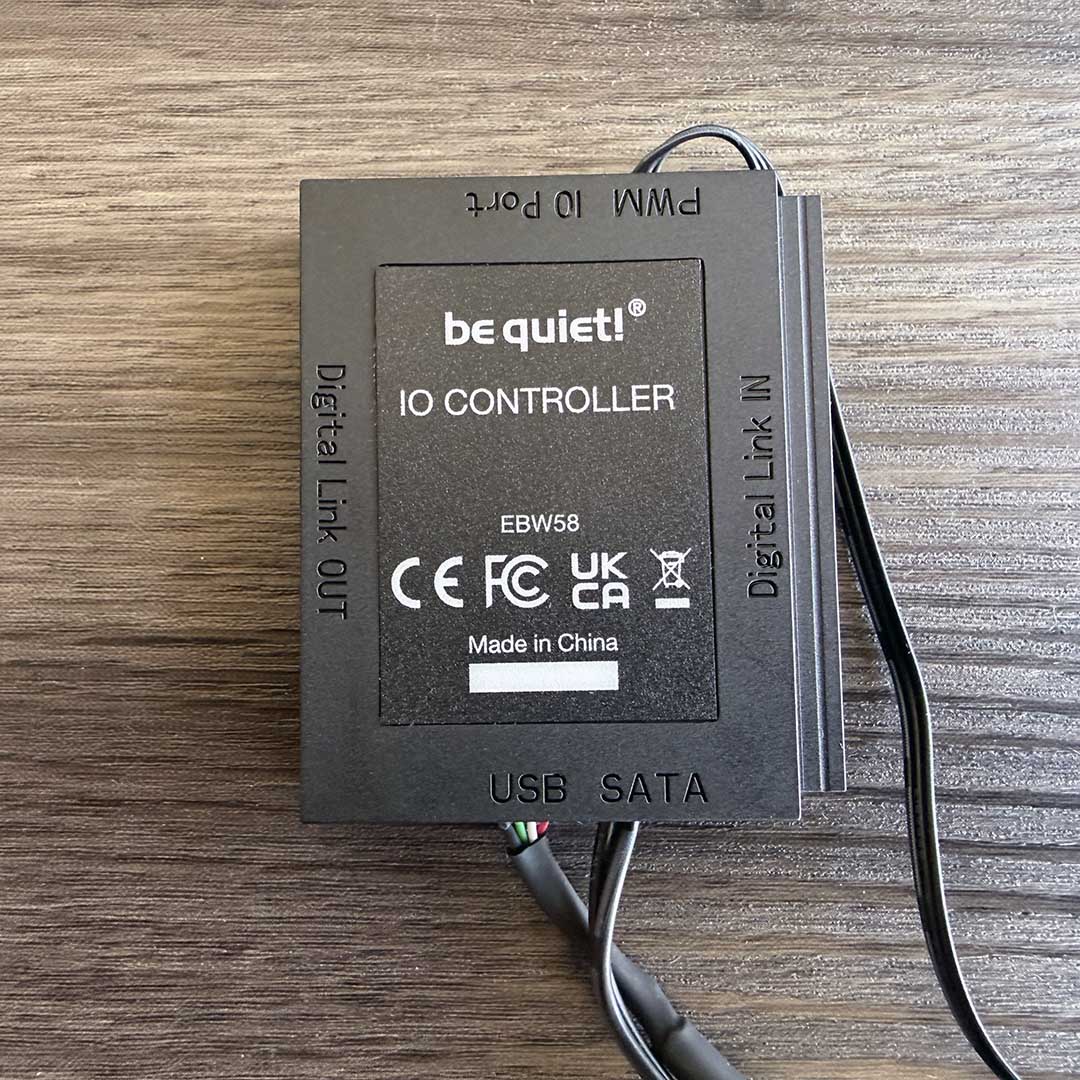
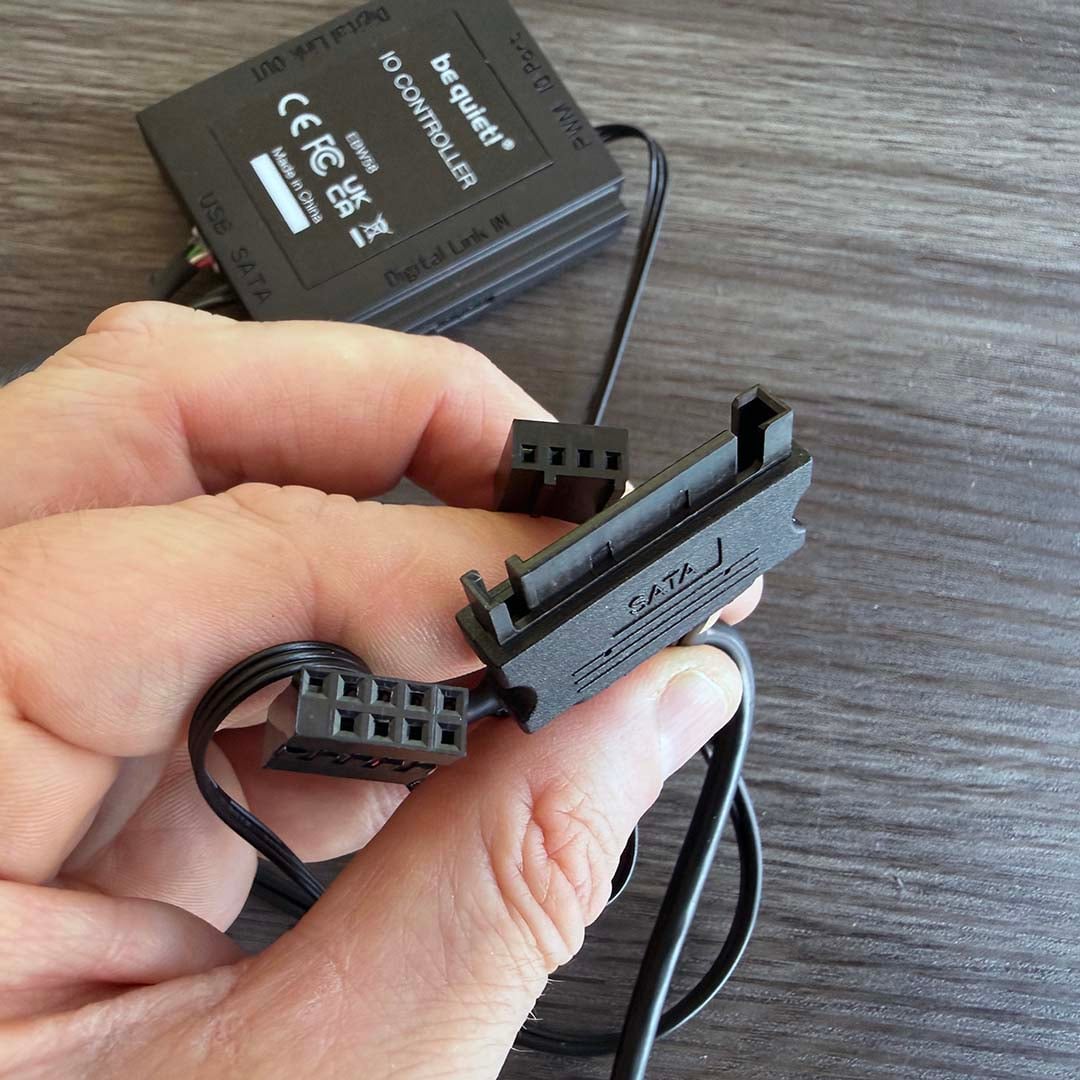
However, you need to deal with a lot of wires around the back, which hook up to a central hub called the IO Controller. This little box has several cables sprouting from it, which you’ll need to hook up to a SATA connector on your PSU, a USB 2 header on your motherboard, as well as a 4-pin PWM header. Irritatingly, the manual doesn’t provide any guidance about where you should plug the latter, which isn’t much help to newbies, but your best bet is to hook it up to your motherboard’s AIO pump power header, to make sure it can get enough juice.
Niftily, the IO hub will magnetically attach to your case’s inner frame, so you just need to find a place to mount it where all the cables can reach. Finally, you need to plug the USB-C cable, which comes straight from the pump unit. It’s all a bit of a faff, as there are cables going in all directions (to your PSU, to the pump, and also to the top and bottom of your motherboard), but it’s much better than having even more wires all over the place.
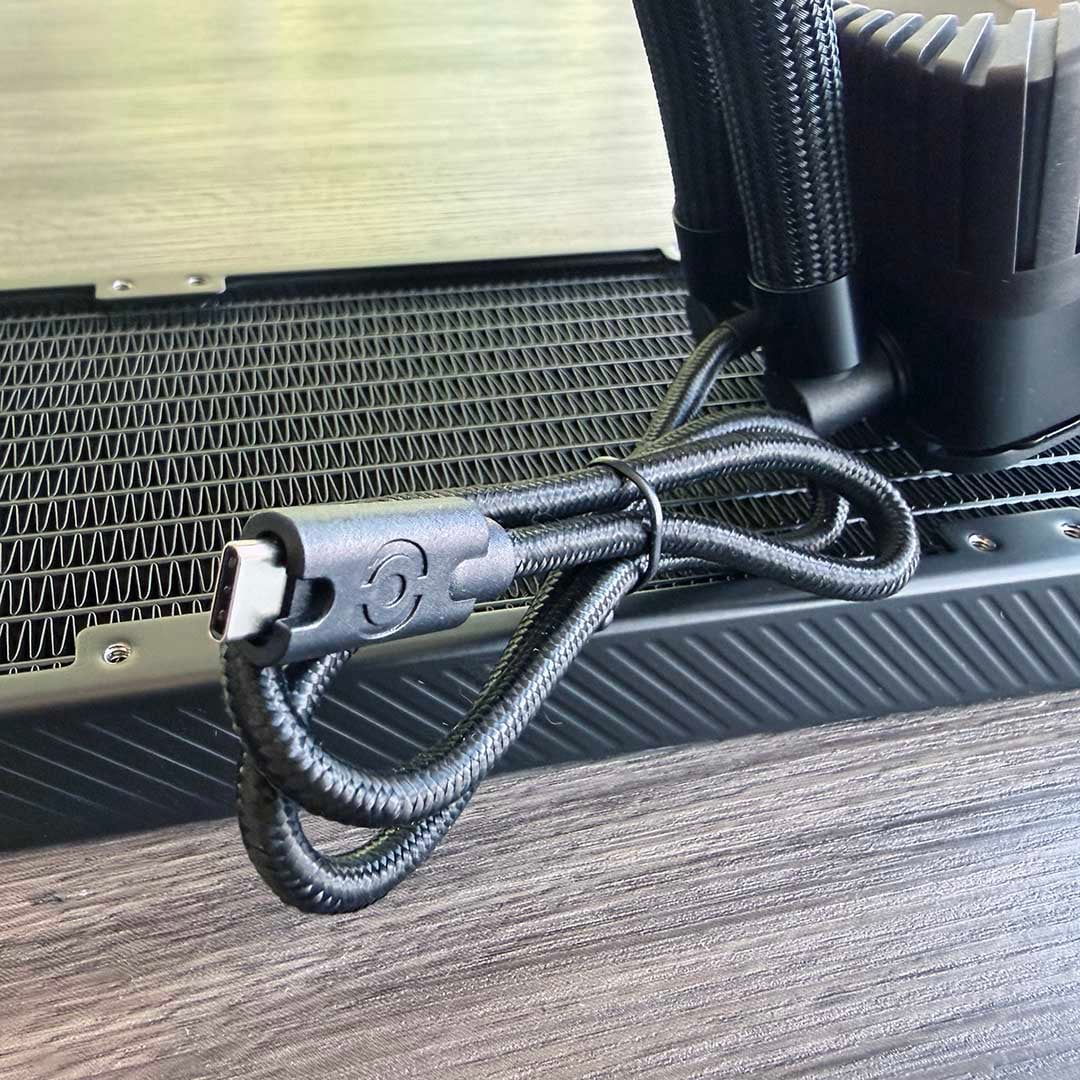
It takes a little while to install this cooler. You need to pay attention to your case’s cable-routing holes, and add a SATA power cable to your modular PSU if you have one. It’s not completely straightforward and requires some thought about where you’re going to put everything, but the end result is a very clean-looking interior with minimal clutter where it matters. The only wire you can see is the USB-C cable coming from the pump unit, and it all looks fantastic once the LCD and lights power on.
Performance
How we test
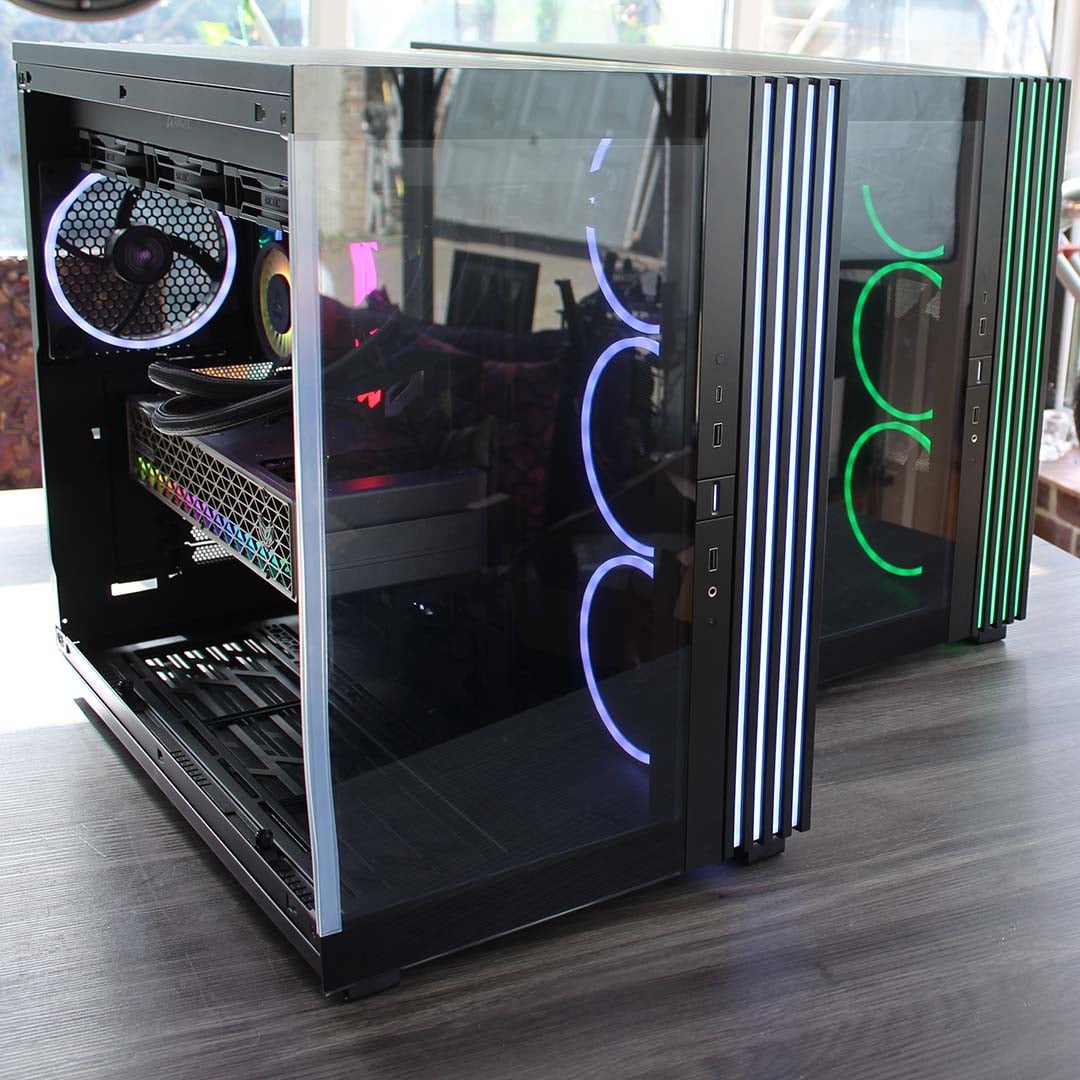
I’m testing this be quiet! LCD cooler in one of our new Club386 test PCs, which all have identical components. This setup includes a be quiet! Light Base 900 FX case, with all its fans fixed to 30% speed. The noise from the case at these settings is practically inaudible to our human ears and is undetectable by our noise meter, enabling us to hear the difference made by a CPU cooler.
We use an AMD Ryzen 9 9950X3D as our test chip, which is the top choice on our guide to buying the best CPU. For each test, we run Cinebench 26’s multi-threaded benchmark, and record the average (mean) temperature of all this CPU’s cores over the benchmark run, as well as the absolute maximum core temperature, so you have an idea of the worst-case scenario.
We run this CPU at its normal peak 170W TDP, but also at 105W and 65W TDP settings. This means you can see how well a cooler can keep a lower-spec CPU, such as a 65W Ryzen 5 9600, in check, as well as more powerful chips.
Our 9950X3D Test PCs
Club386 carefully chooses each component in a test bench to best suit the review at hand. When you view our benchmarks, you’re not just getting an opinion, but the results of rigorous testing carried out using hardware we trust.
Shop Club386 test platform components:
CPU: AMD Ryzen 9 9950X3D
Motherboard: MSI MEG X870E Ace Max
Cooler: Arctic Liquid Freezer III 420 Pro ARGB
GPU: Sapphire Nitro+ Radeon RX 9070 XT
Memory: 64GB Kingston Fury Renegade DDR5
Storage: 4TB Sandisk Optimus GX Pro 8100
PSU: be quiet! Dark Power 14 1,200W
Chassis: be quiet! Light Base 900 FX
Before we conduct each temperature test, we record the ambient room temperature. We then subtract this from the raw CPU temperature result to give us a delta T reading. This enables us to account for differences in test conditions without having a temperature-controlled lab, and compare results between other coolers tested on different days. Bear in mind that this means the results listed in the table below will be considerably lower than the actual CPU core temperatures.
We conduct all temperature and noise level tests with the cooler inside our case and all the side panels closed. We record temperatures using CoreTemp, and measure sound levels with a noise meter positioned 10in away from the front of the case. This means our results come from a real-world scenario, rather than an open-air test bench.
Temperatures
| 9950X3D TDP / fan speed | Avg temp (delta T) | Peak core temp (delta T) |
|---|---|---|
| 170W / 600rpm | 58.3°C | 65.0°C |
| 170W / 1,200rpm | 50.2°C | 55.4°C |
| 170W / 2,100rpm | 44.1°C | 51.5°C |
| 105W / 600rpm | 41.3°C | 44.6°C |
| 105W / 1,200rpm | 33.5°C | 40.8°C |
| 105W / 2,100rpm | 29.3°C | 36.6°C |
| 65W / 600rpm | 23.7°C | 34.9°C |
| 65W / 1,200rpm | 18.8°C | 34.4°C |
| 65W / 2,100rpm | 15.3°C | 31.6°C |
Cooling performance from the Light Loop IO LCD 360 is solid, if not spectacular. With its fans running at 600rpm, it’s basically inaudible, and happily cools a 105W CPU, such as an AMD Ryzen 7 5800X3D, with an average delta T of 41.3°C.
However, it coped less well when cooling our Ryzen 9 9950X3D with its full 170W TDP unlocked at this fan speed. Its peak delta T of 65.0°C corresponds to an actual peak temperature of 91°C, and while that’s within thermal specifications for this CPU, it’s still on the toasty side. Comparatively, the MSI CoreLiquid P22 360 has an average delta T of 56.1°C, with a 62.9°C peak, giving the CPU a couple more degrees of thermal headroom.
As a further point of comparison, the 420mm Arctic Liquid Freezer III Pro ARGB in our test rig peaks at a delta T of just 54.5°C at these settings, showing the benefits of going for a larger cooler. That’s not an option for everyone, though, and the Light Loop IO LCD 360 copes much better with our test chip with its fans running at 1,200rpm.
Here, the be quiet! cooler managed an average delta T of 50.2°C, corresponding with a real core temperature of 76.8°C. Again, though, the cheaper MSI cooler is better here, with a lower average delta T of 44.3°C, and its 52.2°C peak delta T is a few degrees cooler than the be quiet!’s 55.4°C as well.
That doesn’t mean this is a bad cooler, of course. There’s some serious thermal power in this 360mm AIO setup, and it can happily cope with the heat output of a demanding CPU, such as the Ryzen 9 9950X3D. It’s just that you can get slightly better cooling for less money elsewhere.
Noise
| Fan speed | Noise level |
|---|---|
| 600rpm | Undetected |
| 1,200rpm | 30.6dBA |
| 2,100rpm (max) | 45.2dBA |
As you would expect from a cooler made by a firm called be quiet!, low-noise operation is a speciality here. With its fans running at 600rpm, I couldn’t hear any noise at all from the Light Loop IO LCD 360, and my decibel meter couldn’t detect it either.
Increasing the speeds to 1,200rpm resulted in a just-about-audible hum, but it was still very quiet at these settings – you can barely hear it once all your case panels are on.
Unsurprisingly, ramping the spinners up to full speed results in a much louder noise, although it’s a low-frequency whir, rather than an annoying hiss. Hitting 45.2dBA on my decibel meter, it’s louder than the MSI CoreLiquid P22 360’s 43.1dBA at full speed, but then its fans also spin 100rpm faster.
Conclusion
First off, I need to say that be quiet! has made a gorgeous-looking cooler here. There’s a lot of bling, yes, but it also has a touch of class, thanks to that stylish lighting block around the LCD, as well as the cool-looking video presets provided in the software. In terms of looks, it’s a cut above the likes of the MSI MPG CoreLiquid P22 360 in my eyes, going beyond just offering an LCD.
The question is whether that’s worth the asking price of £179.99 / $249.90. Compared to a lot of the competition, £179.99 is reasonable value for money in the UK, given the amount of RGB lighting you’re getting, and the display specs. Corsair’s equivalent iCUE Link Titan 360 RX LCD currently costs £204.99, for example, and NZXT’s Kraken Elite 360 RGB costs £250.99. The latter has a slightly larger screen with a higher resolution, but you can see that be quiet! has priced this cooler about right for the feature set.
There’s more to a cooler than features, though, and thermal performance is a little disappointing for the money, particularly in the US. MSI’s CoreLiquid P22 360 costs $149.99, for example, undercutting the be quiet! by $100, and while it doesn’t have the fancy RGB surround on the pump block, it runs cooler in our tests. Add in the fact that you have to wire up and fit all the fans yourself, when so many coolers do this for you straight out of the box now, and you can see that the Light Loop IO LCD 360 hasn’t quite nailed the formula.
Hats off to be quiet! for everything it’s got right here – the ability to top up your coolant, the paper manual, and the great looks. However, this is an extremely competitive market, and the Light Loop IO LCD 360 doesn’t quite do enough to justify its premium. That said, if (like me) you’re in love with this cooler’s looks, and you’re happy to pay the price, it’s a mightily attractive piece of kit, and it can quietly handle a 16-core AMD X3D CPU as well. This is a solid, good-looking cooler, but it could be even better.